18
English
Recommended cleaning method
1. Spray the detergent sparingly on the dry surface and
let it work for a while (do not let it dry).
2. Rinse off the loosened dirt with the high-pressure
jet.
After operation with detergent
1. Pull the Plug ‘n’ Clean detergent bottle out of the
mount and close it with the cap before transporting
the device lying down.
2. Store the detergent bottle in the holder with the lid
facing up.
3. Flush the device with clear water for approx. 30 sec-
onds.
Interrupting operation
1. Release the lever of the high-pressure gun.
The device switches off when the lever is released.
The high pressure in the system is retained.
2. Lock the lever of the high-pressure gun.
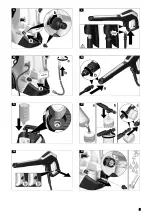
Illustration Q
3. Place the high-pressure gun with the spray lance in
the parking position.
4. Switch the device off "0/OFF" during work breaks
longer than 5 minutes.
Ending operation
몇
CAUTION
Pressure in the system
Injuries from high-pressure water escaping uncontrolla-
bly
Only disconnect the high-pressure hose from the high-
pressure gun or the device when the system is fully de-
pressurised.
1. Release the lever of the high-pressure gun.
2. Close the water tap.
3. Press the lever of the high-pressure gun for 30 sec-
onds.
The pressure remaining in the system is discharged.
4. Release the lever of the high-pressure gun.
5. Lock the lever of the high-pressure gun.
6. Disconnect the device from the water supply.
7. Switch off the device "0/OFF".
8. Pull the mains plug out of the socket.
Transport
몇
CAUTION
Failure to observe the weight
Risk of injury and damage
Be aware of the weight of the device during transporta-
tion.
Carrying the device
1. Lift and carry the device by the carrying handles.
Pulling the device
1. Pull the transport handle out until it audibly latches
into place.
2. Pull the device via the transport handle.
Transporting the device in a vehicle
1. Before transporting lying down, pull the Plug ‘n’
Clean detergent bottle out of the mount and close it
with the cap.
2. Secure the device against slipping and tipping over.
Storage
몇
CAUTION
Failure to observe the weight
Risk of injury and damage
Be aware of the weight of the device during storage.
Storing the device
1. Place the device on a level surface.
2. Disconnect the spray lance from the high-pressure
gun.
3. Press the separation button on the high-pressure
gun and disconnect the high-pressure hose from the
high-pressure gun.
ATTENTION
Damage to the high-pressure hose
Damage to the high-pressure hose through incorrect di-
rection of rotation
Observe the correct direction of rotation of the hose reel
when winding on the hose.
4. For devices with a hose reel: Use the crank handle
to turn the hose reel anticlockwise and coil up the
high-pressure hose.
5. For devices without a hose reel: Store the high-pres-
sure hose on the device.
6. Store the mains connection cable and accessories
on the device.
Observe the additional instructions before storing the device
for a longer period of time, see chapter
Frost protection
ATTENTION
Danger of frost
Incompletely emptied devices can be destroyed by frost.
Completely empty the device and accessories.
Protect the device from frost.
The following requirements must be satisfied:
●
The device is disconnected from the water supply.
●
The high-pressure gun is disconnected from the
high-pressure hose.
1. Switch the device on "I/ON".
2. Wait for a maximum of 1 minute until no more water
escapes from the high-pressure hose.
3. Switch off the device.
4. Store the device in a frost-protected room, together
with all accessories.
Care and service
DANGER
Danger of electric shock
Injuries due to touching live parts
Switch off the device.
Remove the mains plug.
The device is maintenance-free, i.e. you do not need to
perform any maintenance work.
Clean the sieve in the water connection
ATTENTION
Damaged sieve in the water connection
Damage to the device through contaminated water
Check the sieve for damage before inserting it in the wa-
ter connection.
If necessary, clean the sieve in the water connection.
1. Remove the water connection coupling.
2. Pull the sieve out using flat pliers.
3. Clean the sieve under running water.
Illustration R
4. Insert the sieve into the water connection.
Summary of Contents for K 4 Power Control
Page 2: ...2 A...
Page 3: ...3 B...
Page 4: ...4 4 C D E F G H I J...
Page 5: ...5 5 K L M N O P Q R...

