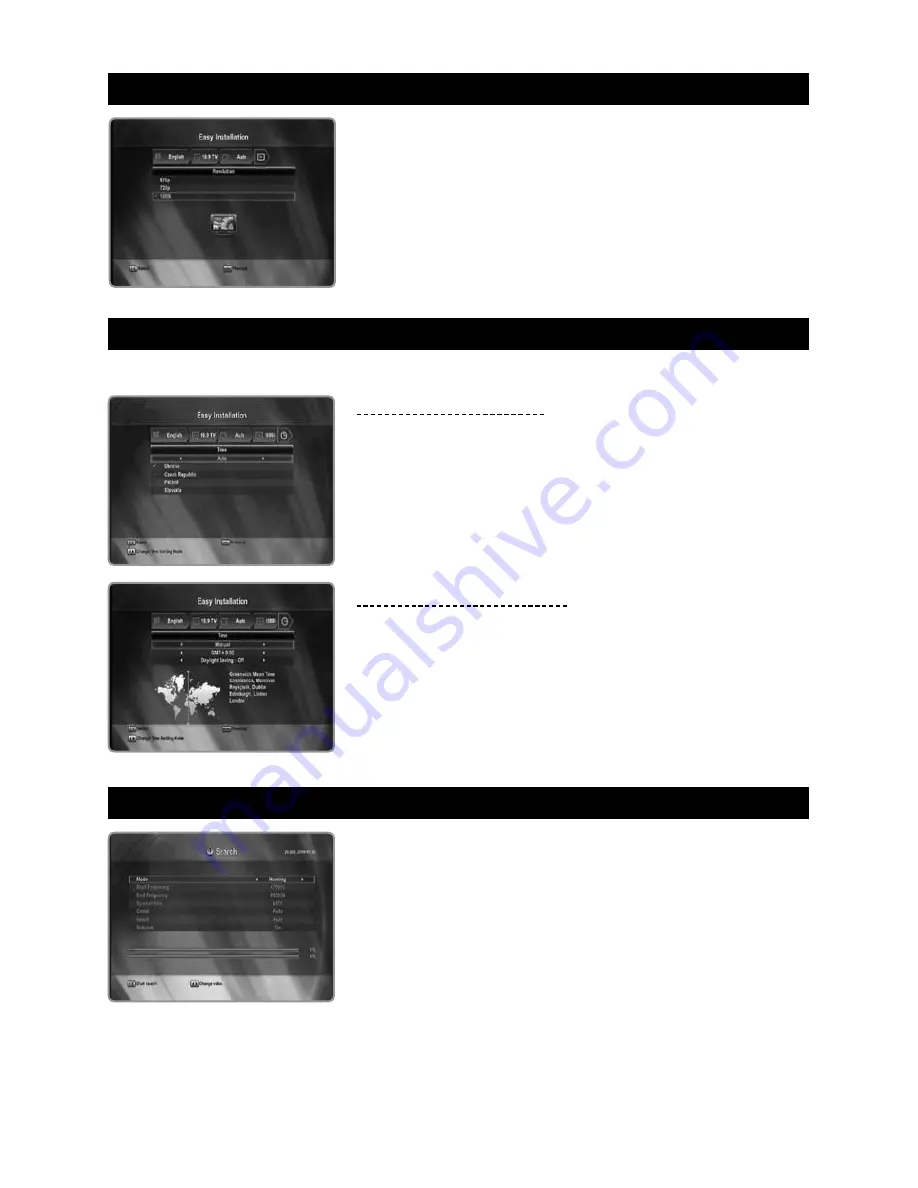
background image

15 - ENG

3.4  Resolution

The receiver supports various video resolutions (576p, 720p, and 1080i).
Press the 

/

 button to select desired option and press the 

OK

 button. 

3.5  Time

You can set your local time according to your location.

When “Auto” is selected

Press the 

/

 buttons to select desired country and press the 

OK

 button.

When “Manual” is selected

1. 

Press the 

/

 button to select the current time zone from standard time 

and then press the 

OK

 button. When you press the 

/

 button, the time 

zone will move by 30 minutes.

2. 

If you want to turn the Day Light Saving on, press the 

/

 button to 

select “

On

” and press the 

OK

 button. 

3.6  Search

You can search the channels according to the automatic or manual mode. 

Please wait until the channel search is complete.

1. 

Press the 

/

 button to select "

Homing

", "

Auto

", "

Manual

", or  

"

Network


ID

".

2. 

Press the 

/

button to select the desired option and then press the 

/

/

Numeric

 button to set it as you want.

For more information, refer to 

5.4 Installation

.

Summary of Contents for HD-3000

Page 1: ...User s Manual High Definition Cable Receiver PersonalVideo Recorder ...

Page 2: ...owercord Ifitisdamaged itcouldresultin fire or electric shock Do not place metal objects on top of the apparatus If metal objects fall into the apparatus it could result in fire or electric shock Do not repair disassemble or modify this apparatus yourself It might cause fire or electric shock If internal checking or maintenance is needed please contact your service center or agency Do not block or...

Page 3: ...irconditioners or heating vents Where there is dust or soot In confined areas where the heat cannot be released Where it is exposed to direct sunlight Turn the apparatus off or unplug the power cord if it is to remain unused for a long period of time Do not place heavy objects on top of this apparatus It might cause malfunction or damage Iftheapparatusissoseriouslydamagedthatitcannotberepaired orh...

Page 4: ...nna 11 2 2 ConnectingYour Equipment 11 2 3 Turning On and OffYour Receiver 13 3 Easy installation 3 1 Language 14 3 2 TV 14 3 3 ScreenType 14 3 4 Resolution 15 3 5 Time 15 3 6 Search 15 4 Basic Functions 4 1 Changing the Channel 16 4 2 Volume Control 16 4 3 Audio 16 4 4 Subtitle 17 4 5 Teletext 17 4 6 SleepTime 17 4 7 Channel List 17 4 8 Channel Banner 18 ...

Page 5: ...6 CA System 29 6 PVR Guide 6 1 Recorded List 30 6 2 Progress Bar 31 6 3 Playback 31 6 4 Time Shift Recording 34 6 5 Instant Recording 34 6 6 Multi Channel Recording 34 6 7 Stop Recording 34 6 8 MP3 Photo 35 7 Supplement 7 1 Troubleshooting 36 7 2 Technical Specification 37 7 3 Menu Map 38 7 4 Remote ControlTV Setting 39 ...

Page 6: ...gramme 5 MENU Press to display the main menu on the screen or return to the previous menu 6 EXIT Press to exit and return to the previous menu and screen 7 Display window Displays the current state such as channel time and massage 8 Reset Press to restart the receiver 9 Smartcard Slot Slot for Smartcard BThe front of the product is subject to change without notice 1 Introduction 1 1 Package Conten...

Page 7: ...it card and entitles you to view and listen to all the channels you choose to subscribe to The Smart card slot on the receiver can be used for Smart cards only 1 Open the right hand cover on the front panel of the receiver 2 Hold the Smart card horizontally with the electronic chip small square shaped gold in colour facing upwards 3 Insert the Smart card into the top slot Smartcard ...

Page 8: ...IF OPTICAL Connect a digital amplifier output 6 HDMI Use the HDMI cable to connect this jack to the HDMI jack on yourTV for the best quality picture 7 RJ45 Connect the LAN cable 8 USB Connect the USB memory with USB cable 9 ON OFF Power switch Turn on and off the receiver 10 Power supply 90 250V AC 50 60Hz BThe rear of the product is subject to change without notice 3 1 7 4 5 6 8 2 9 10 ...

Page 9: ...ctions in PVR Program Guide or Edit Channel List menu Green SORT Press to sort channel list Yellow Press to perform functions in PVR Program Guide or Edit Channel List menu Blue INFO Press to display the information box on the screen or to perform functions in Program Guide or Edit Channel List menu 10 Numeric buttons Press to select the channel and enter the PIN code 11 AUDIO Press to select the ...

Page 10: ...wind Press to rewind at high speed Each time you press this button the rewind speed is increased 10 Play Press to play at normal speed or resumes 11 Recorded List Press to display the recording list 12 Stop Press to stop a recording or playback 13 Fast forward Press to fast forward at high speed Each time you press this button the fast forward speed is increased 14 Instant replay Press to jump bac...

Page 11: ...rements 2 1 Connecting the Antenna Connect the antenna cable RF cable from cable system to the ANT IN jack of the receiver Connect a Loop through cable between the LOOP OUT and the ANT IN If not connected you can not record 2 2 ConnectingYour Equipment 2 2 1 Connecting aTV SCART AV jack Connect the receiver to aTV with SCART Cable system HD PVR receiver TV HD PVR receiver SCART cable ...

Page 12: ...lly because it allows multiple channels of digital audio 5 1 channels When connecting via HDMI you do not need to connect Audio Cables 2 2 3 Connecting aVCR Connect the receiver to aVCR with SCART 2 2 4 LoopThough If you have another digital receiver and you wish to use the same antenna cable then you can connect it via the loop through Connect one end of the coaxial cable to the LoopThrough on th...

Page 13: ... power cord of the receiver to a wall outlet 2 Turn on the power switch located at the back of the receiver 3 Press the STANDBY button on the front of the receiver or on the remote control Power Off Press the STANDBY button again The receiver will display Off 3 3 1 2 ...

Page 14: ...ubtitle Press the button to select desired language and press the OK button to change the language The Language of the Menu Audio or Subtitle will be changed to the selected language 3 2 TV You can set the aspect ratio of yourTV Press the button to select desired option and press the OK button If you have aTV set with 4 3 picture format select 4 3TV and if you have aTV set with 16 9 picture format...

Page 15: ...hecurrenttimezonefromstandardtime andthenpresstheOKbutton Whenyoupressthe button thetime zone will move by 30 minutes 2 If you want to turn the Day Light Saving on press the button to select On and press the OK button 3 6 Search You can search the channels according to the automatic or manual mode Please wait until the channel search is complete 1 Press the button to select Homing Auto Manual or N...

Page 16: ... and radio channels Youcanchangechannelbyusingthechannelbanner simplechannellist or program guide 4 2 Volume Control Press the VOL buttons to adjust the volume level Volume level bar is displayed Press the Mute button to temporarily stop the volume To cancel mute press the Mute button again or press the VOL buttons 4 3 Audio If the current programme is available in multiple audio languages you can...

Page 17: ...creen 4 6 SleepTime You can select a time period of between 10 and 90 minutes after which the receiver automatically switches to standby mode PresstheSLEEPbuttontoselectthepresettimeinterval Off 90 forstaying on 4 7 Channel List 1 When you press the OK button during receiving service stream you can view simple channel list 2 Pressthe buttontoselecttherequiredchannelandthenpressthe OK button 3 Pres...

Page 18: ...the channel provides HD programmes Displays the resolution of the current programmes Displayed when the programme is broadcast in Dolby Digital Displayed when the programme is broadcast in AAC Audio Displayed when the programme is broadcast in subtitle language Displayed when the programme is broadcast in teletext Displayed when the channel is a locked channel Displayed when the channel is a scram...

Page 19: ...e button to select the desired option and press the OK button 3 Use the OK button to edit the selected file folder list New Directory To create a new directory in the current directory Rename To change file or directory names Characters such as 0 9 a z and A Z can be used Delete To delete a file or directory Move To change the position of the files Usingthe button selectthefilesyouwantto move and ...

Page 20: ...t a reserved recording to be change and press the Yellow button 2 Whentheeditscreenappears changethereservedrecordinginthesame way as you did with adding Deleting Pressing the Green button on the edit screen deletes the selected recording list only To delete all reserved recording lists press the Green button on the Reservation screen and then press the OK button B Ifyouskipareservedchannel ordele...

Page 21: ...ue Incasedetailedinfocontentistoolongtocheck youcan check its information as a long lists form and resize its lists by pressing Blue button Record To reserve recording of the channel B The Program Guide information might not be supported by the service providers 5 2 2 Recording Reservation by Program guide You can set a programme to be record at a specific time by program guide 1 Press the button ...

Page 22: ...rename the favorite press the Blue button 4 To confirm the channel list press the MENU button or EXIT button and press the OK button to save B The PIN code preset to 0000 from the factory Lock Youcanlockchannelsinanyofthelistinordertoprevente g yourchildren from watching 1 Press the button to select the channel you want to lock and press the OK button 2 Repeat the procedure for each channel you wa...

Page 23: ...n to select the constellation Auto 16 32 64 128 or 256 QAM 3 Press the button to select the spectral invert Auto Off or On 4 Press the button to select for the network search Off or On When you select On you can find more services using the home network 5 Press the OK button and searching will start 6 When searching is finished press theOK button to save the channel list Network ID 1 PresstheNumer...

Page 24: ...tothelanguageyouwantandpresstheOK button B Select the audio language between the first and second audio language Ifthefirstaudiolanguageisnotselected thenthesecondaudiolanguageis selectedbydefault Ifboththefirstandsecondaudiolanguagearenotavailable theaudiolanguageissettothefirstaudiolanguagetheselectedchannelsupports for First subtitle language Second subtitle language You can change default lang...

Page 25: ...he button thetime zone will move by 30 minutes 2 If you want to turn the Day Light Saving on press the button to select On and press the OK button WakeupTime SleepTime You can set the On Off timers so that the receiver will switch on or off automatically at the time you select 1 Press the button to select the desired option Off Once Daily Weekly or Weekday 2 Use the Colour button to select the yea...

Page 26: ...k IftheMenuLockissetto On thePINcodeisneededtosettheEditChannel List Installation Format HDD and System Setting Change PIN Code You can change the PIN code from the standard 0000 DO NOT FORGET IT Without it you are not able to access to any of the functions where the code is required YoucanchangepasswordforChannelLockandMenuLocksimultaneously 1 Enter the current PIN code using Numeric 0 9 button o...

Page 27: ...ure format select 16 9TV Display Format You can select the display format according to theTV screen ratio Press the button to select desired option and press the OK button 4 3TV Auto Letterbox Center cut 16 9TV Auto Pillarbox Pan and scan Resolution The receiver supports various video resolutions 576p 720p and 1080i Press the button to select desired option and press the OK button SCART Output If ...

Page 28: ...the OK button Each selectable time items has meaning of the interval time during a channel banner stays on changed channel screens SlideshowTime Pressthe buttontoselecttheslideshowtime 1 10sec youwantand then press the OK button 5 5 6 Software Upgrade Software can be downloaded through OTA OverThe Air or USB connection OTA Upgrade It is possible to set up OTA upgrade manually Please check if there...

Page 29: ...oader version Press the button on the Setup list to select System Information 5 6 CA System The menus are provided by the CA module and its smart card Your receiver is equipped with 1 slot of smart card Plug in the appropriate a valid smart card You will then have access to the respective scrambled and Pay Per View services provided Insertthesmartcardintotheslot Thesmartcarddeterminestheprograms t...

Page 30: ...t displays as the following Also you can view the recorded list in the PVR File List menu 1 Path of present folder 2 Recorded programme list 3 MP3 file list 4 Photo file list 5 Thumbnail of recording 6 Folder icon 7 File Icon 8 File name time date duration 9 Button help 10 Used size of HDD B When a USB memory is connected to the USB jack the USB icon is displayed on left of File List screen 2 1 6 ...

Page 31: ...isplayed on the screen To display the help box press the Blue button while the progress bar appears on the screen 6 2 Progress Bar Press the Progress bar button while watching a recorded programme to display the progress bar Progress bar displays the current play status the recorded time and elapsed time 6 3 Playback The programme can be played in various ways 6 3 1 Fast Forward Rewind The Fast Fo...

Page 32: ...etedtheprogrammewillplayfromthecurrent point You can set the replay time interval by using the PVR setting menu 6 3 4 Commercial Skip Press the Skip button to jump forward and play from that location When the skip is completed the programme will play from the current point You can set the skip time interval by using the PVR setting menu 6 3 5 Direct jump 1 Press the Progress bar button on the curr...

Page 33: ...the buttontoselect Offrepetition andpresstheOKbutton Alternatively you can use the Yellow button 6 3 7 Bookmark Use bookmarks to search positions quickly and conveniently 1 Press the Progress bar button on the currently playing screen The progress bar will appear 2 Press the Red button at a certain position to set a bookmark 3 Press the Green button to display bookmark list and press the button to...

Page 34: ...the time shift will be start 6 5 Instant Recording You can record a programme using the built in hard disk drive without an external media device Press the Record button to record the current programme instantly The record icon and default record time is displayed 6 6 Multi Channel Recording You can record two channels simultaneously 6 7 Stop Recording 1 Press the Stop button The stop list is disp...

Page 35: ...om your PC 2 Connect the USB memory to USB jack on the receiver 6 8 2 Playing back the Files 1 Pressthe buttontoselect PVR inthemainmenuandpresstheOK button 2 Press the button to select File List and press the OK button 3 Press the button to select MP3 or Photo and press the OK button The MP3 or Photo files are displayed 4 Press the button to select the desired file and press the press the OK butt...

Page 36: ...el if it is low Check that the RF cable is properly connected No sound Check the volume level of theTV and receiver Check the mute status of theTV and receiver Remote control does not operate Point remote control directly towards the receiver Check and replace batteries Check that nothing blocks the front panel Service is not running or scrambled Check that the smart card is appropriate for the se...

Page 37: ... Single Mono Dual mono Stereo Joint stereo 32 0 44 1 and 48 0 kHz DATA INPUT OUTPUT Output connectors SCARTTV and SCARTVCR SPDIF OPTICAL HDMI RJ45 USB2 0 Descrambling Access control Standard Number of smart card slots Location Standard DVB common Scrambling algorithm ETR 289 ONE slot One smartcard slot is included in the front panel Front panel Connector on bottom side of smartcard ISO 7816 Part 3...

Page 38: ...ing Language Menu Language First audio language Second audio language First subtitle language Second subtitle language Time Time WakeupTime SleepTime Lock Control Channel Lcok Parental Rating Lock Menu Lock Change PIN Code AV Setting TV Display Format Resolution SCART Output OSD Setting MenuTransparency TeletextTransparency SubtitleTransparency BannerTime SlideshowTime Software Upgrade OTA Upgrade...

Page 39: ...ist below and enter the code by using the number buttons The LED will blink once each time you enter the number 4 Press the OK button to finish The LED will blink 2 times and becomes Off status B Some buttons may not work 7 4 3 Using the Auto Search TV CH 1 Press the TV STANDBY with OK button on the remote control for 2 seconds to convert to Setting Mode It will convert to the Setting Mode after t...

Page 40: ...EY DAVIDSON 028 HARMAN KARDON 164 HARVARD 043 HITACHI 163 004 007 009 011 072 010 012 023 075 143 158 INFINITY 164 INKEL 129 INTEQ 073 JBL 164 JCB 001 JCPENNEY 004 006 008 024 030 065 101 143 156 160 JENSEN 013 JVC 038 001 034 083 206 217 068 069 KENWOOD 006 001 KLOSS 002 059 KTV 006 043 143 154 LG 004 106 119 110 112 113 127 143 LODGENET 072 LOEWE 207 164 LOGIK 072 LUXMAN 004 LXI 007 015 052 081 ...

Page 41: ... 022 143 175 SIGNATURE 072 SONY 001 126 139 SOUNDESIGN 003 004 028 043 SPECTRICON 112 SQUAREVIEW 052 SSS 004 043 STARLITE 043 SUPRE MACY 002 SUPREME 001 SYLVANIA 006 003 059 060 063 064 127 160 164 044 249 SYMPHONIC 052 249 TANDY 081 TATUNG 056 062 TECHNICS 034 080 TECHNOL ACE 028 TECHWOOD 004 TEKNIKA 002 003 004 024 028 043 072 101 143 103 164 TELERENT 072 TERA 172 TMK 004 TNCI 073 TOSHIBA 015 03...

Page 42: ...ENG 42 Memo ...

Reviews: