Kanguru Defender Basic, User Manual
Introducing the Kanguru Defender Basic, a powerful hardware encrypted USB drive built to protect your sensitive data. Get started swiftly with the included Quick Start Manual, available for free download from our website. Safeguard your files today with this advanced storage solution. Visit manualshive.com to access your manual.
Share
Download


Reviews:
No comments
Related manuals for Defender Basic

X1
Brand: XenData Pages: 12

G-RAID Studio
Brand: G-Technology Pages: 51

e.module L5.1
Brand: Tab Pages: 26

ShelfTrack
Brand: ClosetMaid Pages: 11

BASIC PRO SERIES
Brand: Borroughs Pages: 17

MDWT301
Brand: Magnusson Pages: 18

STP7536
Brand: Supatool Pages: 2

30232GK
Brand: ABSCO SHEDS Pages: 25

TS-451DeU
Brand: QNAP Pages: 49
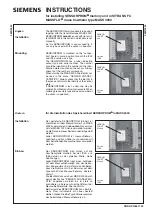
SENSORPROM
Brand: Siemens Pages: 2

SISTORE AX
Brand: Siemens Pages: 40
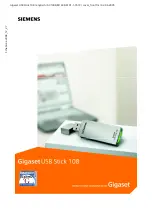
Gigaset USB Stick 108
Brand: Siemens Pages: 58

SIMODRIVE 611-D
Brand: Siemens Pages: 1154

DS212C
Brand: NetApp Pages: 58

TS-932PX
Brand: QNAP Pages: 50

TS-251D
Brand: QNAP Pages: 53

DELAHEY TM370322
Brand: BHG Pages: 3

Bluetooth USB Dongle
Brand: X-Micro Pages: 49


