KaCool D
02.02.2017
30
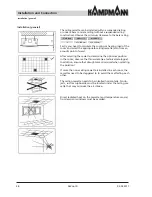
Water-side connection
Firstly,
fi
t the enclosed valve kit to the ceiling cassette, if there
is one. Use the enclosed sealing material to do this.
The
counterpart must be
fi
xed accordingly to the cassette when
tightening the screw connection!
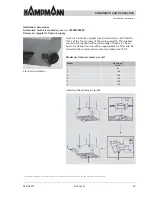
Now the valve condensation tray can be installed with the
screws supplied according to the illustrated procedure.
The pipes on site can then be connected to the valve kit.
Establish a
fl
exible connection, e.g. using reinforced hoses. In
any case, avoid tensions and vibrations in the pipe system from
transferring to the ceiling cassette.
Insulate the pipes to just over the valve condensation tray to
ensure they are vapour diffusion-tight.
If necessary, install shut-off devices and quantity regulators
(e.g. tacosetter) before the cassette for hydraulic calibration
and for maintenance purposes.
Installation and Connection
Water-side connection
3-way valve kit
2-way valve kit
Model 1 – 3
Model 1 – 3
Model 4 – 6
Model 4 – 6


