background image

3 Description and Operation

32

Engine Oil

Always refer to the Engine Operation Manual for complete 
information on engine oil requirements. Service intervals, oil 
types and refill quantities are all covered in the Engine 
Operation Manual. READ IT!

Transmission

Standard tractors are equipped with an Allison Automatic 
Transmission. This heavy-duty transmission is designed for 
stop-and-go operation. An Allison Transmission Operator’s 
Manual is provided with every Kalmar tractor. This manual 
provides important information on operation of the 
transmission.

The following information can be found in your Allison 
Operator’s Manual:

1. Gear selection

2. Shifting the transmission

3. Driving tips

4. Care and maintenance

5. Check oil level with shifter

6. Check/clear fault codes

7. Prognostics

The operator of this vehicle must read and follow the 
instructions in the Allison Operator’s Manual. Failure to 
do so may lead to serious vehicle damage or personal 
injury.

The forward to reverse shifts of the transmission are controlled 
by the ECM.

Parking with an Automatic Transmission

The Allison transmission does not have a PARK position like 
an automobile transmission. For information on how to 
properly park your Kalmar tractor, see the following sections in 
this manual:

Page 37, Parking the Vehicle
Page 37, Parking Brake

Axles

Kalmar tractors may be ordered with a variety of axle 
configurations, makes and models. It is important to refer to 
the axle manufacturer’s information for your specific axle. You 
can obtain axle operation and maintenance information from 

Summary of Contents for Ottawa t2

Page 1: ...OP E R A T OR SMA N U A L...

Page 2: ...xhaust Warning Battery posts terminals and related accessories contain lead and lead compounds chemicals known to the State of California to cause cancer and reproductive harm Wash hands after handlin...

Page 3: ...manual are subject to change at the publisher s discretion DO NOT REMOVE THIS MANUAL FROM THE VEHICLE STUDY THIS MANUAL READ AND COMPLY WITH ALL WARNINGS IN THIS MANUAL IF THE VEHICLE IS SOLD GIVE TH...

Page 4: ...Notes Notes...

Page 5: ...9 1 8 Additional Manuals and Safety Information 11 1 9 Service Assistance 12 3 Description and Operation 13 3 1 Cab Deck 13 Vehicle Entry and Exit 13 3 1 3 Cab Tilting 14 To Tilt Cab 15 To Lower Cab 1...

Page 6: ...oolant Anti Freeze 53 Fuel 54 Engine Oil 55 Diesel Exhaust Fluid DEF 55 Hydraulic System Fluid 56 Multi Purpose Grease 56 Filters 56 Preventative Maintenance Guidelines 57 Cab Interior 57 Check HVAC S...

Page 7: ...d basic operating information for the tractor itself The Scheduled Maintenance section covers basic operator maintenance and lubrication information Remember that the safe operation of the Kalmar trac...

Page 8: ...d its use 1 5 Vehicle Towing Towing a vehicle requires special equipment and training Kalmar Solutions LLC recommends that a professional towing service be used when towing a disabled Kalmar tractor T...

Page 9: ...ls See page 38 Manually Releasing Tractor Spring Brakes Caging A loss of air pressure could occur while towing the vehicle This would apply the spring parking brakes and lock the rear wheels on the to...

Page 10: ...ition The following section is intended to provide a basic knowledge of important safety check procedures These checks must be performed regularly to ensure safe vehicle operation The frequency of the...

Page 11: ...s been thoroughly inspected Failure to conduct a complete Kalmar Daily Inspection prior to operation could lead to serious injury or death Check the following 1 Check brake controls for proper operati...

Page 12: ...Remove ice and frost with the cab heater defroster or by applying heat Mirrors Check to be certain all mirrors are installed and that they are clean undamaged and properly adjusted Seat Belt System Al...

Page 13: ...rusted corroded or damaged If necessary replace defective or missing hardware with authorized parts and or tighten hardware 9 Inspect tethers for cuts fraying extreme or unusual wear Tethers must also...

Page 14: ...ng Repair any problems before operating the vehicle Propeller Shaft Check the universal joints for wear If propeller shaft vibrations occur stop the vehicle immediately to prevent serious damage to th...

Page 15: ...oper maintenance Wheels Tires Check the condition and maintain the specified torque on all wheel mounting nuts Replace missing or broken studs and nuts Check tire inflation and wear Do not operate thi...

Page 16: ...r operation _____ Check steering system for any binding Make sure steering effort is smooth and light ______ Check accelerator for proper operation The accelerator should operate smoothly _____ Check...

Page 17: ...important information that all Kalmar operators must know The video should be used in conjunction with this manual to instruct the operator on the proper operation of the Kalmar tractor Shipped with...

Page 18: ...ting your Kalmar dealer The serial number is located on an ID plate inside of the cab Kalmar is proud to have been the leader in the Port and Terminal Tractor Industry for over 50 years We strive to s...

Page 19: ...hicle safely DO NOT ATTEMPT TO OPERATE THIS VEHICLE WITHOUT ADEQUATE TRAINING OPERATING THIS VEHICLE WITHOUT ADEQUATE TRAINING COULD RESULT IN SERIOUS INJURY OR DEATH 3 1 Cab Deck Vehicle Entry and Ex...

Page 20: ...able hoist be used to tilt the cab all the way to the 90 degree position All tractors come standard with a cab air suspension These units are designed to work with the power cab tilt and unlatch autom...

Page 21: ...ab tilt control switch and safety prop release cable 2 Pull the safety prop release cable and hold the cable to the rear 3 While holding the cable to the rear move the tilt control switch to the UP po...

Page 22: ...ing the cab If the cab latch is not properly locked down the cab could tilt while the vehicle is in motion resulting in serious injury or death If a cab latch fails or the tilt system malfunctions the...

Page 23: ...is obtained by changing the air pressure in the suspension which changes the height The fore and aft position is obtained by moving the seat cushion back on its slides Once this position is achieved...

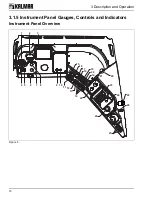
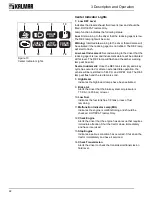
Page 24: ...3 Description and Operation 18 3 1 5 Instrument Panel Gauges Controls and Indicators Instrument Panel Overview Figure 5 4 1 2 3 5 6 7 9 10 11 12 8 22 25 27 13 14 14 21 29 23 24 28 26 18 17 16 15 20 19...

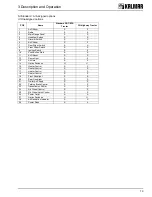
Page 25: ...S S 9 Ignition Switch S S 10 Push Button Start A A 11 Air Diffuser S S 12 Dome Light S S 13 Air Horn A A 14 Option Switches U U 15 Heater Control S S 16 Heater Control S S 17 Heater Control S S 18 Hea...

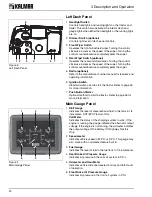
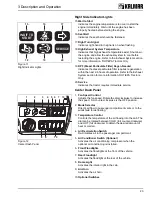
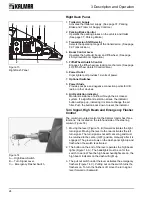
Page 26: ...fer to page 25 for more information 7 Push Button Starter Optional method to start the tractor Refer to page 26 for more information Main Gauge Panel 1 DEF Gauge Indicates the level of diesel exhaust...

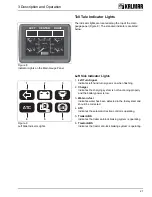
Page 27: ...charging system is not functioning properly and the battery power is low 3 Water in fuel Indicates water has been detected in the fuel system and should be corrected 4 ATC Indicates the automatic trac...

Page 28: ...tended idle operation the vehicle will be restricted to 5 M P H and R P M limit The DEF lamp will flash and the red lamp is solid 8 High Beam Indicates the high beam lamps have been activated 9 Brake...

Page 29: ...requires immediate service Center Dash Panel 1 Fan Speed Control Adjusts the fan speed Rotate the dial clockwise to increase the speed Full counter clockwise is the OFF position 2 Mode Selector Direct...

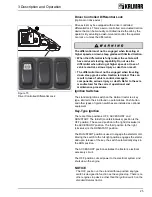
Page 30: ...is time to change the air filter Push the button back down to reset the indicator Turn Signal High Beam and Emergency Flasher Control The column mounted control on the Kalmar tractor has three functio...

Page 31: ...and maintenance procedures Ignition Switches The standard ignition switch on the Kalmar tractor is a key type similar to the kind found on automobiles Push button and other types of ignition switches...

Page 32: ...ontact your Kalmar dealer if you have any questions regarding the operation of any optional starter switches or shut down systems For starting the vehicle refer to page 30 Starting the Engine 3 1 6 El...

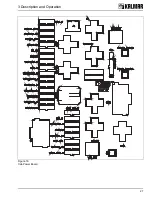
Page 33: ...3 Description and Operation 27 Figure 16 Cab Power Board...

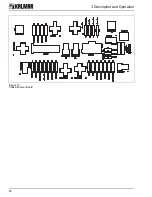
Page 34: ...3 Description and Operation 28 Figure 17 Chassis Power Board...

Page 35: ...utton on the buckle and the belt will retract automatically 3 2 Chassis 3 2 2 Powertrain Engine Kalmar tractors come equipped with a variety of engines Kalmar provides the manufacturer s Engine Operat...

Page 36: ...dly when the starter is engaged Serious injury or death can result All Kalmar tractors are designed to start in NEUTRAL ONLY If the vehicle you are operating starts while it is in gear DO NOT OPERATE...

Page 37: ...ate large amounts of heat Internal engine parts on any diesel engine need to cool down before the engine is shut off The operator should allow the engine to idle for at least 3 minutes prior to shutti...

Page 38: ...iving tips 4 Care and maintenance 5 Check oil level with shifter 6 Check clear fault codes 7 Prognostics The operator of this vehicle must read and follow the instructions in the Allison Operator s Ma...

Page 39: ...l operates Locking or limited slip differentials are not standard on Kalmar tractors If you do not know if your vehicle is equipped with a special axle and differential contact your Kalmar dealer No S...

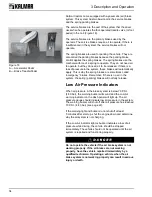
Page 40: ...if there is no air in the system the spring parking brakes will not fully release Low Air Pressure Indicators When air pressure in the brake system is below 70 P S I 4 83 bar the warning buzzer will s...

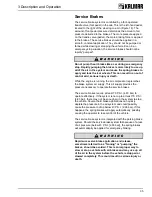
Page 41: ...compressor replenishes the brake system air supply This air supply provides the pressure necessary to operate the service brakes The service brakes require at least 70 P S I 4 83 bar to operate effect...

Page 42: ...ht will warn the operator if there is a potential problem in the system Trucks should not be operated if the indicator light is on Contact your nearest Kalmar dealer for qualified service on the ABS T...

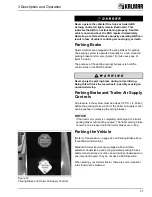
Page 43: ...eels possibly causing an uncontrolled stop Parking Brake and Trailer Air Supply Controls Air pressure in the system must be at least 70 P S I 4 83 bar before the parking brake control or the trailer a...

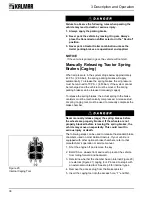
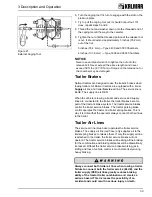
Page 44: ...s the actual spring in the brake canisters must be mechanically compressed A release stud or spring caging tool must be used to manually compress the brake chamber Never manually release cage the spri...

Page 45: ...lines are connected to the trailer the trailer brakes become part of the tractor s brake system The tractor service brakes control the trailer service brakes The tractor parking brake control operates...

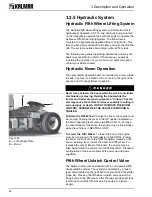
Page 46: ...cause the vehicle to rollover possibly resulting in serious injury or death DO NOT OPERATE THE BOOM CONTROL LEVER WHILE THE VEHICLE IS MOVING A TRAILER To Raise the Fifth Wheel To raise the boom the e...

Page 47: ...lever in NEUTRAL move the boom control lever to the UP position and raise the trailer until the trailer support is JUST OFF THE GROUND DO NOT raise the trailer any more than a few inches to provide c...

Page 48: ...with the tractor parking brake released 12 Using the boom control lever lower the trailer until the trailer supports are resting completely on the ground 13 Disconnect and STORE the air lines and elec...

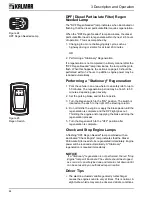
Page 49: ...aust system components Failure to do so can result in serious personal injury Diesel Particulate Filter DPF Regeneration To meet current emissions regulations this vehicle is equipped with a Diesel Pa...

Page 50: ...d let the truck idle 3 Turn the Regen switch to the ON position The switch is located on the dash to the right of the steering column 4 Do not throttle the engine or apply the brake pedal until the re...

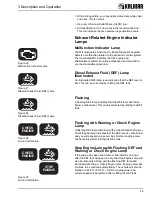
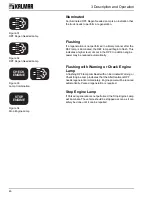
Page 51: ...a critical level This can be corrected by refilling the DEF tank Flashing with Warning or Check Engine Lamp A flashing DEF lamp combined with an illuminated Warning or Check Engine lamp indicates tha...

Page 52: ...ng with Warning or Check Engine Lamp A flashing DPF lamp combined with an illuminated Warning or Check Engine Lamp indicates that the Aftertreatment DPF needs regeneration immediately Engine power wil...

Page 53: ...call your Kalmar dealer for assistance NOTICE The Kalmar Daily Inspection or walk around will assist the operator in identifying obvious problems that could affect normal operation of the vehicle a s...

Page 54: ...uled Maintenance 48 6 1 Checklists Chassis Lubrication Diagram left hand drive chassis shown Figure 35 Chassis Lubrication Diagram Both Sides Both Sides Front and Rear 2 3 4 5 6 7 8 9 10 11 12 13 14 1...

Page 55: ...e Operator Manual 10 Driveline Slip Yoke Lithium Grease 11 Hydraulic Steering Fluid Dexron III 12 Cab Suspension Latch Lithium Grease 13 Diesel Exhaust Fluid See Engine Operator Manual 14 Front Wheel...

Page 56: ...HEEL BEARINGS IF APP CAB DOWN EXTERIOR CHECK BATTERY CABLES HOLDDOWNS CHECK SIDE DOOR HINGE IFF APP CHECK BATTERIES FOR CRACKS OR DAMAGE CHECK CAB ACCESS STEPS AND HANDLES CLEAN BATTERY CABLE CONNECTI...

Page 57: ...K FRONT WHEEL BEARINGS IF APP CAB DOWN EXTERIOR CHECK BATTERY CABLES HOLDDOWNS CHECK SIDE DOOR HINGE IFF APP CHECK BATTERIES FOR CRACKS OR DAMAGE CHECK CAB ACCESS STEPS AND HANDLES CLEAN BATTERY CABLE...

Page 58: ...ecific lubrication and fluid points for easy reference The Preventative Maintenance Forms see pages 51 and 52 indicates services that need to be performed at every 250 500 1000 and 2000 hour interval...

Page 59: ...h make of axle and customer requirements Refer to the Axle Manufacturer s Operator s Manual for required specifications and operating information NOTICE Synthetic gear lubricant is available as an opt...

Page 60: ...This could cause severe burns or blindness The coolant should be tested every 250 hours and replaced every 2000 hours at the very minimum Exceeding these intervals may damage the cooling system or le...

Page 61: ...ailure to comply with the engine manufacturer s requirements for engine oil may void the warranty on the engine and cause severe engine damage and injury Contact your Kalmar dealer if you did not rece...

Page 62: ...ystems are 1 Boom lift 2 Power steering 3 Cab tilt Dexron III should be used whenever replenishing or replacing the fluid NOTICE The fluid in the hydraulic system and the filter must both be replaced...

Page 63: ...that all gauges are functional Check Low Air Buzzer and Light Apply and release the brake pedal until air pressure drops below 90 P S I At that point the low air buzzer and dash warning light should...

Page 64: ...peration if applicable With the engine running and the air conditioner control turned on confirm cooled air flow from the defroster vents Auxiliary Fan s if applicable With the key on turn on the auxi...

Page 65: ...he entire belt system 5 Inspect shoulder loop web guide optional component Seat belt must move freely through shoulder loop Shoulder loop must also pivot freely and be free of obstructions If necessar...

Page 66: ...d confirm that a trailer connected with the light cord also has lights This can be done either with a trailer connected or with a test box Check Headlights Marker Lights Start the engine turn on the l...

Page 67: ...adiator Mounts Inspect the radiator mounts for wear or excessive looseness Check Coolant Level and Concentration Check the cooling system level Coolant should be visible in the radiator sight glass It...

Page 68: ...ge reset start the engine run to high idle and shut off the engine If the reading remains on zero the gauge may be defective or the intake piping has a leak The cause must be investigated and the gaug...

Page 69: ...unting bolts are tight Inspect the electrical connections for good contact at the starter terminals Check Engine and Transmission for Leaks Perform a visual inspection of the engine and transmission l...

Page 70: ...ont Wheel Bearings if applicable Remove the front hubs and repack the bearings using grease meeting at least the minimum specifications of the component manufacturer Check Battery Cables and Holddowns...

Page 71: ...the fluid level on the tank gauge Fill as necessary Change Hydraulic Fluid Drain the hydraulic tank and refill with Dexron III automatic transmission fluid Clean Hydraulic Tank Vent Remove any dirt co...

Page 72: ...o the surface of the top plate Check Lubricate Fifth Wheel Pivot Pins Inspect the fifth wheel pivot pins for wear or damage Lubricate with lithium grease Check Lubricate Boom Pivot Bearings Inspect th...

Page 73: ...s at the factory is based on the manufacturer s operational policy to which this environmental policy is a supplement Our operations are based on making continual improvements to prevent pollution of...

Page 74: ...ings in the right way Environmental Problems By environmental problems we mean faults detected in machine operation that will or might be harmful to the environment The most common of these are oil an...

Page 75: ...chine operation Pay special attention to starting the machine from cold and the instructions given for this Effects of Exhaust Gases Diesel engine emissions are the cause of both health and environmen...

Page 76: ...or the environment because of some chemical or other property When collecting and handling toxic waste these health and environmental risks need to be taken into account Toxic waste typically includes...

Page 77: ...in good condition to prevent unpleasant surprises When there is a spillage absorb the spilled oil in sawdust for example and remove the contaminated sawdust according to your site instructions In case...

Page 78: ...les or other dust fills the air When the machine has been used in such an environment take special care when discarding the cabin and engine air filters If the machine has been operated in environment...

Page 79: ...with the terminal tractor does not exceed 1 64 feet s2 0 5m s2 at normal operation Noise Levels Maximum noise level inside the cabin is 77dB A LpAZ according to the standard SFS EN 12053 AC Maximum n...

Reviews: