background image

Pg 

1

User Manual

Pg 

2

User Manual

Digital Photo Frame

Digital Photo Frame

Ultra Slim 

L

E

D

Ultra Slim 

L

E

D

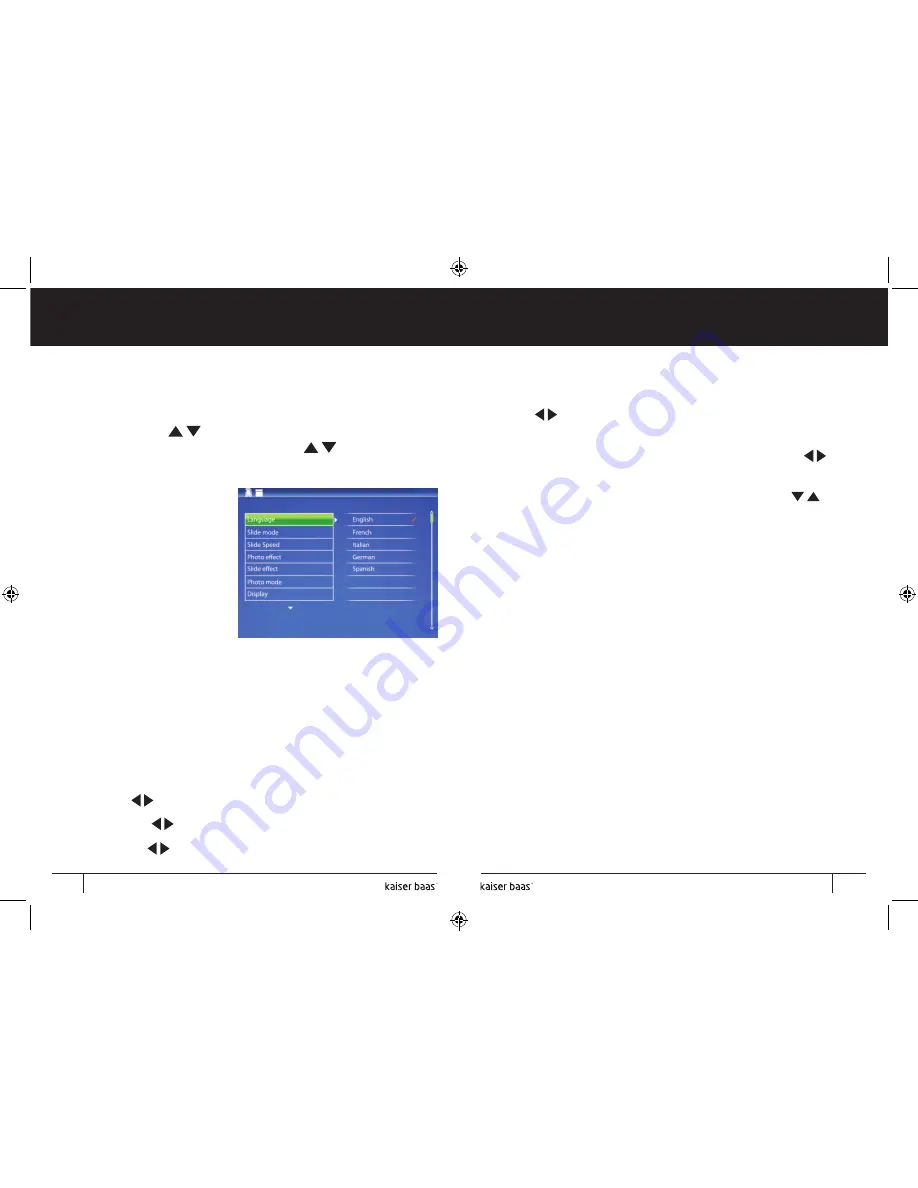
To enter the setup menu, select 

‘SETUP’

 from the main menu and 

then press 

‘OK’

. Use  

to select the item you want to set up. 

Press 

‘OK’

 to show the sub menu, select with             then press 

‘OK’  

to confirm. Exit menu at any time by pressing the 

‘EXIT’

 button.

The menu options are:

Language:

 English, French, 

Italian, German, Spanish, Greek

Slide mode:

 Single window, 

Four windows and Triple 
windows 

Slide speed: 

3, 5, 15, 30 

seconds, 1, 5, 15, 30 minutes 
and 1 hour 

10. Setup menu

Tint: 

Use          to select between 0 (lowest) and 40 (highest).

Set time/date:

 Press 

‘OK’

 to choose setup items as follows: Year, 

Month, Date, Hour, Minute, Second, Save time, adjust with           , 
press

 ‘OK’ 

to confirm, 

‘RETURN’ 

to quit.

Set Time format:

 12 or 24 hour, press

 ‘OK’

, select with            ,  

press 

‘OK’ 

to confirm.

Auto Power On:

 Select a time to automatically turn the frame on.

Auto Power Off:

 Select a time to automatically turn the frame off.

Format built-in memory:

 Format (clear) in-built memory.

Reset setting:

 Select to reset to factory default settings.

Exit: 

Exit the setup menu.

Photo effect:

 Colour, Mono, Sepia

Slide effect:

 Random, Split horizontal in/out, Jalousie, Split vertical in/

out, Radiation, Surround, Fade, Right/Next refresh, On pan, Roll from 
down to up, Roll from up to down, Brick

Photo mode:

 Auto fit, Optimal, full

Display:

Contrast:

 Use         to select between 0 (lowest) and 40 (highest).

Brightness:

  Use          to select between 0 (lowest) and 40 (highest).

Saturation: 

 Use         to select between 0 (lowest) and 40 (highest).

14

15

Summary of Contents for Ultra Slim LED

Page 1: ...Digital Photo Frame User Manual Ultra Slim LED ...

Page 2: ...14 16 1 What s in the box 2 Attaching the stand 3 Connecting the power 4 Touch button controls 5 Remote control 6 Loading to the on board memory 7 Playing photos from a USB stick 8 Playing photos from an SD card 9 Photo frame interface 10 Setup menu 11 Technical specifications 1 2 ...

Page 3: ...packaging includes the following contents Digital Photo Frame AC power adaptor Remote control USB adaptor USB cable 2 Attaching the stand The Digital Photo Frame is supplied with a magnetic stand Simply fit the grooves on the stand to the corresponding slots on the base of the photo frame and it will clip easily into place 2 32 ...

Page 4: ...onnect the power adaptor to a mains power point 4 Touch button controls The Digital Photo Frame features touch button controls on the front of the panel providing easy operation and photo navigation A light simple touch will activate and illuminate the controls The buttons are laid out as follows Power Up Right OK Play Pause Setup Down Left Return 4 5 Turn on the Digital Photo Frame by pressing th...

Page 5: ... to resume 7 SLIDESHOW Press to start or pause a slideshow 8 EXIT Press to return to upper page or enter main menu 1 2 3 4 5 6 7 8 6 Loading to the on board memory The Digital Photo Frame has 2GB on board memory for storing up to 1 000 photos The easiest way to load photos onto the on board memory is to connect directly to the computer using the supplied USB cable Make sure the power is connected ...

Page 6: ...o Frame A slideshow of your photos will then automatically start 8 Playing photos from a memory card To display photos on the Digital Photo Frame from an SD MMC or MS card first you must copy the files you wish to view from your computer to the card Alternatively you can load photos directly from a digital camera photo scanner or other photo device that uses a memory card Simply remove the card fr...

Page 7: ...d memory to a USB memory stick press the RETURN or EXIT button three times to access the menu After selecting the device a menu will appear giving you the option of Photo File Calendar or Setup Press OK on Photo to view photos from your chosen device A screen will then appear showing thumbnails of the first nine photos on the chosen device To view a photo full screen select the photo and press the...

Page 8: ...ete File using the buttons and select using OK The file will now be copied to the frame s internal memory File Manager Select the FILE option from the main menu to bring up the file manager The file manager lets you delete or copy files on your chosen memory storage To copy or delete files press the SETUP button to bring up the menu Calendar Press Calendar from the main menu press OK to access the...

Page 9: ...s Year Month Date Hour Minute Second Save time adjust with press OK to confirm RETURN to quit Set Time format 12 or 24 hour press OK select with press OK to confirm Auto Power On Select a time to automatically turn the frame on Auto Power Off Select a time to automatically turn the frame off Format built in memory Format clear in built memory Reset setting Select to reset to factory default settin...

Page 10: ...im LED Screen size 10 inch Screen type TFT digital display Resolution 1024 x 768 Aspect ratio 4 3 Internal memory 2GB Brightness 200 250CD m Contrast 480 600 1 Photo file format JPEG Memory card support MMC MS SD SDHC maximum 16GB USB USB 2 0 Host Mini USB Power 5V 1 5A 11 Product specifications 16 ...

Page 11: ......

Reviews: