


W W W . K A A R T A . C O M
7 4
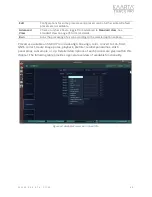
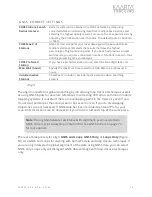
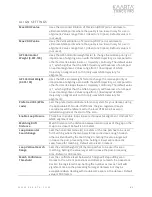
The
BASE Importer
file corresponds to the output configuration of your base station
receiver, whether a subscription-based corrections network or a standard base station. If
the correct GNSS Correct preset was chosen in the previous step, no additional changes
should be made.
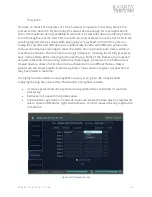
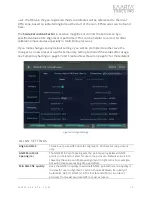
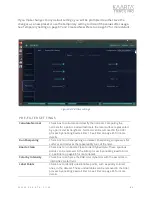
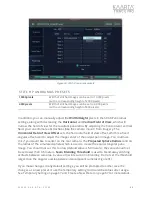
The
RTKLib (First and Last) Elevation Mask
can assist with eliminating satellites with
atmospheric errors and signal degradation. Satellites that appear near the horizon are
subject to signal fade and pick up other atmospheric noise; it can be helpful to ignore
those satellites during GNSS correction. Any satellite below this elevation (in degrees) are
excluded. A typical mask is set between 10 to 20 degrees. These two parameters allow for
a range of elevation masks and, after evaluation, selects the best outcome.
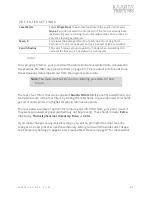
RTKLib Solution Type
refers to the direction in time that the data is filtered. For those
familiar with rtkLib, it can be set to forward (from beginning to end), backward (from end
to beginning), or combined (both forward and backward). The default is the combined
mode, where the filter is run both ways and the two results are combined into a single
solution.
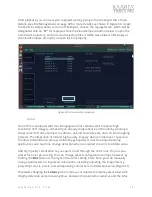
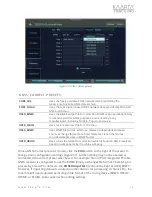
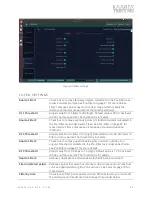
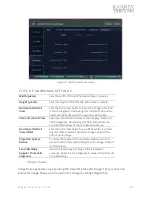
When utilizing a CORS network as your base station, several options can be modified for
improved results. You can change the
Stations Search Radius
, and
Max # of Stations
, or
manually enter a
Preferred Station
from which to obtain data. The Stations Search
Radius allows you to refine or expand results by narrowing or widening the range of
stations. A default radius is 50000m or 50km. Ideally you will find a GNSS site within 50
km. More distant stations can be used; however, longer baselines increase accuracy
errors. You can search for CORS stations in the United States, at the online
, to locate stations within your project proximity.
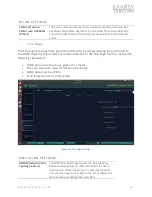
If you make changes to any default settings, you will be prompted to either save the
changes as a new preset or use the temporary setting to discard the values after usage.
See Temporary Setting on page 67 and Create a New Preset on page 67 for more details.