


W W W . K A A R T A . C O M
5 0
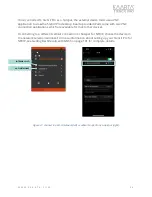
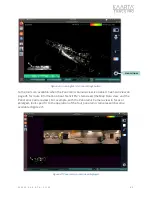
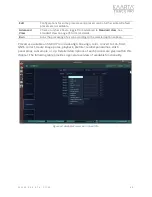
I m a g e M a n a g e m e n t
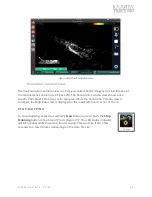
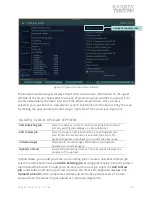
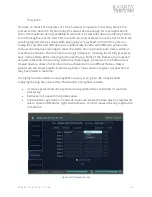
The Image Management tab shows all color images captured during scanning (Figure 34).
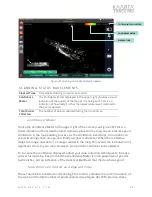
Scans are saved in the recordings folder on Stencil Pro desktop, like previous Stencil
versions. To view your images, navigate to your scan in the Stencil Pro desktop/recordings
folder. Open the raw_data/images folder within your scan to review captured images.
Images are captured once per second (1hz). Verify the number of images is consistent
with your scan time and that the image size is not null. Open a few images to make sure
they are in color.
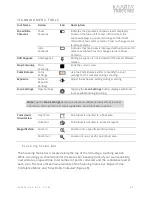
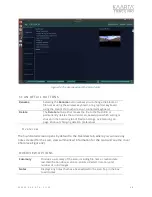
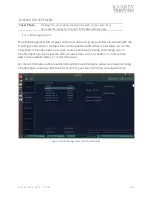
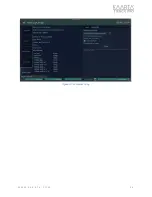
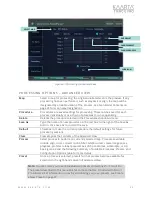
F ILE MANAGE MENT OPTIONS
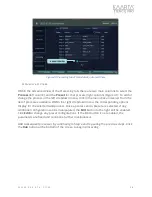
Scan Total Size
Shows the total size of the scan. Processed files also display here once
performed from the Processing tab. Click the
Convert to LAS
button to
convert raw .ply files to .las file format and save those .las files in the scan
folder. Those files can then be opened in a wider number of CAD
programs. Select the scan file, then click on the
CloudCompare
button to
open the scan in the CloudCompare software. Use the
Select All
prior to
performing an action to select all files. Select individual files or all to
Delete File(s)
from the system. See Scanning on page 20 for options to
send deleted files to the Trash Bin or remove completely.
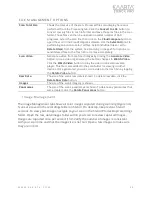
Scan Video
Generate a video from captured images by clicking the
Generate Video
button. Once a video is generated, the button changes to
Watch Video
.
Click the
Watch Video
button to play the video in an external video
player. This file is also added to the scan folder for viewing on other
devices. Once generated, you can send a video to the trash bin by tapping
the
Delete Video
button.
Raw Data
The size of the scan’s raw data is shown. To delete raw data, click the
Delete Raw Data
button.
Images
The size of the scan’s imagery is shown.
Panoramas
The size of the scan’s panoramas is shown. To delete any panoramas that
were created, click the
Delete Panoramas
button.