


W W W . K A A R T A . C O M
1 5
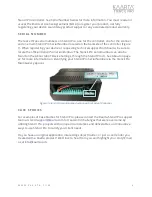
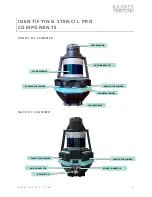
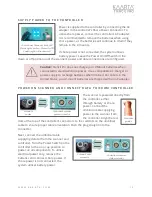
S U P P L Y P O W E R T O T H E C O N T R O L L E R
Power is supplied to the controller by connecting the AC
adapter to the controller’s Shore Power Connector. To
utilize shore power, connect the controller’s AC adapter.
It is recommended to remove the batteries when using
shore power, as the batteries will continue to drain if they
remain in the V-mounts.
If shore power is not connected, the system utilizes
battery power. Leave the Power On/Off Switch in the
down or off position until the scanner’s power and data connections are configured.
Caution:
Stencil Pro does not charge your V-Mount batteries when
connected to electrical/shore power. Use a compatible AC charger or
power supply to recharge batteries when drained. For orders in the
United States, your V-mount batteries are shipped with an AC adapter.
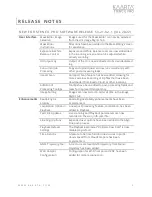
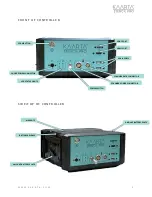
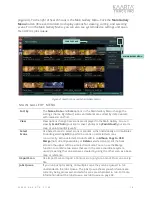
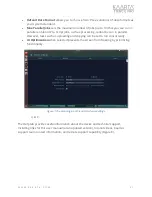
P O W E R O N S C A N N E R A N D C O N N E C T D A T A T O / F R O M C O N T R O L L E R
The scanner is powered directly from
the controller, either
through battery or shore
power. Connect the
umbilical cable supplying
power to the scanner from
the controller. Align the red
dots at the top of the controller’s connectors to the red dots on the umbilical
cable to ensure proper cable orientation. Push the plug straight into the
connector.
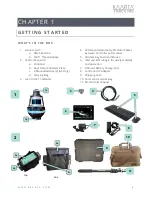
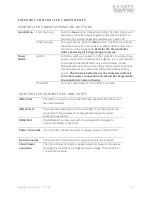
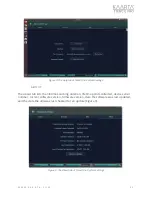
Next, connect the umbilical cable
supplying data to/from the scanner and
controller. Turn the Power Switch on the
controller to the on or up position to
power on all components. To utilize
electrical power only, remove the
batteries and connect shore power. If
shore power is not connected, the
system utilizes battery power.
Scanner’s
power
Controller’s scanner
power connector
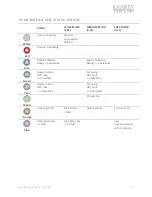
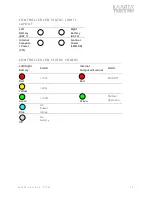
Shore Power Connector (left); LED
Status Lights (center); Power On/Off
Switch (right) in the down/off
Scanner’s data
connector
Controller’s scanner
data connector
Connector
guides