7
In the following, let us start the VN-S400U and try some of the basic operations.
<< Connecting to View Point and Displaying the Image>>
1
Start the VN-S400U.
Open the Windows [Start] menu, select [Programs] and then the [JVC] folder, and click on [VN-S400U] to start
the program. (The VN-S400U program can also be started by double-clicking on the VN-S400U icon on the
desktop.)
2
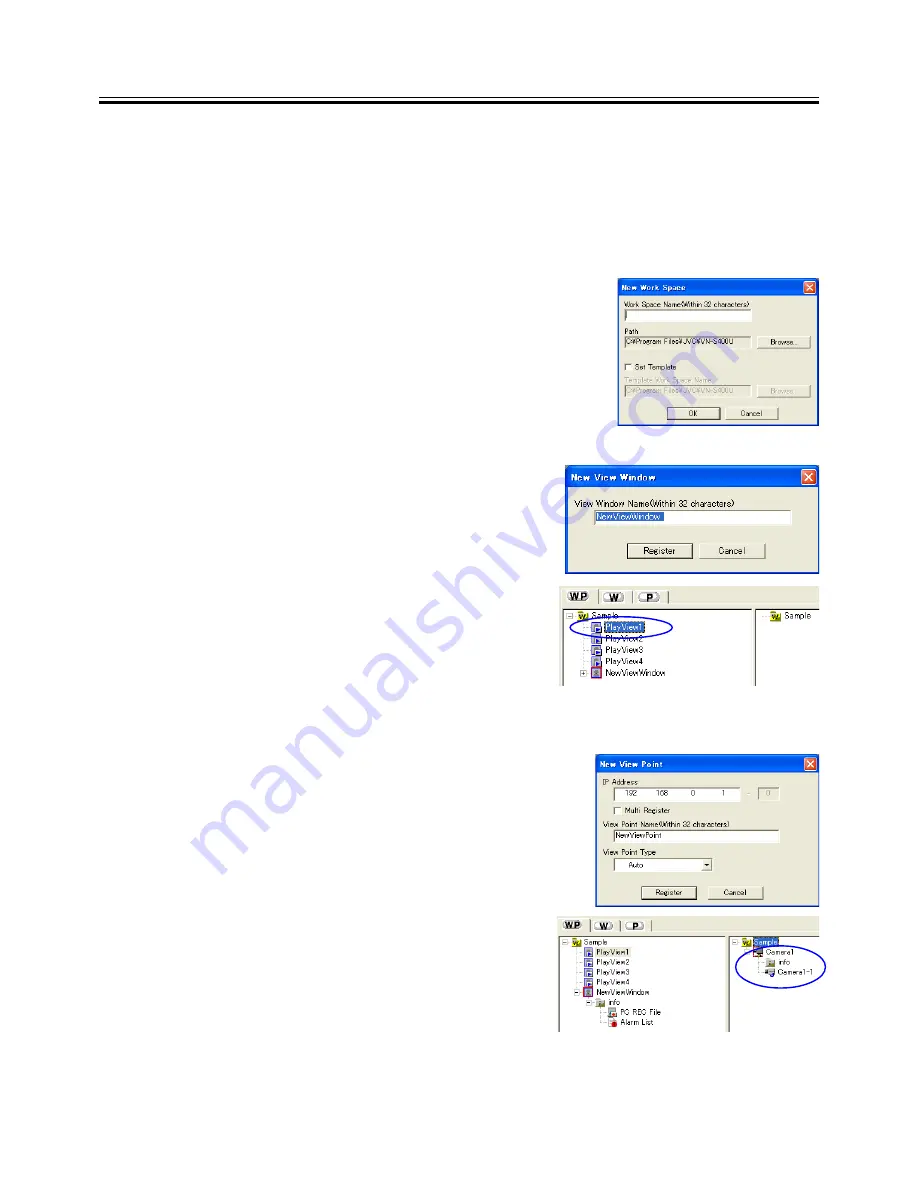
Create a new work space.
Open the [File] menu and select [New Work Space].
When the ‘New Work Space’ dialog box appears, enter the name
of the new Work Space within 32 characters and click on [OK].
3
Register the Live View Window.
Open the [Insert] menu and select [View Window].
‘New View Window’ dialog box appears, enter the name of the
new View Window within 32 characters and click [Register].
A Live View Window appears and the icon for the Live View
Window is added in the Tree View Area Layout.
4
Register a View Point.
Open the [Insert] menu and select [View Point].
The [New View Point] dialog box appears.
Enter the IP address and the name of the view point within 32
characters.
For the [View Point Type], select [Auto] in usual use.(Select
[Unknown] if the device of View Point is not in connectable condi-
tion. In this case, this View Point is connected automatically when
the Work Space is opened next time.)
After completing the entries, click on [Register].
The icons for the view point and its view channel are added in the
view point display section of the Tree View Area Layout.
3. Let’s Try


