


18
The system turns off automatically when the specified period of
time has passed.
Press SLEEP.
Each time you press the button, the shut-off time changes as
follows:
Example:
To check the remaining time
Press
SLEEP
once.
To change the remaining time
Press
SLEEP
repeatedly.
To cancel
Press
SLEEP
repeatedly until “SLEEP – –” appears.
• Turning off the power also cancels the Sleep Timer.
1
Press SPK LEVEL to show the target
speaker indication on the display
window.
Each time you press the button, the indication of the speakers
changes as follows:
2
Press LEVEL +/– to adjust the output
level from –6 to +6.
NOTE
• You can also make adjustments by using the setup menu shown on
the TV screen. (See page 35.)
• The adjustments take effect for all sources.
1
Press TREBLE/BASS to show “TRE” or
“BASS” on the display window.
Each time you press the button, the indication alternates
between “TRE” and “BASS”.
• TRE: Select this to adjust treble sound.
• BASS: Select this to adjust bass sound.
2
Press LEVEL +/– to adjust the level from
– 10 to +10 (in 2 steps).
NOTE
• The adjustments take effect for all sources.
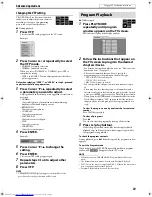
The system can be accommodated to your TV’s scan mode.
NOTE
• To use the system in the progressive mode, it is required that the
center unit is connected to the TV by using an HDMI cable or a
component video cord (not supplied). (See page 12.)
7
While DVD or USB MEMORY is selected as the source and
stopped
1
Press and hold SCAN MODE for
2 seconds.
Currently selected scan mode appears on the display window.
2
Press Cursor
3
/
2
to select the desired
mode.
Each time you press the button, the scan mode changes as
follows:
7
When connecting the TV with the component video cord:
7
When connecting the TV with the HDMI cable:
• When selecting “AUTO”, the system outputs the video
signal to get the best picture quality on your TV according
to the High-Definition video signal compatibility of the
TV.
• When selecting “AUTO”, “1080i”, or “720p”, the system
up-convert the 480i or 480p signal to 1080i or 720p.
• When “1080i” or “720p” is selected, the HD indicator lights
on the display window.
*
480i, 480p, 1080i, and 720p indicate the number of scanning
lines and scanning format of a video signal.
– 480i/1080i indicates 480/1080 scanning lines with
interlaced format.
– 480p/720p indicates 480/720 scanning lines with
progressive format.
• Generally, you can get better picture quality by selecting the
larger the number of scanning lines.
• You can get better picture quality in the progressive mode
than in the interlace mode.
3
Press ENTER while the selected mode is
displayed.
When the progressive mode is selected, the PROGRESSIVE
indicator lights on the display window.
NOTE
• Changing the scan mode does not take effect when connecting the TV
with the S-video or the composite video cord.
• Although the picture may be distorted when you press
ENTER
, this is
not a malfunction of the system.
Sleep Timer [SLEEP]
– –
(off)
Z
10
Z
20
Z
30
Z
60
Z
90
Z
120
Z
150
Z
(back to the beginning)
(Unit: min.)
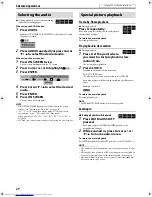
Adjusting the output level of
the subwoofer and speakers
FRNT L
(Front Left speaker)
Z
FRNT R
(Front Right
speaker)
Z
CENTER
(Center speaker)
Z
SURR
L
(Surround Left speaker)
Z
SURR
R
(Surround Right
speaker)
Z
SUBWFR
(Subwoofer)
Z
(back to the
beginning)
Adjusting the sound
minutes
Changing the scan mode
480i
*
mZ
480p
*
AUTO
Z
480p
*
Z
1080i
*
Z
720p
*
Z
(back to the
beginning)
• There are some progressive TVs and High-Definition TVs that are
not fully compatible with this system, resulting in an unnatural
picture when playing back a DVD VIDEO in the progressive scan
mode. In such a case, change the scan mode to the interlace mode.
To check the compatibility of your TV, contact your local JVC
customer service center.
• All JVC progressive TVs and High-Definition TVs are fully
compatible with this system.
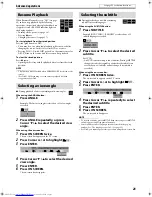
Basic operations
See page 16 for button locations.
TH-C60-40[J]7.book Page 18 Monday, February 27, 2006 11:25 AM