34
English
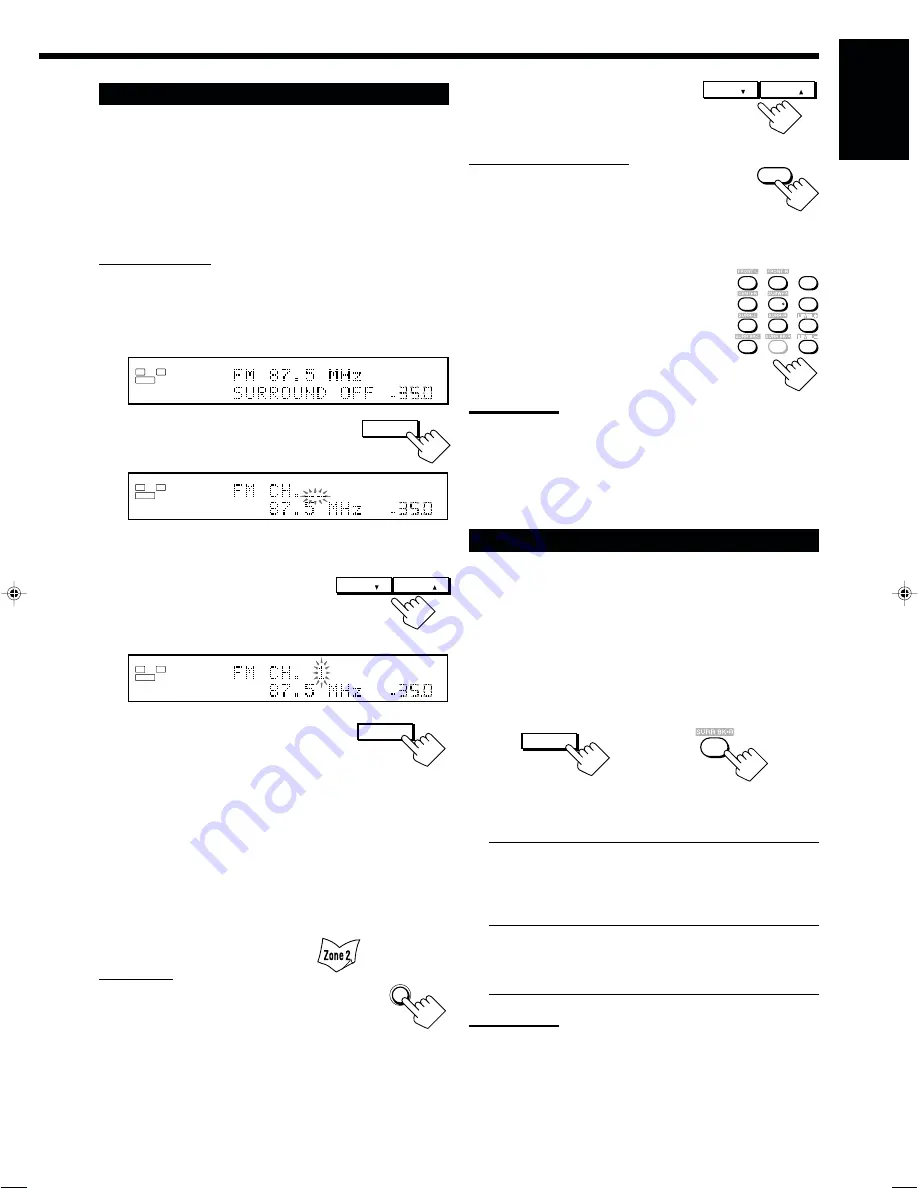
Using Preset Tuning
Once a station is assigned to a channel number, the station can be
quickly tuned in. You can preset up to 30 FM and 15 AM stations.
To store the preset stations
Before you start, remember...
• There is a time limit in doing the following steps. If the setting is
canceled before you finish, start from step 1 again.
On the unit ONLY:
1. Tune in to an FM or AM station you want to preset
(see “Tuning in to Stations Manually” on page 33).
• If you want to store the FM reception mode for an FM station,
select the FM reception mode you want. See “Selecting the
FM Reception Mode.”
2. Press MEMORY (inside the front
door).
The channel number position starts flashing on the display for
about 10 seconds.
3. Press PRESET
5
/
∞
(inside
the front door) to select a
channel number while the
channel number position is flashing.
4. Press MEMORY again while the
selected channel number is
flashing on the display.
The selected channel number stops flashing.
The station is assigned to the selected channel number.
5. Repeat steps 1 to 4 until you store all the FM and
AM stations you want.
To erase a stored preset station
Storing a new station on a used number erases the previously stored
one.
To tune in to a preset station
On the unit:
1. Press FM/AM.
The last received station of the last selected band is
tuned in.
• Each time you press the button, the band alternates between
FM and AM.
2. Press PRESET
5
/
∞
(inside
the front door) until you find
the channel you want.
From the remote control:
1. Press FM/AM.
The last received station of the last selected band is
tuned in.
• Each time you press the button, the band alternates between
FM and AM.
2. Press the 10 keys to select a preset
channel number.
• For channel number 5, press 5.
• For channel number 15, press +10 then 5.
• For channel number 20, press +10 then 10.
• For channel number 30, press +10, +10,
then 10.
Note:
You can only select the same station of the same band (FM or AM) for
both Zone 1 and Zone 2 operations. If you change the station for Zone
2, it also changes for Zone 1 (and vice versa: indications in the main
display also change). This also means that if you change the station
for Zone 2 while recording a broadcasting program in Zone 1,
recording in Zone 1 will be interrupted.
Selecting the FM Reception Mode
When an FM stereo broadcast is hard to
receive or noisy
You can change the FM reception mode while receiving an FM
broadcast.
• You can store the FM reception mode for each preset station.
Press FM MODE.
• Each time you press the button, the FM reception mode alternates
between “AUTO MUTING” and “MONO.”
AUTO MUTING:
When a program is broadcasted in stereo,
you will hear stereo sound; when in monaural, you will
hear monaural sounds. This mode is also useful to
suppress static noise between stations. The AUTO
MUTING indicator lights up on the display.
MONO:
Reception will be improved although you will lose the
stereo effect. In this mode, you will hear noise while
tuning in to the stations. The AUTO MUTING and
STEREO indicators go off.
Note:
When you press FM MODE on the remote control, be sure that
“TUNER” appears on the remote’s display. If not, press FM/AM first to
select the FM band, then press FM MODE.
L
ANALOG
STEREO
TUNED
SPEAKERS
VOLUME
1
SUBWFR
R
dB
AUTO MUTING
dB
LEFT
/
PRESET
RIGHT
/
PRESET
LEFT
/
PRESET
RIGHT
/
PRESET
L
ANALOG
STEREO
TUNED
SPEAKERS
VOLUME
1
SUBWFR
R
dB
AUTO MUTING
dB
FM/AM
EFFECT
LIVENESS
FM MODE
RETURN
100+
1
2
3
4
5
6
8
9
10
0
FM MODE
0
On the unit
(inside the front door)
From the remote control
EXIT
/
FM MODE
SET
/
MEMORY
SET
/
MEMORY
FM/AM
L
ANALOG
STEREO
TUNED
SPEAKERS
VOLUME
1
SUBWFR
R
dB
AUTO MUTING
dB
33-34_RX-DP15B[C]f.pm6
04.4.14, 3:06 PM
34


