background image

Configuring your remote control

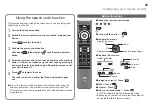
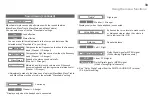
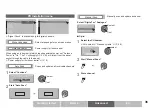
Using the search code function

This function searches through the codes one by one, beginning from 

the first code in the list.

  Turn on the device manually.

  Switch the remote control mode to a mode that matches your 

device.


Press 

 to select the mode.

  Activate the search code function.


Hold down 

 (stand-by) and 

 until the mode indicator 

blinks.

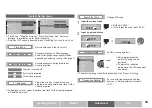
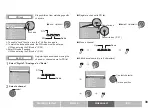
  Point the remote control at your device and press the stand-by 

button. If there is no response, try the next code by pressing 

3


and press the stand-by button again. Repeat the process until 

your device turns off.

  Press 

 to register the code.


The code is now set. Confirm that the mode indicator goes 

out.

If your TV’s remote control still does not work even after using the 

search code function, use your device’s own remote control. The 

TV’s remote control is not guaranteed to work with all models, brands 

or operations.

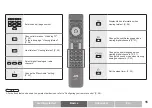
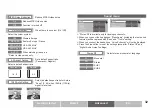
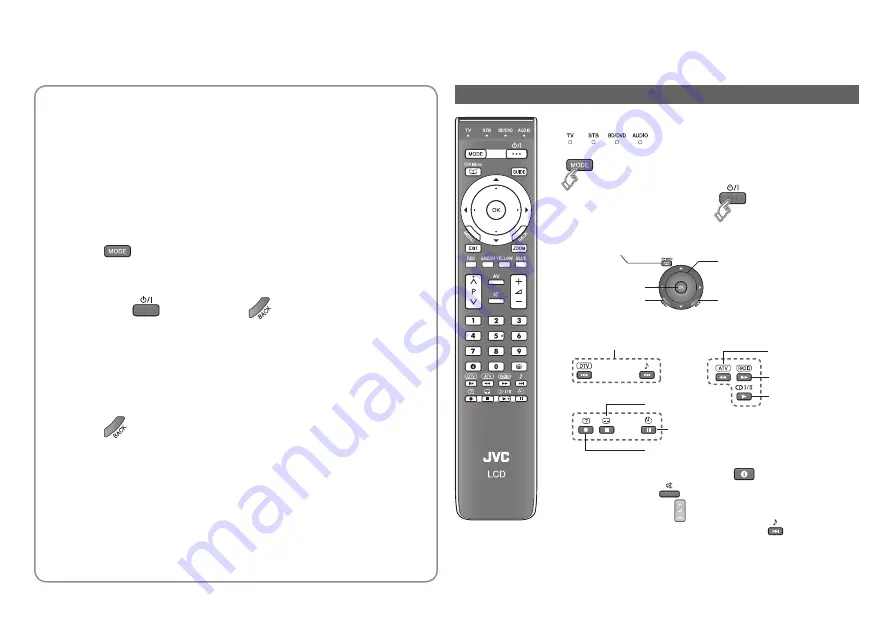
Display on screen 

Æ

 Press “

Mute 

Æ

 Press “

Volume 

Æ

 Press “ ”

Select a surround mode 

Æ

 Press “ ”

For STB, it displays Electric Programme Guide.

Depending on your device, some functions may not 

be operable with this remote control.

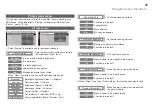
Turn on/off the device

Navigate the menus

Display top menu

OK

Select

Display menu

Back to previous page

Playback / Record, etc.

Select a chapter

Play

Reverse

Stop

Pause

Record

Change the remote control mode

Button functions

Forward

Summary of Contents for LT-37DV1BJ

Page 1: ...LCT2525 002A L INSTRUCTIONS WIDE LCD PANEL TV LT 37DV1BJ LT 42DV1BJ LT 47DV1BJ ...

Page 2: ...able for incorrect disposal of this waste in accordance with national legislation Business users If you wish to dispose of this product please visit our web page http www jvc eu to obtain information about the take back of the product Other Countries outside the European Union These symbols are only valid in the European Union If you wish to dispose of these items please do so in accordance with a...

Page 3: ...echnician See the included manual on mounting procedures JVC assumes no responsibility for damage due to improper mounting Do not allow the TV to fall Do not rest your elbows on or allow children to hang from the TV There is a risk that the TV will fall and cause injuries Handle LCD panel with care Use a soft dry cloth when cleaning Never dismantle the rear panel It may cause an electric shock If ...

Page 4: ...TV by clapping your hands 17 Watching TV 19 Using EPG 24 Viewing teletext Analogue channel 26 Watching videos DVDs 27 Configuring your remote control 28 Advanced Using the menu functions 30 Viewing listening from USB device 40 Etc Troubleshooting 42 Technical information 45 Frequency table 49 Specifications 52 Digital terrestrial broadcasting DVB T Æ Digital channels Analogue terrestrial broadcast...

Page 5: ...15 For confirming the TV works WARNING Batteries shall not be exposed to excessive heat such as direct sunshine fire or the like Attach the stand to the TV Stand assembly The stand will be supplied separately See the illustration below to attach the stand to the TV 2 1 3 4 To prevent scratches on the panel lay a piece of soft cloth on an even platform and place the TV onto it See P 7 Short x 4 Lon...

Page 6: ... a picture on the TV and the Power lamp will stay lit When the Power lamp is blinking the TV will not be able to receive any commands When Power Lamp is set to Off the Power lamp will not light up For details refer to Power Lamp P 35 Peel off the protection films pasted on the TV stand after the TV has been placed properly Note Eco sensor See P 47 Microphone See P 17 Touch sensor panel operation P...

Page 7: ...power switched on For details on connecting terminals see P 9 Concerning blinking power lamp and a beep This TV is equipped with Operate TV by clapping your hands Hand Clap Function P 17 If you clap your hands facing towards the TV the TV will detect a clap sound and the power lamp will blink If the TV detects a command by clapping your hand you will hear a beep and the TV will operate according t...

Page 8: ...two AAA R03 dry cell batteries Insert the batteries from the end making sure the and polarities are correct Subscribe to a broadcasting company beforehand A Viewing Card B will be sent by the broadcasting company after subscribing to it It may be necessary for you to purchase a CAM Conditional Access Module A in addition to the Viewing Card Consult your broadcasting company or retailer 1 Unplug th...

Page 9: ...in step 7 of Initial settings P 14 The TV will supply DC 5 V 50 mA max from the aerial socket through the cable to the aerial Supplying power to outdoor and indoor aerials which does not require external power may cause damage to the aerial If you are uncertain whether the aerial needs external power select Off Connect the aerial directly to the TV When a recording device is connected between the ...

Page 10: ...and Find the best connections that are possible with your devices Æ P 11 Connecting external devices type of connections C D E DVD player Video camera Game consoles C E D D EXT 1 EXT 2 EXT 1 Satellite broadcast tuner EXT 2 VCR DVD recorder PC IN D SUB PC terminal Refer to P 48 EXT 3 Removing the terminal cover Using the cable clamp To remove the terminal cover press both tips at same time When att...

Page 11: ...eadphones A B F A A Audio system Digital Satellite broadcast tuner DVD player HD Video camera CI Common Interface slot Refer to P 7 DIGITAL AUDIO OUT EXT 4 HDMI 1 EXT 5 HDMI 2 EXT 6 HDMI 3 Not available for service adjustments HDMITM Connector type of connections A B F ...

Page 12: ...peed HDMITM Cable are tested to carry an HD signal up to 1080p and higher B DVI Audio DVI HDMI cable Audio cable EXT 4 EXT 3 L and R jacks Input DVI digital SD 576i 625i 480i 525i ED 576p 625p 480p 525p HD 1080i 1125i 1080p 1125p 24Hz 1080p 1125p 50Hz 1080p 1125p 60Hz 720p 750p Audio L R analogue Better C Component video and Audio Component video cable Audio cable EXT 3 Input Component analogue SD...

Page 13: ...deo analogue S Video analogue NTSC PAL compatible Audio L R analogue Output Monitor out composite video and audio L R analogue E Video and audio Video and audio cable EXT 3 V L R jacks Input Composite video analogue Audio L R analogue Change the EXT 3 setting from Component to Composite P 27 Audio system Connecting cables Connect to your TV Available signals Notes F Optical input Optical audio cab...

Page 14: ...ngs 2 Turn the TV on If the remote control doesn t work confirm that the mode is set to TV If the Menu Language does not appear refer to Factory Setting P 39 or Retuning P 39 for channel settings 3 Select a Menu language Select a language for on screen displays Select the country of installation Receivable digital channels will differ depending on the Country setting 2set 1select 2set 1select Init...

Page 15: ...al Note You can check the broadcast signal level of the channel you are watching For details refer to Signal Check P 39 2 Set digital channels using Factory Settings For details refer to Factory Settings P 39 If you still cannot watch digital channels after following the steps above there may be a problem with your aerial or its cable Or the signal may be too weak Æ Consult your retailer 8 Start a...

Page 16: ...Display the Electronic Programme Guide P 24 Select and confirm settings in menus Display on screen menu Using the menu functions P 30 To the previous menu Exit from Electric Programme Guide and on screen menu Change the aspect ratio P 22 Colour buttons Select a page when viewing teletext Operate functions in menus Change channel page Volume control The volume settings for headphone and speaker wil...

Page 17: ...channels Change the MaxxAudio setting P 23 Display hidden information when viewing teletext P 26 Change the subtitle language when viewing digital channels P 21 Change the audio language when viewing digital channels P 21 Change the sound mode when viewing analogue channels P 22 Set the sleep timer P 23 Note For buttons that can be used to operate other devices refer to Configuring your remote con...

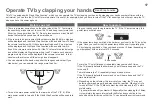
Page 18: ...s You can operate with a hand clap under the range shown below If you clap harder you can operate in a range more than 3m Turn on the main power switch on the rear side of the TV P 6 If the main power switch is turned off the Hand Clap Function will be unable to work How to operate Clap your hands once facing towards the TV If the TV detects a clap the power lamp will blink once If the power lamp ...

Page 19: ...he Auto Shut Off is working it may seem as though that the TV just suddenly turned off This is not a malfunction You can temporarily cancel the Auto Shut Off by operating the TV with a remote or with a touch censor within 3 hours The factory default setting for Auto Shut Off is set to On If you do not want the TV to automatically shut off when the TV is turned on by Hand Clap Function set the Auto...

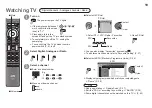
Page 20: ...in to turn the screen off and put the TV into standby mode To completely turn off the TV unplug the power plug You cannot turn the TV on when the main power switch P 6 is off Enter a channel number E g 1 15 Move up or down a channel up down Select with PR List PR List You can also display Favourites by pressing To edit favourite channels refer to Favourite Setting P 37 Select with EPG Electronic P...

Page 21: ...e Radio programme TV programme with teletext information P 22 t u t Audio in another language is not available u Other audio languages are available P 21 Pay TV channel Minimum viewing age limit of the programme Set viewing age limit Æ P 34 Subtitles are available P 21 More information about the programme is available Æ Dolby Digital Dolby Digital signal is received P 46 Special audio track for th...

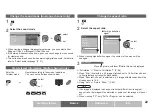
Page 22: ... track for the hearing impaired Undefined When the audio s language cannot be identified Dolby Dolby Digital The language that can be selected depends on the broadcast Please read Dolby Digital output from the DIGITAL AUDIO OUT terminal P 46 before selecting Dolby 2set 1select By default the language set in System Language P 34 is automatically selected When not broadcast in that language another ...

Page 23: ...e is displayed in an aspect ratio that differs from its original aspect ratio the image will be distorted or portions of the image will be cut off When viewing PC only Full or Regular can be selected Change the aspect ratio 1 3 2 Select the sound mode Change the sound mode Analogue channel only 1 When viewing a bilingual broadcast programme you can select either Bilingual I Sub I or Bilingual II S...

Page 24: ... in the Sound menu P 33 MaxxAudio does not work with headphones When the headphone is connected MaxxAudio will not display even if you press the button Change the MaxxAudio setting Low Less effective High More effective Each press of will increase the time by 10 minutes MaxxAudio improves sound performance with four sound features MaxxBass MaxxTreble MaxxStereo and MaxxVolume You can select one of...

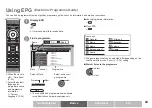
Page 25: ...rogramme Genre Channel Programme Date TV Radio Check programme information Æ Close EPG Æ When the clock is off Æ Time Zone P 34 Select the default language for programme name and programme information Æ System Language P 34 The genre types that can be selected differ depending on the country selected in the Country P 13 setting Watch listen to the programme 2view 1select 1 2 Next Previous Select a...

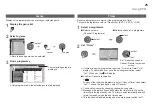
Page 26: ...e are displayed select 1 Select a programme 2 Set Timer Select a column Channel Programme Select a channel a programme select 2set 1select Display only programmes which match your selected genre Reserve a programme to watch One programme at a time To record a programme refer to Monitor out EXT 1 EXT 2 P 45 Set Reserve a channel Cancel Return to previous screen If there already is a programme reser...

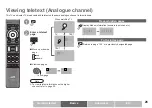
Page 27: ...nel in two windows Enter a teletext page When watching TV TV TEXT TEXT Move up or down a page Display hidden information answers to quizzes etc Returns to page 100 or a previously designated page Reveal hidden pages To the index page 1 2 up down View sub pages to sub page Note To view teletext information on the digital channel refer to page 22 ...

Page 28: ...tton or select ATV from the EXT Input menu for analogue channels To return to TV channels 1 2 Setting external terminals 1 Display the Connection setting menu Display the menu bar Select System Setup Select Connection setting 2next 1select 2next 1select 2 Select EXT 3 Setting EXT ID Setting or Control with HDMI 2next 1select EXT 3 Setting 2set 1select Select Component or Composite Component For co...

Page 29: ...ol code Press and hold Enter four digit number Release the button 5 Point the remote control at your device press and confirm that your device is turned off If your device does not respond try entering another available code Note If your device does not respond try all the available codes for the device s brand If none of the code works or the brand is not listed refer to Using the search code fun...

Page 30: ...ur device turns off 5 Press to register the code The code is now set Confirm that the mode indicator goes out If your TV s remote control still does not work even after using the search code function use your device s own remote control The TV s remote control is not guaranteed to work with all models brands or operations Display on screen Æ Press Mute Æ Press Volume Æ Press Select a surround mode...

Page 31: ...st To enter an item s menu select To hide or display the bottom area of the menu Æ Depending on the situation some items will be displayed in gray colour and will not work You will not be able to change their setting as well When entering the PIN code When watching digital channels or changing DTV menu settings it may be necessary for you to enter a PIN code Once a PIN code has been entered there ...

Page 32: ...harpness Softer ó Sharper Sharpness Brightness Darker ó Brighter Brightness Contrast Lower ó Higher Contrast Backlight brightness Darker ó Brighter Backlight Super DigiPure For natural looking outlines Colour Management For natural looking pictures Off Function is turned off Picture Management Fix bright dark pictures Min Less effective Smart Picture Make it easier to view white areas On Maintain ...

Page 33: ...ramic Regular Select a default aspect ratio Regular Panoramic Sound menu Stereo t u is available only for analogue channels When you connect the headphone MaxxAudio including the four sound features will be replaced with Bass and Treble setting When you connect the headphone Voice Enhancer will not be displayed Press the blue button to reset the settings except for Stereo t u and Digital Audio Out...

Page 34: ...reo sound naturally Weaker ó Stronger MaxxVolume Maintains a uniform sound volume even if the sound becomes loud suddenly during commercial breaks etc Weaker ó Stronger You can make further adjustments to the four sound features of the selected preset MaxxAudio to your liking MaxxBass Compensates low frequencies to widen the frequency band Weaker ó Stronger Adjustments made to the three sound feat...

Page 35: ...tricted programme the PIN code must be entered Enter PIN Code Change PIN code 1 Input the current code Default is 0000 If you forget the code input 0081 2 Input a new code twice The maturity rating may differ depending on the Country setting System Setup menu Time Zone Set the time zone if the clock is off System Language Set audio language subtitle language and EPG language Languages will differ ...

Page 36: ...ditional Access Module menu This function can only be used when pay TV can be received in your region When the CAM Conditional Access Module etc is inserted after subscribing to the broadcasting company this function is available Press OK button to display the CAM Conditional Access Module menu and follow the instructions on the screen Watch pay TV digital channels Æ P 7 If the CAM Conditional Acc...

Page 37: ...d Etc Advanced Basics Getting started Manual Scan Manually scan and update a channel Select Digital or Analogue 2set 1select Digital 1 Select the CH number select 2 Start Manual Scan 3 Store channel CH number Æ Frequency table Æ P 49 or PR Installation menu Menu Language Select a language for on screen menus Antenna Power Power supply for indoor aerial When using an indoor aerial which requires ex...

Page 38: ...n System Band Search Fine Tune B G VHF UHF D K I L B G Analogue Manual Scan System Search Fine Tune I VHF UHF CATV VHF UHF Band Analogue Manual Scan Fine Tune 43 UHF CH United Kingdom 1 20 21 69 Favourite Setting Register your favourite channel To move through only your favourite channels Select with PR List P 19 Æ Register icon Set Cancel Æ Update Scan Updates new channels Start Update Scan All C...

Page 39: ... THREE 1 2 Name PR 3 4 5 6 7 8 9 10 D D D D D D D D D D Edit PR Selection of Network DTV Etc Advanced Basics Getting started Register a channel to PR list Move a channel Down Up Edit channel name Up to 5 characters 2 move position 1 select character Register icon Install Uninstall Æ Favourite icon P 37 Edit PR Registering channels and moving the channel or channel name for PR list PR lock Stops ch...

Page 40: ...Select Yes in Factory Setting will enter standby then turn on from standby and start the Initial settings P 13 2start 1select Yes Initial setting will start again Initial settings P 13 Retuning menu You can set the TV to restart the initial setting For details refer to step 3 in Initial setting P 13 Signal Check Check the broadcast signal To check another broadcast channel The Channel is the frequ...

Page 41: ...8 00002 00001 File Name 00001 Etc Advanced Basics Getting started Viewing listening from USB device Picture Music You can view photos and play music by connecting usb mass storage class devices Connect USB device Select Picture or Music 1 2 If the Photo Viewer does not appear select Photo Viewer from the menu bar 2set 1select Picture 2view 1select Zoom Rotate To view as slide show Play Pause Next ...

Page 42: ...formats refer to Supported music formats for Photo Viewer P 46 Slide show with background music 1 Start the background music 2 Start the slide show You can view slide show with background music by setting To continuously play the songs P 41 and To view as slide show P 40 To view slide show with background music make sure to place the pictures and music inside the folder To start the background mus...

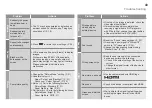
Page 43: ...y of the signal there may be a time lag when changing channels I can t turn it on Is the power cord connected to the AC outlet correctly Is the main power switch turned on P 6 Problem Actions Basics Remote control stops working Unplug TV several minutes later plug it in again TV screen is frozen Touch MENU TV and continuously press remote with under 2 seconds of interval Unplug TV several minutes ...

Page 44: ...x P 31 Dull picture Set to the following functions Picture Mode Bright P 31 Super DigiPure Off P 31 Problem Actions Picture Strange picture when using an external device If the top of the image is distorted check the video signal quality itself If movement appears unnatural when receiving a signal from a DVD player etc with 576p 625p change the output setting of the external device to 576i 625i So...

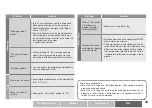
Page 45: ...the main power switch on or by plugging to the AC outlet it will take approx 15 seconds until the TV is ready to receive any commands Problem Actions Message Missing or weak signal Is the TV connected correctly to the aerial Change the direction of the indoor aerial Check digital channels signal with Signal Check P 39 If you still cannot watch the digital channels after following the steps above t...

Page 46: ...record and video audio will output as an analogue signal Analogue channel video audio will output from EXT 1 when analogue channel or EXT 1 is selected To record video and audio from another external devices Connect the external device to EXT 1 or EXT 2 Select an external device you want to record and video audio will output as an analogue signal Set the aspect ratio to Regular or Full The aspect ...

Page 47: ...l signals Even if Dolby Digital is set Liner PCM signals will be output from the sources other than digital channels Set the audio system so that it is compatible with Dolby Digital MPEG and Linear PCM For detail refer to the audio system instruction manual If the audio system does not have a MPEG decoder change the setting to PCM when listening the sound of a channel that is not broadcast with Do...

Page 48: ...vice When switching the TV s external input or channel When switching the TV s menu language Information regarding behaviour of the device when status is received refer to the external device s manual Turning On Off HDMI CEC Set HDMI CEC Æ Control with HDMI P 27 Factory default setting is On If HDMI CEC does not work correctly When HDMI CEC enabled device is connected to EXT 1 or EXT 2 with SCART ...

Page 49: ...e Æ PC Position P 39 Note Computer EXT 3 PC IN D SUB The illustrations are emphasised to make clear differences between Full and Full Native Dark bar or noise may appear at the edges of the screen when viewing in Full Native for some videos This is resulted from the signal itself not due to TV malfunction Full Native cannot be selected in 720p signal Software downloaded by Over air download If new...

Page 50: ...6 586 586 586 586 CH 36 594 594 594 594 594 CH 37 602 602 602 602 602 CH 38 610 610 610 610 610 CH 39 618 618 618 618 618 CH 40 626 626 626 626 626 CH 41 634 634 634 634 634 CH 42 642 642 642 642 642 CH Austria Switzerland Czech Republic Germany Denmark Netherlands Sweden Belgium Other Italy Spain Finland France United Kingdom CH Frequency CH 43 650 650 650 650 650 CH 44 658 658 658 658 658 CH 45 ...

Page 51: ...9 203 25 295 25 231 25 CH 20 210 25 303 25 239 25 CH Austria Switzerland Germany Denmark Spain Finland Netherlands Sweden Belgium Other Italy United Kingdom Czech Republic France CH Frequency CH 21 471 25 CH 22 479 25 CH 23 487 25 CH 24 495 25 CH 25 503 25 CH 26 511 25 CH 27 519 25 CH 28 527 25 CH 29 535 25 CH 30 543 25 CH 31 551 25 CH 32 559 25 CH 33 567 25 CH 34 575 25 CH 35 583 25 CH 36 591 25 ...

Page 52: ... 25 284 75 CH 19 287 25 296 75 CH 20 294 25 CH 21 303 25 303 25 CH 22 311 25 311 25 CH 23 319 25 319 25 CH 24 327 25 327 25 CH 25 335 25 335 25 CH 26 343 25 343 25 CH 27 351 25 351 25 CH 28 359 25 359 25 CH 29 367 25 367 25 CH 30 375 25 375 25 CH 31 383 25 383 25 CH 32 391 25 391 25 CH Austria Switzerland Germany Denmark Spain Finland Netherlands Sweden Belgium Other Italy United Kingdom Czech Rep...

Page 53: ... x 13 cm x 2 Power consumption standby 177 W 0 5 W 225 W 0 5 W 246 W 0 5 W Screen size visible area size measured diagonally 94 cm 107 cm 119 cm Connectors HDMI x 3 RCA x 5 component video or composite video audio L R Euroconnector SCART x 2 Optical connector digital audio output x 1 USB x 1 D SUB 15 pins x 1 For details Æ P 11 40 48 Headphone jack Stereo mini jack 3 5 mm in diameter x 1 Dimension...

Page 54: ...2 Amitronica 0713 Ampere 0132 0396 Amstrad 0132 0396 0501 0713 0847 0885 1113 1175 1693 Anglo 0713 Ankaro 0713 Anttron 0613 Apollo 0455 Axitronic 1626 B ytronic 1412 Balmet 1457 Beko 0455 Best Buy 1993 Big Sat 1457 Black Diamond 1284 Blaupunkt 0173 Blue Sky 0713 Boca 0132 0713 1232 1366 1579 Bodner Mann 1480 Boston 1251 Brainwave 0658 1294 1672 British Sky Broadcasting 0847 1175 1662 Broco 0713 Bs...

Page 55: ...liocom 0607 Helium 0607 Hirschmann 0173 0299 0396 0501 0607 1111 1232 1412 Hitachi 0455 1284 HNE 0132 Hornet 1300 Houston 0396 Humax 1176 1427 1675 1743 1788 1808 1882 1915 2144 2408 Huth 0132 0607 1075 1143 Hyundai 0758 1075 1159 i CAN 1367 ID Digital 1176 ILLUSION sat 1557 Imperial 1195 1197 1334 1429 1672 Ingelen 0114 0396 Inno Hit 1626 International 0132 Interstar 1214 Intervision 0607 Inves 1...

Page 56: ...SM Electronic 0713 1200 1409 Smart 0132 0396 0713 1113 1232 1273 1404 1413 Sony 0282 0292 0455 0847 0853 1558 SR 0132 Patriot 0132 peeKTon 1457 1659 1993 Philips 0099 0133 0173 0200 0292 0455 0613 0818 0853 1114 1499 1543 1672 1743 Phonotrend 1200 Pilotime 1339 Pino 1334 Pioneer 0292 0329 0853 1308 Planet 0396 PMB 0713 1611 Polytron 0396 Portland 1296 Preisner 0132 0396 1113 1366 Premier 0292 0723...

Page 57: ...t 1300 DMT 1075 Dream Multimedia 1237 Echostar 0610 eMTech 1214 GbSAT 1214 Nokia 1023 1310 Opentel 1412 Orbis 1412 Pace 1175 1423 1693 1850 Panasonic 1304 Philips 0099 Pilotime 1339 Rebox 1214 Samsung 1206 1570 Sansui 1545 Sat Control 1300 Schneider 1206 Schwaiger 1075 1412 Sedea Electronique 1206 Serd 1412 SKY 1175 1662 1693 1848 1850 Gecco 1412 Globo 1412 HDT 1159 Hirschmann 1412 Humax 1176 1427...

Page 58: ... 1004 1140 1152 1221 1316 1423 1530 1730 1923 2014 GoWell 1643 GPX 0699 0741 Graetz 0665 Gran Prix 0831 0898 Grandin 0713 1233 Clayton 0713 CMX 1643 Coby 0730 0852 Codex 1233 Commax 1321 Conia 0852 Contel 0788 Continental Edison 0831 0872 Crown 0713 0770 1115 Cybercom 0831 CyberHome 0714 0816 1502 Cytron 0651 0774 1347 1423 D Vision 1115 1367 Daenyx 0872 Daewoo 0714 0770 0870 0872 1436 1483 2155 D...

Page 59: ...4 1316 1483 Proscan 0522 Proson 0713 Prosonic 0699 0752 ProVision 0699 0730 1163 1321 1484 1923 Mark 0713 Marquant 0770 Mastec 1221 1434 Matsui 0651 0672 0695 0713 1004 1316 1695 1730 Maxim 0713 0872 1367 MBO 0730 1730 MDS 0713 Mecotek 0770 Medialine 1271 Mediencom 0751 Medion 0630 0651 0741 0774 0783 0831 0879 1006 1347 1423 MEI 0790 Memorex 0831 Messo 1513 Metz 0525 0571 0713 1994 MiCO 0723 0751...

Page 60: ...ptek 0763 Star Clusters 1152 1227 Starlogic 1005 Starmedia 0818 1005 1224 Strato 1152 1382 Strong 0713 Sunkai 0770 0850 Sunstech 0831 1513 Sunwood 0788 0898 Supervision 0768 1152 Supratech 0893 1513 SVA 0672 0752 Sylvania 0675 Symphonic 0675 Synn 0768 Tamashi 1394 Tandberg 0713 1695 1994 Tangent 1321 Targa 1227 1906 Tatung 0770 1695 Tchibo 0741 TCM 0741 0790 Teac 0741 0768 1227 Tec 0898 Technica 1...

Page 61: ...530 Welltech 1221 Xoro 1221 Yamada 1158 1416 Yamaha 0646 Yukai 1730 Home Theater in Box AEG 0790 1923 AFK 1923 Akai 0790 Amstrad 0790 ASCOMTEC 1923 Audiosonic 1923 Basic Line 1994 Belson 1923 Binatone 1923 Blue Sky 0790 Bose 2023 Bush 1832 Cat 1923 Centrum 1923 1994 Clatronic 1923 Dantax 0790 Denon 0634 1634 Denver 1923 Digitech 1832 Dual 0779 0790 Marquant 0770 MEI 0790 Metz 1994 Nexius 0790 Nikk...

Page 62: ...92 Meridian 0269 Micromega 0269 Myryad 0269 Naim 0269 Optimus 0013 0300 Panasonic 0521 Philips 0269 0892 Pioneer 0269 0013 0300 Quad 0269 Radiola 0269 RCA 0300 Revox 0269 Sony 0689 Technics 0521 Thorens 0269 Universum 0269 Wards 0013 Yamaha 0848 Home Theater in Box Sony 0689 Panasonic 0521 Technics 0521 Receiver AEG 1389 1390 AFK 1389 Aiwa 0121 0189 1189 1269 1405 Akai 0609 0804 1390 Alba 1554 All...

Page 63: ...0744 Palladium 0797 1220 1293 1344 1390 Panasonic 1308 1309 1316 1518 1763 1765 1779 Paramount Pictures 1220 Philips 0189 0891 1089 1189 1269 1289 1673 Pioneer 0186 1023 1459 1623 PJ 1389 Polk Audio 1289 Prima Electronic 0797 Proline 0797 1390 ProVision 1389 Targa 1293 TCM 0797 Teac 0112 0609 Technics 1308 1309 1518 1763 1765 Techwood 1554 Tevion 1389 1611 Thomson 1154 1354 Thorens 0189 1189 Thorn...

Page 64: ...74 Daeryung 0477 Fosgate 0276 General Instrument 0014 GNI 1466 1468 Hitachi 0014 Jerrold 0014 Jiuzhou 1445 LG 0779 Pacific 1410 Philips 0290 TopTV 1465 Topway 1991 Toshiba 0000 Trans PX 0276 Visionetics 1374 Zenith 0000 Pioneer 0023 Samsung 0000 0702 Skyworth 1464 Starcom 0014 StarHub 1927 Taepyung 1410 TCL 1445 Cable PVR Combination Astro 0316 Receiver Aiko 2027 Aiwa 0121 0189 1405 Anam 0112 0609...

Page 65: ...4 2250 Skyworth 0898 1258 Funai 0675 Hitachi 0664 1664 Hiteker 0672 JVC 0623 1164 1241 1597 2365 jWin 1049 1051 Konka 0711 0719 0720 0721 LG 0741 1544 Malata 2155 Mastar 1217 Microsoft 1708 2083 Sony 0533 1033 1070 1516 1633 1824 Sylvania 0675 TCL 1180 1182 1186 1189 1225 Toshiba 0503 1510 1769 Victor 1241 1597 Xbox 0522 1708 2083 Xoceco 1231 Yamaha 0490 Blu Ray DVD Denon 2258 JVC 2365 LG 0741 Pio...

Page 66: ...TKH CR BL If you have any problems setting up your new TV please call the Helpline on 1890 582500 If you have any problems setting up your new TV please call the Helpline on 0870 330 5000 For users in the UK For users in the Republic of Ireland ...

Reviews: