background image

29

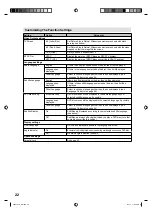
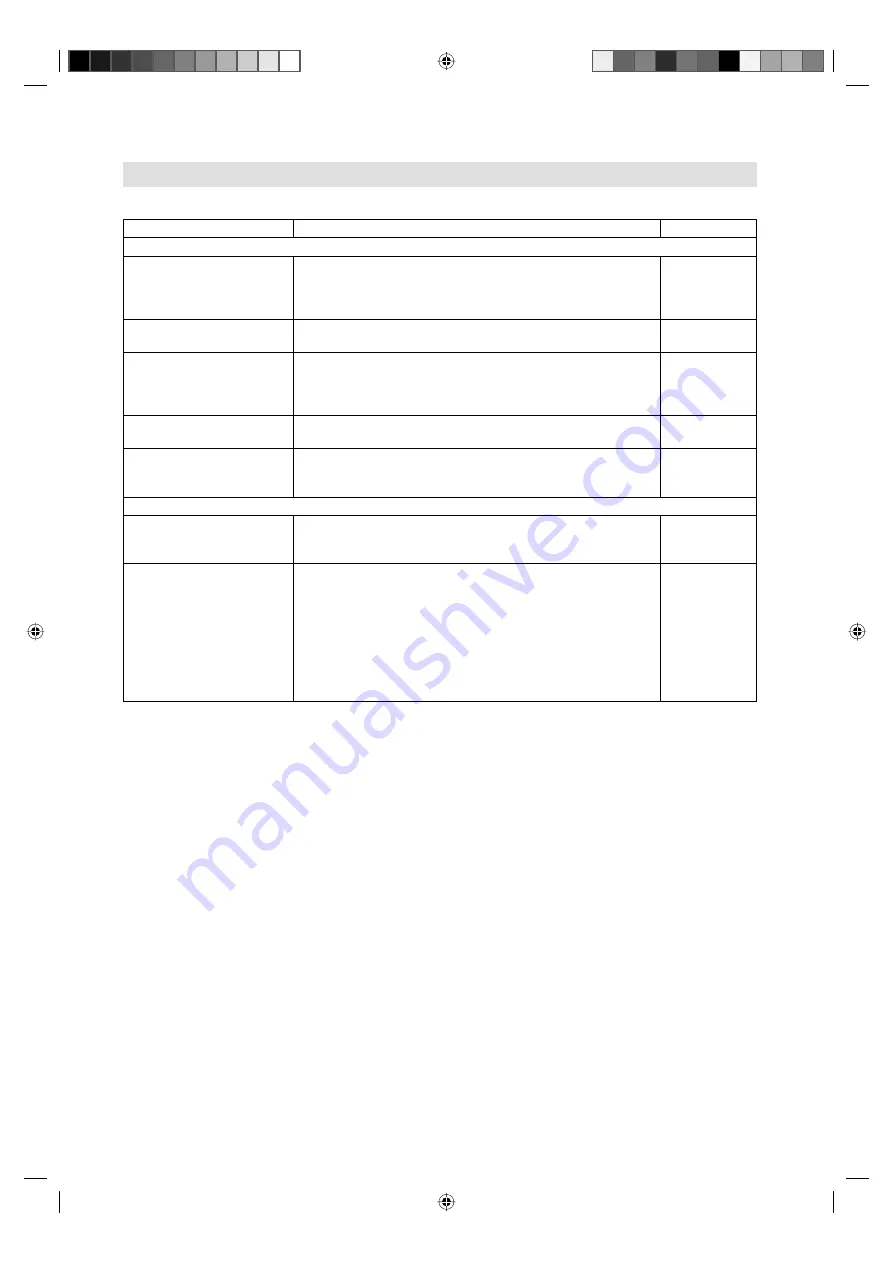
Troubleshooting table

Please check the following list before requesting service.

Symptom

Possible solution

Page

TV

No picture, no sound

Switch on the set.

Check that the mains power outlet is properly connected.

Select appropriate input mode.

Unplug unit for 1 minute, then plug it back in.

5

9

No reception with built-in 

tuner.

Connect the antenna.

Try another antenna.

8

8

The TV switches off with 

missing antenna or external 

input signal

This is normal.

15 minutes after the antenna or external input signal has 

disappeared, the set will change to standby mode. (in PC 

input mode: after 2 minutes)

11

Channel option cannot be 

selected.

The unit is set to AV mode. Press 

1

 on the remote control.

9

Wrong Colours

Colour and Brightness errors can occur when the viewing 

angle/ambient air temperature (see technical specifications) 

are exceeded.

DVD

The playback picture has 

occasional distortion.

The disc is dirty. Eject the disc and clean it.

Some times a small amount of picture distortion may appear. 

This is not a malfunction.

15

The unit does not start 

playback or disc ejects 

automatically.

No disc is inserted. Insert a disc.

An unplayable disc is inserted. Insert a playable disc (Check 

the disc type and colour system).

Place the disc in the disc slot with the label side facing 

forward.

The disc is dirty. Clean the disc.

The disc is scratched or warped.

Cancel the parental lock function or change the parental lock 

level.

17

15

17

15

15

23

The LCD panel is a very high technology product, giving you fine picture details. Occasionally, a few nonactive pixels 

may appear on the screen as a fixed point of blue, green or red. Please note that this does not affect the performance 

of your product.

56V0101A_EN.indd   29

56V0101A_EN.indd   29

2/1/11   11:04:04 AM

2/1/11   11:04:04 AM

Summary of Contents for LT-32D1

Page 1: ...INSTRUCTIONS LT 32D1 LCD TV DVD Combo 56V0101A_EN indd 1 56V0101A_EN indd 1 2 1 11 11 46 48 AM 2 1 11 11 46 48 AM ...

Page 2: ...nt the TV from falling easily If the TV is damaged or behaving strangely stop using it at once Unplug the power cord and contact your retailer Never place anything on the TV Placing liquid naked flames cloths paper etc on the TV may cause a fire Never expose to rain or moisture To prevent fire or electric shock never allow liquids to enter the unit Never insert objects into the cabinet openings It...

Page 3: ...ting children about the dangers of climbing on furniture to reach the television or its controls Keep away from rodents Rodents and also cockatiels enjoy biting into electric flexes The animal can cause a short cut fire hazard and receive a fatal electric shock Headphone Warning Loud music can damage your hearing irreversibly therefore do not set the volume to a high level when listening through h...

Page 4: ...t in the TV falling over 1 Place the TV on its front onto a table 2 Align the stand s bottom plate supplied as seen here It will fit in only one direction 3 Hold the unit and attach the stand slowly Finally secure the bottom plate with 2 screws included M6x35mm Dismantling the base For wall mounting the base must be dismantled To do this remove 2 screws J see page 8 from the back Take off the base...

Page 5: ... menu screen 9 INPUT ENTER button Select input mode Press INPUT ENTER Then press to select input source In Menu Using as ENTER button 10 Power button Preparation Connect AC Cord to AC110 240V 50 60Hz a If standby LED is red you may power off To power off press power button 1x and release For confirmation standby LED will change to dark Power on by remote control is not available b If standby LED i...

Page 6: ... Teletext page up or down 11 Cursor buttons Memorize Channel List 11 Still picture 11 Teletext ON Text mix OFF 11 Display the subtitle 18 Select between the available broadcast audio Change sound track language of DVD 12 18 Select menu of a DVD disc 19 q Select title of a DVD disc 19 w Cancel the Program Step 18 20 e Call Play Mode screen 20 r Hold the text page Reverse slow motion 11 18 t Reveal ...

Page 7: ... like 1 Open the battery compartment 2 Install the batteries as shown below ensuring the correct polarity 3 Close the battery compartment The remote control handset will not work properly in the following cases a If bright sunlight directly beams onto the unit front b If an obstacle is placed between the unit and the handset Z Z Z Z Z Z c If the batteries have not been installed according to their...

Page 8: ...put See P 25 26 H HDMI1 DVI HDMI2 input See P 26 I FOR SERVICE PERSONNEL USE ONLY Do NOT insert ANY USB device into this port Use of this port by other than Service Personnel may void this products warranty J To hang the television on a wall remove these screws and then remove a stand Before performing work spread cushioning over the base area to lay the TV on K Power supply Connect the supplied p...

Page 9: ...U SWITCH THE SET ON HOWEVER YOU CAN RESTART THIS PROCESS VIA THE MENU SYSTEM see page 10 If you could not set up a correct language in this auto setup process you will be able to make your preferred language selection as illustrated in page 10 On screen Language Selection Quick guide for Menu operation Call Menu and for example Select Auto Search 1 Press INPUT SELECT Select TV then press ENTER Pre...

Page 10: ...sary to change the Color system or Sound system 4 Press to start auto search Channels found Frequency 89 50 MHz 5 2 Channel Auto Search Picture Sound PC Setup Feature Channel 5 Press then press or to perform intermittent search from current selected channel s frequency position Finally press ENTER on Save Frequency Save 48 75 MHz Channel Manual Search Picture Sound PC Setup Feature Channel 6 Press...

Page 11: ...r half of the screen is enlarged Each time you press you switch between the display of the upper or lower half of the screen or the full picture Answering Quiz Questions Some pages contain quiz questions with concealed answers Press in order to show the answers Basic Operation Channel selection With the Numbered buttons 0 9 Example No 2 Press 2 No 29 Press 2 and within 2 seconds press 9 No 929 Pre...

Page 12: ...rd you need to enter the same password again for confirmation 3 Press RETURN several times to return to the normal screen While toggling between channels if a channel which you have set the Lock to On is selected the channel will be locked The password entering screen will appear Then enter the password to view that channel Picture Format Picture Size The required picture format can be set by pres...

Page 13: ... film in letterbox format or a noisy analogue cable TV signal This feature can slightly reduce interferences caused by the faulty input signal This option is not available in 1080i p and PC mode Off Low Middle High Reset Select Reset to reset Picture options to the factory preset values Sound Sound Mode You can change the sound mode setting If you select Favorite you can change the setting of Bass...

Page 14: ...standby after a defined period of time To cancel the Sleep Timer set to Off Off 15 30 45 60 Min Auto Power Off When the Set and Remote key operation are not operated with specified period by this setting 1 2 4 Hr the power status is changed to stand by mode automatically Off 1 2 4 Hr Power On LED To cancel the lighting of indicator P 5 2 during operation set to Off On Off HDMI Mode See page 26 Res...

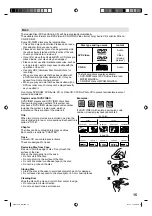
Page 15: ...e system s region code which is indicated on the rear panel of the main unit Title When two or more movies are recorded on a disc the disc is divided into two or more sections Each section is called a TITLE Chapter The titles can be subdivided into many sections Each section is called a CHAPTER Track An Audio CD can contain several items These are assigned to tracks Removing Disc from Case Be sure...

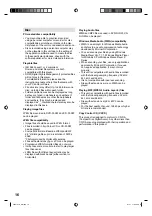
Page 16: ... of 3072 x 2048 File format used by digital still cameras Files with extensions jpg or JPG can be played Progressive JPEG formatted files do not work It may take some more time to start to play larger files than usual JPEG files with different aspect ratio may be displayed with black bands either vertical or horizontal Playing Audio files WMA and MP3 files recoded in DVD R RW CD R RW can be played...

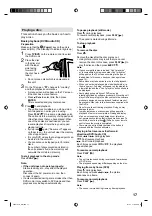
Page 17: ...d scan of DVD discs The playback speed may differ depending on the disc Playing frame by frame DVD Press during playback Each time you press or the picture advances one frame To resume normal playback Press PLAY Note The sound is muted during frame by frame playback Playing a disc This section shows you the basics on how to play a disc Basic playback DVD Audio CD Preparation Make sure that the Pow...

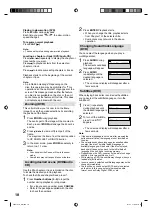
Page 18: ... press CANCEL Refer to the package supplied with the disc to check the numbers 2 Press ENTER Playback starts When you change the title playback starts from Chapter 1 of the selected title Some discs may not work in the above operation Changing Soundtrack Language DVD You can select the language when you play a multilingual disc 1 Press AUDIO during playback The current soundtrack language will app...

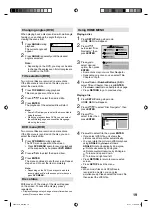
Page 19: ...s DVD MENU Disc status With press of the status of the disc will appear on the screen To cancel the display press repeatedly Display messages may change at every time when you press for some discs or files Using HOME MENU Playing a disc 1 Press SETUP during stop mode HOME MENU will appear 2 Press to select Disc Navigator then press ENTER Audio Settings Video Adjust Disc Navigator Play Mode Initial...

Page 20: ...Program then press or ENTER 3 Press to select Create Edit then press ENTER Create Edit display differs depending on discs or files Program Step 01 01 02 03 04 05 06 07 08 Title 1 38 Title 01 Title 02 Title 03 Title 04 Title 05 Title 06 Title 07 Title 08 Chapter 1 004 Chapter 001 Chapter 002 Chapter 003 Chapter 004 Program Current Title 02 Chapter 001 4 Press to select Title Chapter or Track then p...

Page 21: ... ENTER Audio Settings Video Adjust Disc Navigator Play Mode Initial Settings HOME MENU DVD 3 Press to setting the option then press ENTER Sharpness Brightness Contrast Gamma Hue Chroma Level Fine Standard Soft Video Adjust 4 Press SETUP to save the setting Sharpness Adjust sharpness of images Brightness Adjust brightness of images Contrast Adjust a ratio of brightness between the brightest part an...

Page 22: ...If there is the subtitle language selected on the disc then it will be displayed Other Language Select to choose a language other than the ones displayed see Language Code List on page 24 DVD Menu Lang w Subtitle Lang DVD disc menus will be displayed in the same language as your selected subtitle language if possible Languages as displayed DVD disc menus will be displayed in the selected language ...

Page 23: ... buttons 0 9 to input the current password then press ENTER Video Output Language Display Options 1 2 3 4 5 6 7 8 Off Initial Settings Parental Lock Level Change Password 3 Press or to select from the level 1 to level 8 The limitation will be more severe as the level number is lower Then press ENTER Video Output Language Display Options 1 2 3 4 6 7 8 Off Initial Settings Parental Lock Level Change...

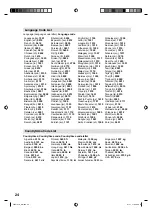
Page 24: ... Maltese mt 1320 Burmese my 1325 Nauru na 1401 Nepali ne 1405 Norwegian no 1415 Occitan oc 1503 Oromo om 1513 Oriya or 1518 Panjabi pa 1601 Polish pl 1612 Pashto Pushto ps 1619 Quechua qu 1721 Rhaeto Romance rm 1813 Kirundi rn 1814 Romanian ro 1815 Kinyarwanda rw 1823 Sanskrit sa 1901 Sindhi sd 1904 Sangho sg 1907 Serbo Croatian sh 1908 Sinhalese si 1909 Slovak sk 1911 Slovenian sl 1912 Samoan sm ...

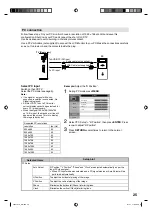
Page 25: ...ed No Signal is displayed As this LCD TV is not a PC monitor correct display cannot be guaranteed for every PC graphics card When the signal 1280x768 1360x768 on 16 9 is input the black bar or line will appear on the screen This is to display the image to dot by dot Example Adjust the H Position 1 During PC mode press MENU Auto Adjust H Position V Position Phase Clock 0 0 0 0 PC Setup Picture Soun...

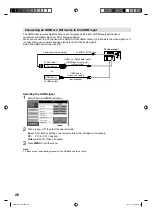
Page 26: ...o Auto Language Lock Blue Back OSD Timer Sleep Timer Auto Power Off Power On LED HDMI Mode Feature Picture Sound PC Setup Feature Channel 2 Then press or to select the desired mode Auto Auto factory setting can remain in this mode Change not necessary PC PC for PC if desired Video Video for Video if desired 3 Press MENU to exit the menu Note Please notice the operating manual for the HDMI device t...

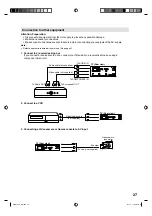
Page 27: ...ceiver set top box If you connect a receiver set top box connect your Television to a receiver set top box using a component video cord Y Pb Pr 2 Connect to a VCR 3 Connecting a Video camera or Games console to AV input AV cable not supplied AV output Video camera example TV Rear view TV Rear view To Component OUT To Audio OUT Video cable not supplied Audio cable not supplied To COMPONENT IN TV Re...

Page 28: ...als PAL 576i 1080i or NTSC 480i 1080i and progressive signals PAL 576p 720p or NTSC 480p 720p DVD player 5 Connecting an audio system You can supply the TV sound to the stereo equipment with the Audio output jacks Use a Audio cable RCA Phono for the connection which sold at the accessory shop please consult your hi fi instructions for details Note The Bass Treble Balance adjustments see P 13 only ...

Page 29: ... temperature see technical specifications are exceeded DVD The playback picture has occasional distortion The disc is dirty Eject the disc and clean it Some times a small amount of picture distortion may appear This is not a malfunction 15 The unit does not start playback or disc ejects automatically No disc is inserted Insert a disc An unplayable disc is inserted Insert a playable disc Check the ...

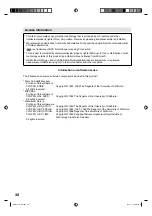
Page 30: ...countries License information Information on software license The following open source software component is included in this product Posix Compatibility Layer Portions of this software is CYGPKG_POSIX Copyright 1990 1999 The Regents of the University of California All rights reserved MIPS HAL Portions of this software is CYGPKG_HAL_MIPS Copyright 1992 The Regents of the University of California ...

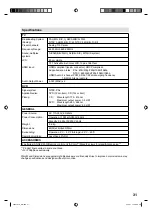
Page 31: ...icable disc DVD 12cm 8cm CD 12cm 8cm Pickup CD Wavelength 775 815 nm Maximum output power 0 5 mW DVD Wavelength 650 666 nm Maximum output power 2 0 mW GENERAL Power Source AC 110 240V 50 60Hz Power Consumption Operation 110W at AC230V 50Hz Standby 0 5W at AC230V 50Hz Weight 9 6 kg Dimensions 80 W x59 H x22 D cm Surrounding Operation 5 C 40 C Storage 20 C 60 C Operating Humidity Less than 80 RH ACC...

Page 32: ...J56V0101A SH 11 03 N 2011 Victor Company of Japan Limited 0211TMH OR OR 56V0101A_EN indd 32 56V0101A_EN indd 32 2 1 11 11 04 04 AM 2 1 11 11 04 04 AM ...

Reviews: