background image

USB

76

Seuls les noms de fichier et de dossier sont 
affichés s'il n'y a pas d'information de balise.

3


[

Touches d'opération

• 

1

]

 : Fait une recherche de piste/fichier. 

Pour plus de détails sur les recherches, voir 

Recherche (P.77)

.

• 

E

]


[

F

]

 : Recherche la piste/fichier 

précédent/suivant.
Touchez et maintenez enfoncé pour effectuer 
une avance ou un retour rapide.

• 

[

D

]

H

  : Lit ou met en pause.

• 

 : Touchez pour diminuer/restaurer le son.

4

 Panneau de fonction

Appuyez sur le côté gauche de l'écran pour 
afficher le panneau de fonction. Appuyez de 
nouveau pour fermer le panneau.

• 

[

]


[

]

 : Recherche le dossier précédent/

suivant.

• Aspect

: Sélectionnez le mode d'écran.

Full

: Modifie le rapport d'aspect de la vidéo et 

affiche en plein écran.

Normal

: Affichage avec le rapport 4:3.

Auto

: Affiche les vidéos en plein écran 

verticalement ou horizontalement sans 
modification de rapport. 

5

 Liste des contenus

Touchez le côté droit de l'écran pour afficher 
la Liste de contenu. Touchez de nouveau pour 
fermer la liste.
Affiche la liste de lecture. Lorsque vous appuyez 
sur un nom de fichier/piste dans la liste, la 
lecture démarre.

6

 Éléments indicateurs

• 

VIDEO

 : Identifie le fichier vidéo.

• 

MUSIC

: Identifie le fichier musical.

7

 Illustration/Indicateur du mode de 

lecture/du temps de lecture

La pochette du fichier en cours de lecture 
s'affiche.

• 

D

B

, etc.: Indicateur du mode de lecture 

en cours
Chaque pictogramme a la signification 
suivante :  

D

 (jouer), 

B

 (avance rapide), 

A

 (retour 

rapide), 

H

 (pause).

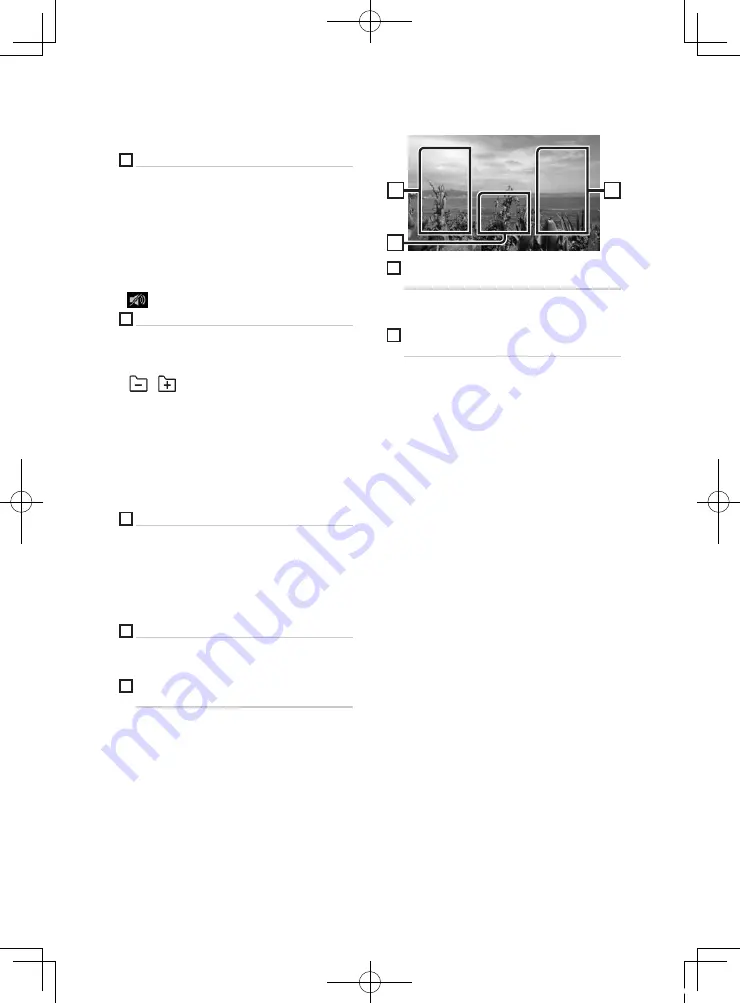
Écran vidéo

9

8

8

8

 Zone de recherche des fichiers (fichier 

vidéo uniquement)

Touchez pour faire une recherche du fichier 
suivant/précédent.

9

 Zone d'affichage des touches (fichier 

vidéo uniquement)

Touchez pour afficher l'écran de contrôle.

!B5A-2246-20_JVC_EnFr_2nd.indb   76

2019/06/14   14:05

Summary of Contents for KW-M741BT

Page 1: ...N MANUAL ÉCRAN AVEC RÉCEPTEUR MODE D EMPLOI Updated information the latest Instruction Manual etc is available from http www jvc net cs car Des informations actualisées le dernier mode d emploi etc sont disponibles sur le site http www jvc net cs car B5A 2246 20_JVC_EnFr_2nd indb 1 2019 06 14 14 04 ...

Page 2: ...iPod iPhone Basic Operation 16 Search Operation 17 USB 18 Connecting a USB device 18 USB Basic Operation 18 Search Operation 20 Tuner 21 Tuner Basic Operation 21 Memory Operation 22 Selecting Operation 22 Traffic Information FM only 23 Tuner Setup 23 DAB 24 DAB Basic Operation 24 Storing Service in Preset Memory 25 Selecting Operation 25 Traffic Information 26 DAB Setup 27 Bluetooth Control 28 Inf...

Page 3: ...43 Equalizer Control 44 Volume Offset 45 Sound Effect 45 Listening Position DTA 46 Remote control 47 Functions of the Remote control Buttons 47 Connection Installation 48 Before Installation 48 Installing the unit 49 Troubleshooting 53 Problems and Solutions 53 Error Messages 53 Appendix 54 Playable Media and Files 54 Specifications 55 About this Unit 57 l B5A 2246 20_JVC_EnFr_2nd indb 3 2019 06 1...

Page 4: ...ith a cloth moistened with neutral cleaner then wipe it again with a clean soft dry cloth NOTE Applying spray cleaner directly to the unit may affect its mechanical parts Wiping the faceplate with a hard cloth or using a volatile liquid such as thinner or alcohol may scratch the surface or erase screened print Ñ Ñ How To Reset Your Unit If the unit or the connected unit fails to operate properly r...

Page 5: ...ff turns the power on 4 FNC Displays the popup menu screen Pressing for 1 second displays the Voice Recognition screen P 33 5 Displays the APP CarPlay Android Auto screen Pressing for 1sec turns the display off 6 Reset If the unit or the connected unit fails to operate properly the unit returns to initial settings when this button is pressed Turning on the Unit The method of turning on is differen...

Page 6: ...up P 39 Clock Adjusts clock For detailed operation see Calendar clock settings P 7 Display Set the image on the screen 1 Touch Display 2 Touch Background 3 Select the image 4 Touch For detailed operation see Display Setup Camera Set the parameters for the camera 1 Touch Camera 2 Set each item and touch For detailed operation see Camera Setup P 36 DEMO Set the demonstration mode Default is ON 1 Tou...

Page 7: ...volume continuously to level 15 Touch screen operations To perform operations on the screen you need to touch touch and hold flick or swipe to select an item display setting menu screen or to change the page etc Touch Touch the screen gently to select an item on the screen Touch and hold Touch the screen and keep your finger in place until the display changes or a message is displayed Flick Slide ...

Page 8: ...rol screen of current source 3 Widget You can change the widget by touching Touch the widget to display the detailed screen 4 Displays the SETUP Menu screen P 38 5 Displays the source selection screen P 9 6 Displays the Hands Free screen P 32 When connecting as Apple CarPlay or Android Auto it works as a phone provided in Apple CarPlay or Android Auto Display the HOME 1 Press the button h h HOME s...

Page 9: ...connect Android device compatible with Android Auto and to set Mode to Android Auto P 15 2 When iPhone compatible with CarPlay is connected Apple CarPlay is displayed 3 To select the Mirroring source it is necessary to connect Android device with Mirroring OA for JVC application installed and to set Mode to Mirroring for Android P 15 To select the playback source on the HOME screen The 3 items dis...

Page 10: ... of the source icons as you like 1 Touch on the HOME screen 2 Touch and hold the icon which you want to move to go into the customizing mode 3 Drag it where you want to move Source control screen descriptions There are some functions which can be operated from most screens Indicators 1 2 3 4 Short cut buttons B5A 2246 20_JVC_EnFr_2nd indb 10 2019 06 14 14 05 ...

Page 11: ...Short cut buttons on HOME screen P 10 4 Û Touch to display the Hands Free screen P 32 When connecting as Apple CarPlay or Android Auto it works as a phone provided in Apple CarPlay or Android Auto Popup menu 1 Press the FNC button h h Popup menu appears 2 Touch to display the popup menu 1 2 3 The contents of the menu are as follows Displays the Screen Adjustment screen P 38 Turns the display off P...

Page 12: ...sic movie file list 3 Text scroll Scrolls the displayed text 4 etc Keys with various functions are displayed here Plays all tracks in the folder containing the current track Moves to the upper hierarchy 5 Page scroll You can change the page to display more items by pressing Displays the top or bottom page 6 Return Returns to previous screen NOTE Buttons which cannot be activated from the list scre...

Page 13: ... terminal P 52 When iPhone compatible with CarPlay is connected to the USB terminal the Bluetooth smartphone currently connected is disconnected 2 Unlock your iPhone Ñ Ñ Operation buttons and available Apps on the home screen of CarPlay You can use the Apps of the connected iPhone The items displayed and the language used on the screen differ among the connected devices To enter CarPlay mode touch...

Page 14: ...atible with Android Auto is connected to the USB terminal the device is connected via Bluetooth automatically and the Bluetooth smartphone currently connected is disconnected 2 Unlock your Android device NOTE To use the Android Auto It is necessary to set Mode to Android Auto P 15 Ñ Ñ Operation buttons and available Apps on the Android Auto screen You can perform the operations of the Apps of the ...

Page 15: ...een appears 3 Touch Device 4 Touch Mode 5 Touch Mirroring for Android Ñ Ñ Compatible Android smartphone Android version 7 0 or later Bluetooth support NOTE This unit may not work for some Android smartphone s Ñ Ñ Connecting an Android device 1 Connect an Android device via the USB terminal 2 Launch Mirroring App on your Android Smartphone Touch OK to start Mirroring App Touch Start now to start ca...

Page 16: ...s can be connected to this unit Made for iPhone 7 Plus iPhone 7 iPhone SE iPhone 6s Plus iPhone 6s iPhone 6 Plus iPhone 6 iPhone 5s iPhone 5c iPhone 5 iPod touch 6th generation iPod touch 5th generation NOTE By connecting your iPod iPhone to this unit with an optional accessory iPod connection cable KS U62 you can supply power to your iPod iPhone as well as charge it while playing music However th...

Page 17: ...Operation P 17 E F Searches the previous next track file Touch and hold to fast forward or fast backward DH Plays or pauses Touch to attenuates restores the sound 4 Content list Touch on the right side of the screen to display the Content list Touch again to close the list Displays the playing list When you touch a track file name on the list playback will start 5 Indicator Items MUSIC Identifies ...

Page 18: ...nit The files can be erased depending on the operating conditions of the USB device We shall have no compensation for any damage arising from any erased data USB Basic Operation Most functions can be controlled from the source control screen and playback screen Control screen 4 3 5 2 6 1 7 Open the drawer 5 4 1 Repeats the current track folder Each time you touch the key repeat mode switches in th...

Page 19: ...vertical or horizontal with no ratio change 5 Content list Touch on the right side of the screen to display the Content list Touch again to close the list Displays the playing list When you touch a track file name on the list playback will start 6 Indicator Items VIDEO Identifies the video file MUSIC Identifies the music file 7 Artwork Play mode indicator Playing time The jacket of the currently p...

Page 20: ... item in the list Repeat this step until you find the desired file Ñ Ñ Link search You can search a file of same artist album genre as the current track 1 Touch Link Search 2 Touch the desired tag type You can select from artist album and genre h h The list corresponding to your selection appears 3 Touch desired item from the content list Ñ Ñ Folder search You can search a file according to hierar...

Page 21: ... display the Preset list Touch again to close the list Recalls the memorized station When touched for 2 seconds stores the current receiving station in memory 5 Function panel Touch on the left side of the screen to display the function panel Touch again to close the panel TI FM only Sets the traffic information mode on For details see Traffic Information P 23 SETUP Displays the TUNER SETUP screen...

Page 22: ...sh to store in memory 2 Touch FM 1 24 or AM 1 12 in which you want to store the station for 2 seconds until a beep sounds Selecting Operation Ñ Ñ Preset select You can list and select memorized station 1 Touch on the right side of the screen Select a station from the list Ñ Ñ Search by program type FM only You can tune to a station with a specific program type when listening to FM 1 Touch on the l...

Page 23: ...bulletin starts The Traffic Information screen appears automatically Tuner Setup You can set tuner related parameters 1 Touch on the left side of the screen Touch SETUP h h Tuner SETUP screen appears 2 Set each item as follows AF When station reception is poor automatically switches to the station that is broadcasting the same program over the same Radio Data System network Default is ON RDS CT Sy...

Page 24: ...d if available from current content Touch to switch between the Control and Information screen P Preset number CH Channel display 5 Operation keys 1 Displays the Service List screen For details on search operation see Service search P 26 E F Tunes in a ensemble service and component The seek mode switching can be changed see 3 in table Touch to attenuates restores the sound 6 Preset list Touch on ...

Page 25: ...you wish to store in memory 2 Touch on the right side of the screen 3 Touch P 1 10 in which you want to store the station for 2 seconds until a beep sounds Selecting Operation Ñ Ñ Search by program type You can tune to a station with a specific program type when listening to Digital Radio 1 Touch on the left side of the screen Touch PTY h h PTY Search screen appears 2 Select a program type from th...

Page 26: ...ou entered alphabet search Traffic Information You can listen and watch the traffic information automatically when a traffic bulletin starts However this feature requires a Digital Radio that includes the TI information 1 Touch on the left side of the screen Touch TI h h Traffic information mode is set Ñ Ñ When the traffic bulletin starts The Traffic Information screen appears automatically B5A 22...

Page 27: ...rvice When you select ON the unit switches to a related service if exists when a DAB service network is not available Default is OFF Antenna Power Sets power supply to the Digital Radio antenna Set to ON when the Digital Radio antenna in use is equipped with a booster Default is ON Ñ Ñ Announcement setup When the service for which ON is selected starts switches from any source to Announcement to r...

Page 28: ...f the device This unit may not work for some Bluetooth devices Connecting conditions may vary depending on your environment For some Bluetooth devices the device is disconnected when the unit is turned off Ñ Ñ About the cell phone and Bluetooth audio player This unit conforms to the following Bluetooth specifications Version Bluetooth Ver 4 1 Profile Cell phone HFP Hands Free Profile SPP Serial Po...

Page 29: ...operation for authentication on this unit or iOS smartphone registers the smartphone as a Bluetooth device 1 Turn on the Bluetooth function on your smartphone cell phone 2 Search the unit KW M from your smartphone cell phone 3 Operate your smartphone cell phone according to the displayed messages Confirm the request on the smartphone cell phone If a PIN code is required enter the PIN code 0000 Whe...

Page 30: ... 4 5 2 1 1 Device name Connected device name Repeats the current track folder Each time you touch the key repeat mode switches in the following sequence File repeat Folder repeat All songs repeat Repeat off Randomly plays all tracks in current folder Each time you touch the key random mode switches in the following sequence All random Random off Operations and display indications may differ accord...

Page 31: ...keys do not appear operate from the player Depending on your cell phone or audio player audio may be heard and controlled but text information may not appear If the volume is too low raise it on your cell phone or audio player Ñ Ñ Connect the Bluetooth audio Selects the device to connect via Bluetooth audio A2DP or APP SPP 1 Touch on the left side of the screen Touch BT DEVICE CHANGE 2 Touch the d...

Page 32: ...is connected Phone book up to 1000 entries Up to 20 entries including dialed calls received calls and missed calls 2 Select a dialing method Call using call records Call using the phonebook Call using the preset number Call by entering a phone number Voice Recognition P 33 Bluetooth SETUP 1 Touch Bluetooth SETUP screen appears NOTE The status icons such as battery and antenna displayed may differ ...

Page 33: ...ebook Now will start downloading the Phonebook Ñ Ñ Voice Recognition You can access the voice recognition function of the cell phone connected to this unit You can search the cell phone phonebook by voice The functionality depends on the cell phone 1 Press the FNC button for 1 second h h Voice Recognition screen appears 2 Start speaking NOTE You can use voice recognition function by touching on th...

Page 34: ...ume Press the or button Output the dial tone Touch DTMF to display the tone input screen You can send tones by touching desired keys on the screen Switching the speaking voice output Touching each time switches the speaking voice output between cell phone and speaker Call waiting When you receive a call while talking on another call you can answer the newly received call by touching The current ca...

Page 35: ...e number directly and touch SET See Call by entering a phone number P 32 Delete To delete a preset number touch Delete and then touch OK on the confirmation screen Ñ Ñ Phonebook transfer You can transfer the phonebook in your Bluetooth smartphone via PBAP 1 Touch 2 Touch h h The phonebook data transmission starts NOTE If the Phonebook contains more than 1000 entries Phonebook data cannot be transf...

Page 36: ...s 3 Adjust each item as follows 1 1 Camera off Touch to exit the camera screen Ñ Ñ Camera Setup 1 Press the FNC button h h Popup menu appears 2 Touch SETUP h h SETUP Menu screen appears 3 Touch Camera h h Camera screen appears 4 Set each item as follows Parking Guidelines You can display parking guidelines to enable easier parking when you shift the gear to the reverse R position Default is ON Gui...

Page 37: ...th the rear view camera When adjusting the parking guidelines make sure to use the parking brake to prevent the car from moving 1 Touch ON of Parking Guidelines in the Camera screen P 36 2 Touch Guidelines SETUP in the Camera screen 3 Adjust the parking guidelines by selecting the mark 4 Adjusting the position of the selected mark A B C D Make sure that A and B are horizontally parallel and that C...

Page 38: ...ch item NOTE Adjusting items are different depending on the current source System Setup NOTE Each operation in this section can be started from the multi function menu 1 Press the FNC button h h Popup menu appears 2 Touch SETUP See the following section for each setting Set up AV P 41 Set up display P 40 Set up the user interface P 39 Set up camera P 36 Set up special P 39 Set up Bluetooth P 29 Se...

Page 39: ...nd time manually P 7 Special Setup You can setup Special parameters 1 Press the FNC button h h Popup menu appears 2 Touch SETUP h h SETUP screen appears 3 Touch Special h h Special screen appears 4 Set each item as follows DEMO Set the demonstration mode Default is ON Software Information Check the software version of this unit P 39 Open Source Licenses Displays the open source licenses Initialize...

Page 40: ...uttons do not dim ON The display and buttons dim SYNC Default Turns the dimmer function on or off when the vehicle light control switch is turned on or off Screen Adjust Displays the Screen Adjustment screen P 38 Background Changing background image P 40 Ñ Ñ Change background image 1 Touch Background in the Display screen 2 Select an image 1 1 Select an original image in advance B5A 2246 20_JVC_En...

Page 41: ...h h Popup menu appears 2 Touch SETUP h h SETUP screen appears 3 Touch AV h h AV screen appears 4 Set each item as follows AV OUT Specify whether to output the current source signal from the AV OUTPUT terminal ON OFF Default NOTE Images can be output only from the AV IN and USB video file source If display of the rear view camera image is selected when the AV IN source is being played no image is o...

Page 42: ... the button 2 Touch 3 Touch Audio h h Audio screen appears 4 Touch Speaker Xʼover 5 Select a car type You can setup the car type and speaker network etc If your car type is selected the Delay Time Alignment is set automatically for timing adjustment of sound output for each channel to have the highest surround effects 6 Touch the speaker 1 you wish to adjust and set each item 2 as follows 1 2 Spea...

Page 43: ...djusts the front speaker rear speaker or subwoofer level TW Tweeter Gain 2 Adjusts the tweeter level When front is selected on Speaker Select screen Phase Inversion 3 Sets the phase of subwoofer output Check Phase Inversion to shift the phase 180 degrees When subwoofer is selected on Speaker Select screen 1 Only when LPF FREQ HPF FREQ is set to a mode other than Through in Xʼover 2 Only when Tweet...

Page 44: ...adjusted equalizer curve from User1 to User4 Initialize The current EQ curve returns to flat ALL SRC Apply the adjusted equalizer to all sources Touch ALL SRC and then touch OK on the confirmation screen Bass EXT Bass Extend Settings When turned on the frequency lower than 62 5 Hz is set to the same gain level as 62 5 Hz SW Level Adjusts the subwoofer volume This setting is not available when subw...

Page 45: ...settings If you have increased the volume first then reduced the volume using the Volume Offset the sound generated if you suddenly switch to another source may be extremely loud Sound Effect You can set sound effects 1 Press the button 2 Touch 3 Touch Audio h h Audio screen appears 4 Touch Sound Effect 5 Set each item as follows Bass Boost Sets the amount of bass boost among OFF 1 2 3 Loudness Se...

Page 46: ... Select listening position from Front R Right front Front L Left front Front All All front and All Position DTA control You can fine adjust your listening position 1 Touch Adjust 2 Touch Delay 3 Touch T or U to adjust the delay time of the selected speaker 4 Touch Level 5 Touch T or U to adjust the sound level of the selected speaker NOTE To return to the initial setting of Delay and Level touch I...

Page 47: ...ANGLE Not used When a call comes in answers the call Key Name Function DIRECT Switches to the direct search mode For details on the direct search mode see Direct search mode P 47 ASPECT Changes the aspect ratio Numeric Keypad Specifies the number to search in direct search For details on the direct search mode see Direct search mode P 47 CLR Deletes a character while in direct search mode ENT Perf...

Page 48: ...ecked If your car s ignition does not have an ACC position connect the ignition wires to a power source that can be turned on and off with the ignition key If you connect the ignition wire to a power source with a constant voltage supply such as with battery wires the battery may be drained If the console has a lid make sure to install the unit so that the front panel will not hit the lid when clo...

Page 49: ...al Settings P 6 Installing the unit Bend the tabs of the mounting sleeve with a screwdriver or similar utensil and attach it in place Ñ Ñ Trim plate 1 Attach accessory 3 to the unit 3 Ñ Ñ Microphone unit 1 Check the installation position of the microphone accessory 1 2 Clean the installation surface 3 Remove the separator of the microphone accessory 1 and stick the microphone to the place shown be...

Page 50: ...1 in Removing the trim plate 2 Insert the extraction key accessory 2 deeply into the slot as shown The protrusion at the tip of the extraction key must face toward the unit 2 3 With the inserted extraction key secured insert the other extraction key into the slot 4 Pull out the unit halfway NOTE Be careful to avoid injury from the catch pins on the extraction key 5 Pull the unit all the way out wi...

Page 51: ... matched to your car Connect to vehicle s reverse lamp harness when using the optional rear view camera Light Blue Yellow Steering remote control wire Connect to vehicle s steering remote harness Contact your JVC dealer for details Fuse 15A Ñ Ñ Connecting wires to terminals Subwoofer Preout Cap Cap FM AM antenna Φ 6 5 mm maximum DAB antenna KW M745DBT only Connector A Connector B USB device 2 USB ...

Page 52: ...7 Red Ignition ACC A 8 Black Earth Ground Connection B 1 B 2 Purple Purple Black Rear Right B 3 B 4 Gray Gray Black Front Right B 5 B 6 White White Black Front Left B 7 B 8 Green Green Black Rear Left 1 Max 300mA 12V Speaker Impedance 4 8 Ω CAUTION Before you connect the commercially available ISO connectors to the unit check the following condition Make sure that the pin assignment of the connect...

Page 53: ...hen an audio file is being played The recording condition is bad Record the file again or use another USB memory Ñ Ñ Other The Touch Sensor Tone doesn t sound The preout jack is being used The Touch Sensor Tone cannot be output from the preout jack Error Messages When you fail to operate the unit correctly the cause of the failure appears as the message on the screen No Device USB device The USB d...

Page 54: ...ble depending on the types or conditions of media or device Acceptable Video files Profile Max Picture size Max bit rate Audio format MPEG 1 mpg mpeg 352 240 352 288 1 5 Mbps MPEG Audio Layer 2 MPEG 2 mpg mpeg MP ML 720 480 720 576 8 Mbps MPEG Audio Layer 2 H 264 MPEG 4 AVC mp4 m4v avi flv Baseline Profile Main Profile 1920 1080 30 fps 8 Mbps MP3 AAC MPEG 4 mp4 avi Advanced Simple Profile 1920 108...

Page 55: ...2 402 2 480 GHz Output Power 4dBm MAX 0dBm AVE Power Class2 Maximum Communication range Line of sight approx 10m 32 8 ft Audio Codec SBC AAC Profile Multi Profile support HFP Hands Free Profile SPP Serial Port Profile A2DP Advanced Audio Distribution Profile AVRCP Audio Video Remote Control Profile PBAP Phonebook Access Profile DSP section Graphics equalizer Band 13 Band Frequency BAND1 13 62 5 10...

Page 56: ...nput Level RCA jack 1 Vp p 75 Ω External Audio Max Input Level RCA jack 2 V 25 kΩ Video Output Level RCA jacks 1 Vp p 75 Ω Audio section Maximum Power Front Rear 50 W 4 Typical Power Output Front Rear Full Bandwidth Power at less than 1 THD 21 W 4 Output frequency band 20 20 000 Hz Preout Level V 4 V 10 kΩ Preout Impedance 1 3 kΩ Speaker Impedance 4 8 Ω General Operating Voltage 14 4 V 10 5 16 V a...

Page 57: ...T IS LICENSED UNDER THE VC 1 PATENT PORTFOLIO LICENSE FOR THE PERSONAL AND NON COMMERCIAL USE OF A CONSUMER TO i ENCODE VIDEO IN COMPLIANCE WITH THE VC 1 STANDARD VC 1 VIDEO AND OR ii DECODE VC 1 VIDEO THAT WAS ENCODED BY A CONSUMER ENGAGED IN A PERSONAL AND NON COMMERCIAL ACTIVITY AND OR WAS OBTAINED FROM A VIDEO PROVIDER LICENSED TO PROVIDE VC 1 VIDEO NO LICENSE IS GRANTED OR SHALL BE IMPLIED FO...

Page 58: ...PRESS OR IMPLIED WARRANTIES INCLUDING BUT NOT LIMITED TO THE IMPLIED WARRANTIES OF MERCHANTABILITY AND FITNESS FOR A PARTICULAR PURPOSE ARE DISCLAIMED IN NO EVENT SHALL THE FOUNDATION OR CONTRIBUTORS BE LIABLE FOR ANY DIRECT INDIRECT INCIDENTAL SPECIAL EXEMPLARY OR CONSEQUENTIAL DAMAGES INCLUDING BUT NOT LIMITED TO PROCUREMENT OF SUBSTITUTE GOODS OR SERVICES LOSS OF USE DATA OR PROFITS OR BUSINESS...

Page 59: ...Connecter un périphérique USB 74 Utilisation de base USB 74 Recherche 76 Tuner 77 Utilisation de base de la radio 77 Utilisation de la mémorisation 78 Utilisation de la sélection 78 Trafic routier syntoniseur FM uniquement 79 Configuration du syntoniseur 79 Radiodiffusion numérique 80 Utilisation de base de DAB 80 Mémorisation des services dans la mémoire préréglée 81 Utilisation de la sélection 8...

Page 60: ...8 Contrôle de l audio en général 99 Contrôle d égaliseur 100 Décalage du volume 101 Effet sonore 101 Position d écoute DTA 102 Télécommande 103 Fonctions des boutons de la télécommande 103 Connexion Installation 104 Avant l installation 104 Installation de l appareil 105 Dépannage 109 Problèmes et solutions 109 Messages d erreur 109 Annexes 110 Supports et fichiers pouvant être lus 110 Spécificati...

Page 61: ... avec un chiffon doux et sec propre REMARQUE La pulvérisation directe de produit de nettoyage sur l appareil risque d endommager les pièces mécaniques Si vous nettoyez la façade avec un chiffon trop rugueux ou un liquide volatil comme un solvant ou de l alcool vous risquez d en rayer la surface ou d effacer les caractères sérigraphiés Ñ Ñ Comment réinitialiser votre appareil Si l appareil ou l app...

Page 62: ...rsqu il est éteint 4 FNC Affiche l écran du menu contextuel Appuyez pendant 1 seconde pour afficher l écran de Reconnaissance Vocale P 90 5 Affiche l écran APP CarPlay Android Auto Appuyez pendant 1 seconde pour éteindre l affichage 6 Réinitialisation Si l appareil ou l appareil qui y est connecté ne fonctionne pas correctement appuyez sur ce bouton pour que l appareil retrouve les réglages initia...

Page 63: ...k Règle l horloge Pour les explications détaillées voir Réglages du calendrier horloge P 64 Display Réglez l image à l écran 1 Touchez Display 2 Touchez Background 3 Sélectionnez l image 4 Touchez Pour les explications détaillées voir Configuration de l affichage Camera Configurez les paramètres de caméra 1 Touchez Camera 2 Réglez chaque option et touchez Pour les explications détaillées voir Conf...

Page 64: ...niveau 15 Fonctionnement tactile Pour réaliser des opérations sur l écran vous devez toucher toucher longuement feuilleter ou défiler pour sélectionner un élément afficher l écran de menu de réglage changer la page etc Toucher Touchez légèrement l écran pour sélectionner un élément sur l écran Toucher longuement Touchez l écran et gardez votre doigt sur l écran jusqu à ce que l affichage change ou...

Page 65: ... de la source en cours 3 Widget élément graphique Vous pouvez changer de gadget en touchant Touchez le widget afin d afficher l écran détaillé 4 Affiche l écran de menu CONFIGURATION P 95 5 Affiche l écran de sélection de la source P 66 6 Affiche l écran Mains libres P 89 Lorsque vous vous connectez avec Apple CarPlay ou Android Auto le mode de fonctionnement est le même que sur un téléphone fourn...

Page 66: ...id Auto et de régler Mode sur Android Auto P 72 2 Quand un iPhone compatible avec CarPlay est connecté Apple CarPlay est affiché 3 Pour sélectionner la source de mise en miroir il est nécessaire de connecter un appareil Android sur lequel l application Mirroring OA for JVC a été installée et de régler Mode sur Mirroring for Android P 72 Pour sélectionner la source de lecture sur l écran ACCUEIL Le...

Page 67: ...urces comme bon vous semble 1 Touchez sur l écran d ACCUEIL 2 Touchez et maintenez le pictogramme que vous souhaitez déplacer pour passer en mode de personnalisation 3 Faites le glisser à l emplacement souhaité Descriptions de l écran de commande de source Certaines fonctions sont accessibles depuis la plupart des écrans Indicateurs 1 2 3 4 Boutons de raccourcis B5A 2246 20_JVC_EnFr_2nd indb 67 20...

Page 68: ... sur l écran ACCUEIL P 67 4 Û Touchez pour afficher l écran mains libres P 89 Lorsque vous vous connectez avec Apple CarPlay ou Android Auto le mode de fonctionnement est le même que sur un téléphone fourni dans Apple CarPlay ou Android Auto Menu contextuel 1 Appuyez sur le bouton FNC h h Le menu contextuel s affiche 2 Appuyez pour afficher le menu contextuel 1 2 3 Le menu contient les options sui...

Page 69: ...de musique ou de film 3 Défilement du texte Fait défiler le texte affiché 4 etc Les touches ayant plusieurs fonctions s affichent ici Joue toutes les pistes dans le dossier contenant la piste actuelle Remonte au niveau hiérarchique supérieur 5 Défilement de la page Vous pouvez changer de page pour afficher plus d éléments en appuyant sur Affiche la page du haut ou la page du bas 6 Retour Revient à...

Page 70: ... du KS U62 via la borne USB P 109 Lorsque l iPhone compatible avec CarPlay est connecté à la borne USB le smartphone Bluetooth actuellement connecté est déconnecté 2 Déverrouillez votre iPhone Ñ Ñ Boutons de commande et applications disponibles sur l écran d accueil de CarPlay Vous pouvez utiliser les applications de l iPhone connecté Les éléments affichés et la langue utilisée sur l écran diffère...

Page 71: ...id par Bluetooth Lorsqu un périphérique Android compatible avec Android Auto est connecté à la borne USB le périphérique est connecté automatiquement via Bluetooth et le smartphone Bluetooth actuellement connecté est déconnecté 2 Déverrouillez votre périphérique Android REMARQUE Pour utiliser Android Auto il est nécessaire de régler Mode sur Android Auto P 72 Ñ Ñ Boutons de commande et application...

Page 72: ... Device 4 Touchez Mode 5 Touchez Mirroring for Android Ñ Ñ Smartphone Android compatible Android version 7 0 ou ultérieure Support Bluetooth REMARQUE Cet appareil peut ne pas fonctionner avec certains smartphones Android Ñ Ñ Connexion d un périphérique Android 1 Connectez un périphérique Android via la borne USB 2 Lancez l application de miroitage sur votre smartphone Android Appuyez sur OK pour l...

Page 73: ...euvent être reliés à cet appareil Convient pour iPhone 7 Plus iPhone 7 iPhone SE iPhone 6s Plus iPhone 6s iPhone 6 Plus iPhone 6 iPhone 5s iPhone 5c iPhone 5 iPod touch 6e génération iPod touch 5e génération REMARQUE En branchant votre iPod iPhone sur cet appareil à l aide d un câble de connexion KS U62 d iPod en option votre iPod iPhone lit la musique tout en étant alimenté et rechargé Cependant ...

Page 74: ... voir Recherche P 74 E F Recherche la piste fichier précédent suivant Touchez et maintenez enfoncé pour effectuer une avance ou un retour rapide DH Lit ou met en pause Touchez pour diminuer restaurer le son 4 Liste des contenus Touchez le côté droit de l écran pour afficher la Liste de contenu Touchez de nouveau pour fermer la liste Affiche la liste de lecture Lorsque vous appuyez sur un nom de fi...

Page 75: ...utilisés avec cet appareil Les fichiers peuvent être effacés en fonction des conditions de fonctionnement du périphérique USB Nous ne proposons pas d indemnisations pour les pertes dues à l effacement de données Utilisation de base USB La plupart des fonctions sont utilisables depuis l écran de contrôle de la source et depuis l écran de lecture Écran de contrôle 4 3 5 2 6 1 7 Ouvrez le tiroir 5 4 ...

Page 76: ...s en plein écran verticalement ou horizontalement sans modification de rapport 5 Liste des contenus Touchez le côté droit de l écran pour afficher la Liste de contenu Touchez de nouveau pour fermer la liste Affiche la liste de lecture Lorsque vous appuyez sur un nom de fichier piste dans la liste la lecture démarre 6 Éléments indicateurs VIDEO Identifie le fichier vidéo MUSIC Identifie le fichier ...

Page 77: ...tte étape jusqu à ce que vous ayez trouvé le fichier voulu Ñ Ñ Recherche par lien Vous pouvez rechercher un fichier du même artiste album genre que la piste en cours 1 Touchez Link Search 2 Touchez le type d étiquette souhaité Vous avez le choix entre l artiste l album et le genre h h La liste correspondant à votre choix s affiche 3 Touchez l élément de votre choix dans la liste des contenus Ñ Ñ R...

Page 78: ...iste des présélections Touchez le côté droit de l écran pour afficher la Liste de préréglage Touchez de nouveau pour fermer la liste Rappelle la station mémorisée En le touchant pendant 2 secondes il mémorise la station en cours de réception 5 Panneau de fonction Appuyez sur le côté gauche de l écran pour afficher le panneau de fonction Appuyez de nouveau pour fermer le panneau TI FM uniquement Ac...

Page 79: ...rain de recevoir 1 Sélectionnez la station que vous souhaitez mémoriser 2 Touchez FM 1 24 ou AM 1 12 dans lequel vous souhaitez enregistrer la station pendant 2 secondes jusqu à ce que vous entendiez un bip Utilisation de la sélection Ñ Ñ Sélection de préréglage Vous pouvez lister et sélectionner la station mémorisée 1 Touchez sur le côté droit de l écran Sélectionnez une station dans la liste Ñ Ñ...

Page 80: ...eçu L écran d informations routières apparaît automatiquement Configuration du syntoniseur Vous pouvez régler les paramètres du syntoniseur 1 Touchez sur le côté gauche de l écran Touchez SETUP h h L écran de CONFIGURATION Tuner s affiche 2 Réglez chaque option comme suit AF Lorsque la réception de la station est médiocre sélectionne automatiquement une station diffusant le même programme sur le m...

Page 81: ... MANUAL Commute sur l ensemble suivant manuellement 4 Zone jaquette d album Les informations de l image disponibles dans le fichier actuel s affichent Touchez pour sélectionner successivement l écran de contrôle ou d information P Numéro de préréglage CH Affichage du canal 5 Touches d opération 1 Affiche l écran de liste des services Pour plus de détails sur les recherches voir Recherche de servic...

Page 82: ... le service que vous êtes en train de recevoir 1 Sélectionnez le service que vous souhaitez mémoriser 2 Touchez sur le côté droit de l écran 3 Touchez P 1 10 dans lequel vous souhaitez enregistrer la station pendant 2 secondes jusqu à ce que vous entendiez un bip Utilisation de la sélection Ñ Ñ Recherche par type de programme Vous pouvez syntoniser une station avec un programme spécifique lorsque ...

Page 83: ...avez saisie recherche alphabétique Infos trafic Vous pouvez écouter et lire les informations de circulation routière automatiquement à l instant ou l appareil reçoit un bulletin d infos trafic Cependant cette fonction nécessite une Radio numérique qui contient les informations TI 1 Touchez sur le côté gauche de l écran Touchez TI h h Le mode d infos trafic est activé Ñ Ñ Lorsqu un bulletin d infos...

Page 84: ... vous sélectionnez MARCHE l appareil commute sur un service semblable s il existe lorsqu un réseau service DAB n est pas disponible Le choix par défaut est OFF Antenna Power Règle l alimentation sur l antenne de la Radio Numérique Règle sur ON lorsque l antenne de la Radio Numérique en cours d utilisation est équipée d un amplificateur Le choix par défaut est ON Ñ Ñ Configuration de l annonce Lors...

Page 85: ...en fonction de la version Bluetooth du périphérique Cet appareil peut ne pas fonctionner avec certains périphériques Bluetooth Les conditions de connexion peuvent varier en fonction des circonstances autour de vous Pour certains périphériques Bluetooth le périphérique est déconnecté quand l appareil est mis hors tension Ñ Ñ À propos du téléphone mobile et du lecteur audio Bluetooth Cet appareil es...

Page 86: ...r cet appareil ou sur un smartphone iOS permet d enregistrer le smartphone en tant que périphérique Bluetooth 1 Activer la fonction Bluetooth sur votre smartphone téléphone portable 2 Recherchez l appareil KW M à partir de votre smartphone téléphone portable 3 Utilisez votre smartphone téléphone portable en fonction des messages affichés Confirmez la requête sur le smartphone téléphone portable Si...

Page 87: ...4 5 2 1 1 Nom du périphérique Nom du périphérique connecté Répète la piste le dossier en cours Chaque fois que vous touchez la touche le mode de répétition change dans l ordre suivant Répéter fichier Répéter dossier Répéter toutes les chansons Répétition désactivée Lit de manière aléatoire tous les morceaux du dossier en cours Chaque fois que vous touchez la touche le mode aléatoire change dans l ...

Page 88: ...le téléphone mobile ou le lecteur audio utilisé il peut arriver que les informations texte ne soient pas affichées alors que l audio est audible et que vous pouvez agir dessus Si le volume est trop bas augmentez le sur votre téléphone mobile ou sur votre lecteur audio Ñ Ñ Connectez l audio Bluetooth Sélectionne le dispositif à connecter via l audio Bluetooth A2DP ou APP SPP 1 Touchez sur le côté g...

Page 89: ...rées Jusqu à 20 entrées y compris appels composés appels reçus et appels manqués 2 Sélectionnez une méthode de numérotation Appel depuis l historique des appels Appel depuis le répertoire téléphonique Appel depuis un numéro présélectionné Appel en saisissant un numéro de téléphone Reconnaissance vocale P 90 Configuration Bluetooth 1 Touchez L écran de configuration Bluetooth s affiche REMARQUE Les...

Page 90: ...hargement du répertoire Ñ Ñ Reconnaissance vocale Vous pouvez accéder à la fonction de reconnaissance vocale du téléphone portable branché sur cet appareil Vous pouvez effectuer une recherche dans le répertoire téléphonique par la voix La fonctionnalité dépend du modèle de votre téléphone portable 1 Appuyez sur le bouton FNC pendant 1 seconde h h L écran de reconnaissance vocale apparaît 2 Commenc...

Page 91: ...ume de réception Appuyez sur le bouton ou Envoyer la tonalité de numérotation Touchez DTMF pour afficher l écran de saisie des tonalités Vous pouvez envoyer des tonalités en touchant les touches voulues à l écran Sélection de la sortie vocale En touchant la sortie vocale bascule systématiquement entre le téléphone portable et le haut parleur Attente d appel Lorsque vous recevez un appel alors que ...

Page 92: ...T Voir Appel par entrée d un numéro de téléphone P 89 Delete Pour supprimer un numéro préréglé touchez Delete puis touchez OK sur l écran de confirmation Ñ Ñ Transfert vers le répertoire téléphonique Vous pouvez transférer le répertoire téléphonique de votre smartphone Bluetooth via PBAP 1 Touchez 2 Touchez h h La transmission des données du répertoire téléphonique démarre REMARQUE Si le répertoir...

Page 93: ...suit 1 1 Arrêt de la caméra Touchez pour quitter l écran de la caméra Ñ Ñ Configuration des caméras 1 Appuyez sur le bouton FNC h h Le menu contextuel s affiche 2 Touchez SETUP h h L écran de menu de configuration s affiche 3 Touchez Camera h h L écran de la caméra apparaît 4 Réglez chaque option comme suit Parking Guidelines Vous pouvez afficher les directives de stationnement pour faciliter le s...

Page 94: ...ustement des lignes de guidage de stationnement assurez vous d utiliser le frein de stationnement pour éviter que la voiture bouge 1 Touchez ON de Parking Guidelines dans l écran de la Caméra P 93 2 Touchez Guidelines SETUP dans l écran de la Caméra 3 Réglez les directives de stationnement en sélectionnant le repère 4 Réglage de la position du repère sélectionné A B C D Assurez vous que A et B son...

Page 95: ...UE Les options de réglage varient selon la source en cours Configuration système REMARQUE Chacune des actions décrites dans cette section est accessible depuis le menu multifonctions 1 Appuyez sur le bouton FNC h h Le menu contextuel s affiche 2 Touchez SETUP Consultez la section qui suit pour chaque option Configurer AV P 98 Configuration de l affichage P 97 Configurer l interface utilisateur P 9...

Page 96: ...l heure manuellement P 64 Configuration spéciale Vous pouvez configurer des paramètres spéciaux 1 Appuyez sur le bouton FNC h h Le menu contextuel s affiche 2 Touchez SETUP h h L écran de CONFIGURATION s affiche 3 Touchez Special h h L écran spécial apparaît 4 Réglez chaque option comme suit DEMO Permet de paramétrer le mode de démonstration Le choix par défaut est ON Software Information Vérifier...

Page 97: ...e et les boutons ne baissent pas en intensité d éclairage ON L affichage et les boutons baissent en intensité d éclairage SYNC par défaut Synchronise l atténuation de l éclairage avec la mise sur marche ou sur arrêt du sélecteur d éclairage du véhicule Screen Adjust Affiche l écran de réglage de l écran P 95 Background Changer l image de fond P 97 Ñ Ñ Changez l image d arrière plan 1 Touchez Backg...

Page 98: ...fiche 2 Touchez SETUP h h L écran de CONFIGURATION s affiche 3 Touchez AV h h L écran AV apparaît 4 Réglez chaque option comme suit AV OUT Spécifiez s il faut émettre ou non la source actuelle de signal à partir de la borne AV OUTPUT ON OFF par défaut REMARQUE Les images peuvent uniquement être émises à partir de la source AV IN et USB fichier vidéo Si l affichage de l image de la caméra de vue ar...

Page 99: ...rrière balance P 100 Configurer la compensation de volume P 102 Réglage des effets sonores P 102 Configuration de l enceinte du répartiteur 1 Appuyez sur le bouton 2 Touchez 3 Touchez Audio h h L écran audio s affiche 4 Touchez Speaker Xʼover 5 Choisissez un type de voiture Vous pouvez configurer le type de la voiture et le réseau de haut parleurs etc Dès lors qu un type de voiture est sélectionné...

Page 100: ...FREQ Ajustement du filtre passe haut Lorsque le haut parleur avant ou arrière est sélectionné dans l écran de sélection des haut parleurs LPF FREQ Ajustement du filtre passe bas Lorsque le caisson de graves est sélectionné dans l écran de sélection des haut parleurs Slope 1 Configure la pente de recouvrement Gain Règle le niveau du haut parleur frontal du haut parleur arrière ou du niveau du subwo...

Page 101: ...quence et ajuster son niveau en utilisant R S Preset Select Affiche l écran pour présenter à nouveau la courbe prédéfinie de l égaliseur Memory Enregistre la courbe d égaliseur ajustée de User1 à User4 Initialize La courbe EQ actuelle est revenue en position linéaire ALL SRC Appliquer l égaliseur réglé pour toutes les sources Touchez ALL SRC puis touchez OK sur l écran de confirmation Bass EXT Par...

Page 102: ...ouchez ou pour régler le niveau Initialize Revient aux paramètres initiaux Si vous avez d abord monté le volume puis réduit avec la fonction Volume Offset Décalage du volume le niveau sonore peut être extrêmement élevé si vous passez brusquement sur une autre source Effet sonore Vous pouvez paramétrer les effets sonores 1 Appuyez sur le bouton 2 Touchez 3 Touchez Audio h h L écran audio s affiche ...

Page 103: ...DTA 5 Sélectionnez la position d écoute parmi les choix Front R avant droit Front L avant gauche Front All avant tous et All Contrôle de DTA position Vous pouvez ajuster finement votre position d écoute 1 Touchez Adjust 2 Touchez Delay 3 Touchez T ou U pour ajuster le délai de l enceinte sélectionnée 4 Touchez Level 5 Touchez T ou U pour ajuster le niveau sonore de l enceinte sélectionnée REMARQUE...

Page 104: ...un appel est reçu répond à l appel DIRECT Passe en mode de recherche directe Pour plus de détails sur le mode de recherche directe voir Mode de recherche directe P 104 ASPECT Change le format d écran Touches numérotées Indique le numéro à rechercher en mode de recherche directe Pour plus de détails sur le mode de recherche directe voir Mode de recherche directe P 104 CLR Efface un caractère en mod...

Page 105: ...t être en court circuit ou est en contact avec le châssis du véhicule et la fonction de protection a peut être été enclenchée C est pourquoi il faut vérifier le câble de l enceinte Si l allumage de votre véhicule ne possède pas de position ACC branchez les câbles d allumage à une source d alimentation que la clé de contact peut allumer ou éteindre Si vous branchez le câble d allumage à une source ...

Page 106: ...reil 4 Installez l appareil dans votre véhicule 5 Reconnectez la borne de la batterie 6 Procédez au réglage initial Voir Paramètres initiaux P 63 Installation de l appareil Courbez les languettes de la douille de montage à l aide d un tournevis ou d un outil similaire puis fixez la en place Ñ Ñ Plaque de garniture 1 Fixez l accessoire 3 sur l appareil 3 Ñ Ñ Microphone 1 Vérifiez la position d inst...

Page 107: ...e garniture en vous référant à l étape 1 dans Retrait de la plaque de garniture 2 Insérez la clé d extraction accessoire 2 profondément dans l emplacement comme illustré La saillie à la pointe de la clé d extraction doit faire face à l appareil 2 3 Une fois que vous avez correctement inséré la clé d extraction insérez l autre clé d extraction dans l emplacement 4 Extraire l appareil à moitié REMAR...

Page 108: ...eu de marche arrière du véhicule lors de l utilisation de la vue arrière de la caméra Bleu ciel Jaune Câble de la télécommande au volant Connexion au faisceau des commandes au volant du véhicule Contactez votre revendeur JVC pour les détails Fusible 15 A Ñ Ñ Connexion des câbles sur les contacts électriques Préamplification du caisson de basses Capuchon Capuchon Antenne FM AM Φ 6 5 mm maximum Ante...

Page 109: ...age ACC A 8 Noir Branchement à la terre masse B 1 B 2 Violet Violet Noir Arrière droit B 3 B 4 Gris Gris Noir Avant droit B 5 B 6 Blanc Blanc Noir Avant gauche B 7 B 8 Vert Vert Noir Arrière gauche 1 Max 300 mA 12 V Impédance d enceinte 4 8 Ω ATTENTION Avant de connecter les connecteurs ISO disponibles dans le commerce à l unité vérifier les conditions suivantes Veiller à ce que l affectation des ...

Page 110: ...ire Le son déraille à la lecture d un fichier audio L enregistrement est en mauvais état Recommencez l enregistrement du fichier ou utilisez une autre mémoire USB Ñ Ñ Autre L appui sur les touches n est pas confirmé par un bip La prise preout est déjà utilisée Le bip d appui sur les touches ne peut pas être envoyé en sortie sur la prise preout Messages d erreur Lorsqu un problème vous empêche d ut...

Page 111: ...mpossible en fonction des types et conditions du support ou du périphérique Fichiers vidéo acceptés Profil Taille de l image max Débit binaire max Format audio MPEG 1 mpg mpeg 352 240 352 288 1 5 Mbps MPEG Audio Layer 2 MPEG 2 mpg mpeg MP ML 720 480 720 576 8 Mbps MPEG Audio Layer 2 H 264 MPEG 4 AVC mp4 m4v avi flv Profil de référence Profil principal 1 920 1 080 30 fps 8 Mbps MP3 AAC MPEG 4 mp4 a...

Page 112: ...ance de sortie 4dBm MAX 0dBm AVE Classe de puissance 2 Portée de communication maximale Ligne de vue approximative 10 m 32 8 pieds Codec Audio SBC AAC Profil Support multi profil HFP Profil mains libres SPP Profil port série A2DP Profil de distribution audio avancée AVRCP Profil de télécommande audio vidéo PBAP Profil d accès au répertoire téléphonique Section DSP Égaliseur graphique Bande 13 Band...

Page 113: ...75 Ω Niveau d entrée maxi audio externe jack RCA 2 V 25 kΩ Niveau de sortie vidéo jacks RCA 1 Vp p 75 Ω Section audio Puissance maximum avant et arrière 50 W 4 Sortie de puissance typique avant et arrière Largeur de bande à pleine puissance à moins de 1 DHT 21 W 4 Bande de la fréquence de sortie 20 20 000 Hz Niveau de pré amplification V 4 V 10 kΩ Impédance du préamplificateur 1 3 kΩ Impédance d e...

Page 114: ...T PORTFOLIO LICENSE FOR THE PERSONAL AND NON COMMERCIAL USE OF A CONSUMER TO i ENCODE VIDEO IN COMPLIANCE WITH THE VC 1 STANDARD VC 1 VIDEO AND OR ii DECODE VC 1 VIDEO THAT WAS ENCODED BY A CONSUMER ENGAGED IN A PERSONAL AND NON COMMERCIAL ACTIVITY AND OR WAS OBTAINED FROM A VIDEO PROVIDER LICENSED TO PROVIDE VC 1 VIDEO NO LICENSE IS GRANTED OR SHALL BE IMPLIED FOR ANY OTHER USE ADDITIONAL INFORMA...

Page 115: ...sed to endorse or promote products derived from this software without specific prior written permission THIS SOFTWARE IS PROVIDED BY THE COPYRIGHT HOLDERS AND CONTRIBUTORS AS IS AND ANY EXPRESS OR IMPLIED WARRANTIES INCLUDING BUT NOT LIMITED TO THE IMPLIED WARRANTIES OF MERCHANTABILITY AND FITNESS FOR A PARTICULAR PURPOSE ARE DISCLAIMED IN NO EVENT SHALL THE FOUNDATION OR CONTRIBUTORS BE LIABLE FO...

Page 116: ...VCKENWOOD Europe B V Amsterdams ewe g 37 1422 AC UITHOORN THE NETHERLANDS Pour les zones de vente d Europe Déclaration de conformité se rapportant à la directive RE 2014 53 UE Déclaration de conformité se rapportant à la directive RoHS 2011 65 UE Fabricant JVC KENWOOD Corporation 3 12 Moriyacho Kanagawa ku Yokohama shi Kanagawa 221 0022 JAPON Représentant dans l UE JVCKENWOOD Europe B V Amsterdams...

Page 117: ...a Slovensko S tem JVC KENWOOD izjavlja da je radijska oprema KW M745DBT KW M741BT v skladu z Direktivo 2014 53 EU Celotno besedilo direktive EU o skladnosti je dostopno na tem spletnem naslovu Slovensky Spoločnosť JVC KENWOOD týmto vyhlasuje že rádiové zariadenie KW M745DBT KW M741BT vyhovuje smernici 2014 53 EÚ Celý text EÚ vyhlásenia o zhode nájdete na nasledovnej internetovej adrese Dansk Herve...

Page 118: ... B5A 2246 20_JVC_EnFr_2nd indb 118 2019 06 14 14 06 ...

Reviews: