44
EN
BLANK SRCH
CANCEL
EXECUTE
–
BLANK SEARCH
4
4
Power Switch
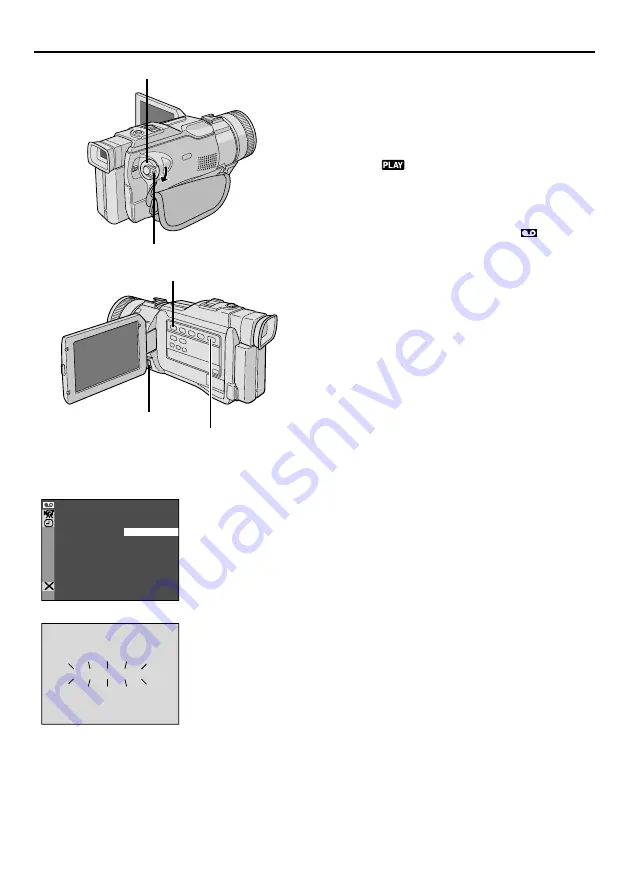
Blank Search
Helps you find where you should start recording in
the middle of a tape to avoid time code interruption
(
墌
pg. 23).
1
Load a tape (
墌
pg. 12). Set the VIDEO/
MEMORY Switch to “VIDEO” and set the Power
Switch to “
” while pressing down the Lock Button
located on the switch.
2
Press the MENU wheel in. The Menu Screen
appears.
3
Rotate the MENU wheel to select “
VIDEO”,
then press it. The VIDEO menu appears.
4
Rotate the MENU wheel to select “BLANK
SRCH”, then press it. The Sub Menu appears.
5
Rotate the MENU wheel to select “EXECUTE”,
then press it.
• “BLANK SEARCH” appears blinking and the
camcorder automatically starts reverse or forward
shuttle search, then stops at the spot which is about
3 seconds of tape before the beginning of the
detected blank portion.
To cancel Blank Search midway . . .
..... press
5
.
NOTES:
●
In step 5, if the current position is at a blank portion the
camcorder searches in the reverse direction, and if the
current position is at a recorded portion the camcorder
searches in the forward direction.
●
Blank Search does not work if “HEAD CLEANING
REQUIRED. USE CLEANING CASSETTE” has
appeared with the tape.
●
If the beginning or end of the tape is reached during
Blank Search, the camcorder stops automatically.
●
A blank portion which is shorter than 5 seconds of tape
cannot be detected.
●
The detected blank portion may be located between
recorded scenes. Before you start recording, make sure
there is no recorded scene after the blank portion.
Lock Button
Display
Stop Button (
5
)
VIDEO/MEMORY Switch
(Open the LCD monitor
to access this switch.)
ADVANCED FEATURES
(cont.)
MENU Wheel


