

CH-X470RF
1-5
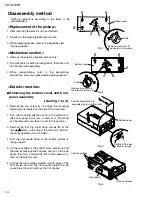
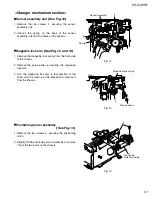
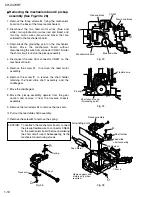
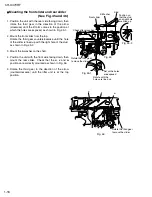
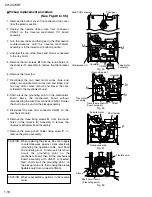
Remove the four damper bracket fixing screws C to
remove the damper brackets.
Pull out the dampers, being careful not to damage
them.
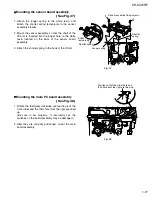
When reattaching a damper, insert your finger to
push out the center of the damper to mount it on the
damper shaft, as shown in Fig. 6-1.
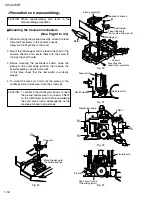
Turn the damper spring bracket toward the top at a
right angle as shown in Fig. 7, then push down the
lower side of the damper spring bracket to lift it off.
Remove the three fixing screws D and E on the DIN
jack board assembly.
Lift the changer unit upward.
Remove the damper springs from the mechanism
chassis if required. To reassemble, refer to the
diagram below.
1.
2.
3.
4.
5.
6.
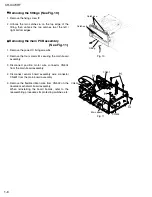
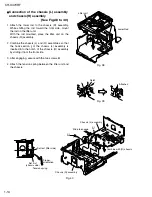
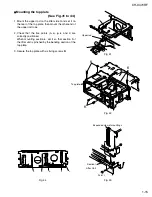
Removing the top cover
(See Fig.5 to 9)
Fig. 5
Turn to the top position (at a right angle),
then push down to lift off.
Lift the changer unit upward
How to attach the damper springs
Silver
(mechanism side)
Black
(magazine side)
Mechanism
Chassis
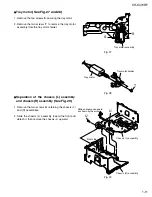
Remove the flexible ribbon
wire if required
C
Apply alcohol to the shaft then immediately
attach the damper. (After attaching, check
that the shaft is correctly inserted.)
Push out with your finger
before attaching
C
C
C
E
E
D
Fig. 6
Fig. 7
Fig. 9
Fig. 6-1
Fig. 8
Fig. 8-1
Damper shaft
Damper
Damper spring
Damper spring
DIN jack board
Damper spring bracket
Damper
Damper bracket
Damper
Damper bracket
Damper
Damper bracket
Damper bracket
Damper