background image

41

Playin

g

 Bac

k Discs

EN

Cancelling and Recalling the PBC 
Function 

Insert a Video CD.

1

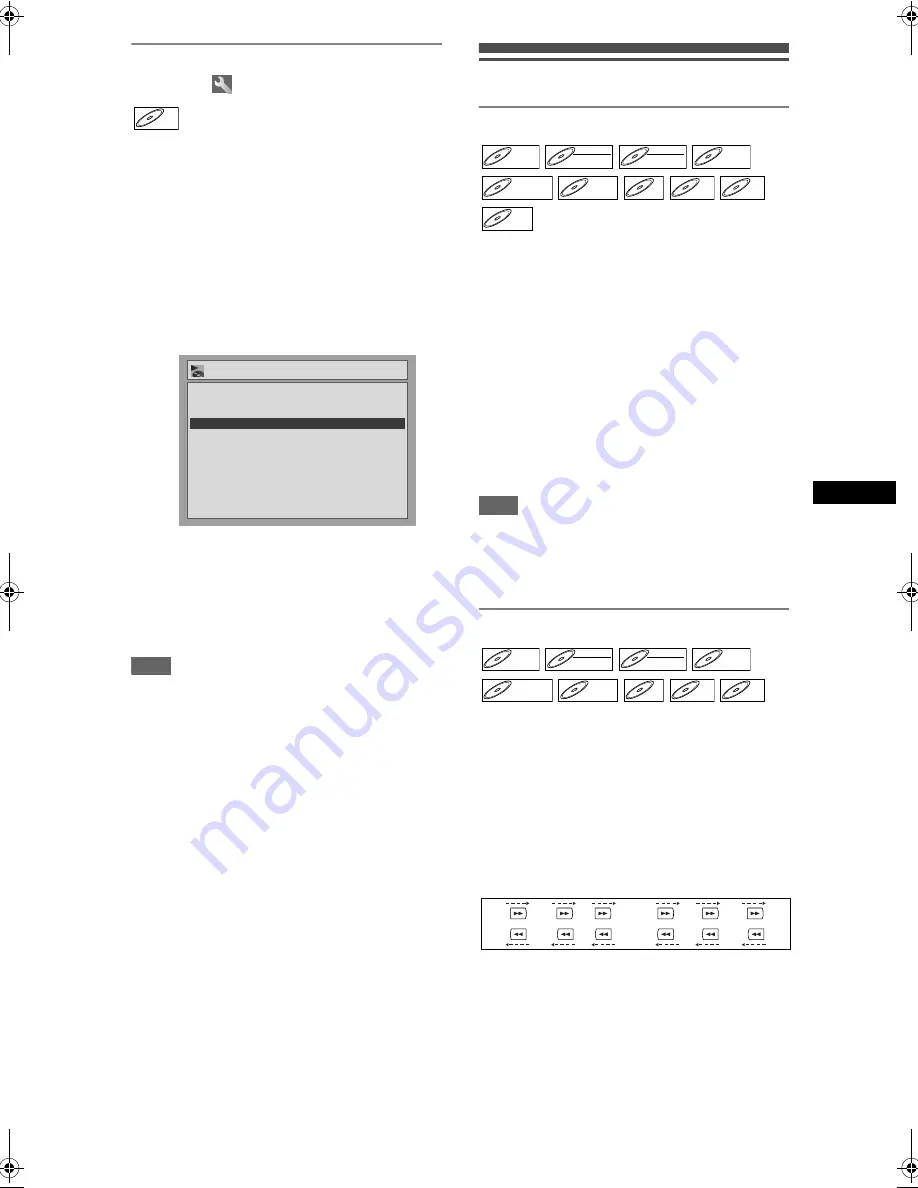
In stop mode, press [SET UP].

“Easy Setting Menu” or “Advanced Setting Menu” 
will appear.

2

Select “CD Playback Mode” using 
[Cursor 

U

 / 

D

], then press [ENTER].

3

Select “PBC (Video CD only)” using 
[Cursor 

U

 / 

D

], then press [ENTER].

4

Select “OFF” using [Cursor 

U

 / 

D

], 

then press [ENTER].

5

Press [SET UP] to exit.

To recall the PBC function, select “ON” in step 4 
above.

Note

• The default setting of “PBC (Video CD only)” is 

“ON.”

Special Playback

Resume Playback

You can resume playback from the point where you 
stopped it before.

1

During playback, press [STOP 

S

].

The resume message will appear.

2

Press [PLAY 

P

].

In a few seconds, playback will resume from the 
point at which you stopped it before. Even if you 
turn off the unit, you can resume playback at the 
same point after turning back on the unit.

To cancel the resume playback and start playing 
back the disc from the beginning:

Press 

[STOP


S

]

 twice while playback is stopped.

Note

• For Video CDs, if you turn PBC on using the setting 

menu, the resume function is cancelled.

• For MP3 and JPEG files, playback will resume from 

the beginning of the track at which playback was 
stopped.

Fast Forward / Fast Reverse

1

During playback, press [FWD 

f

] or 

[REV 

r

].

Each time you press 

[FWD


f

]

 or 

[REV


r

]

, the 

approximate speed will change as follows.

To output sound from DVDs during fast 
forward at x1.5 speed, set “Fast Forward with 
Audio” to “ON” for the “Playback” setting in 
“Advanced Setting Menu.”

Fast forward or fast reverse playback across titles 
(for DVDs) or tracks (for MP3) is not possible.

• For Audio CDs, approximate speed is fixed at x8 

with sound.

• For Video CDs, approximate forward speeds are 

x1.5, x8 and x16, and approximate reverse 
speeds are x2, x8 and x16.

• For MP3 files, approximate speed is fixed at x16.
• To return to playback at normal speed, press 

[PLAY


P

]

.

VCD

VCD

CD Playback Mode

Random Play

Program Play

PBC(Video CD only)

Slide Show

ON

5 sec.

DVD-V

DVD-V

DVD-RW

DVD-RW

Video

DVD-RW

DVD-RW

VR

DVD-R

DVD-R

D

DVD+R

VD+RW

W

DVD+RW

D

DVD+R

VD+R

DVD+R

CD

CD

CD

VCD

VCD

VCD

(PBC OFF)

MP3

MP3

JPEG

JPEG

JPEG

D

DVD-V

VD-V

DVD-V

D

DVD-R

VD-RW

W

DVD-RW

Video

DVD-RW

DVD-RW

VR

DVD-R

DVD-R

D

DVD+R

VD+RW

W

DVD+RW

D

DVD+R

VD+R

DVD+R

CD

CD

CD

VCD

VCD

VCD

MP3

MP3

MP3

x20

x1.5

x20

x5

x40

x40

Normal

speed 

playback

E9770ED_EN.book  Page 41  Wednesday, August 3, 2005  6:35 PM

Summary of Contents for 0905TNH-FN-FN

Page 1: ...P MENU CLEAR AUDIO PLAY SLOW SLOW PAUSE DVD REC STOP TIMER PROG ON SCREEN ABC DEF JKL GHI MNO TUV PQRS WXYZ ENTER VCR DVD REC SPEED REC MONITOR R SHOWVIEW RM SDR057E R N DVD VIDEO RECORDER VIDEO CASSETTE RECORDER DR MV2SEU INSTRUCTIONS SHOWVIEW is a registered trademark of Gemstar Development Corporation The SHOWVIEW system is manufactured under licence from Gemstar Development Corporation ...

Page 2: ... covered Avoid installation in enclosed spaces such as bookcases unless suitable ventilation is provided 3 Keep the unit away from radiators and other heat sources 4 Avoid use near strong magnetic fields 5 Do not push objects of any kind into the unit through the cabinet slots or openings as they could touch electrically live parts or short circuit parts resulting in a fire or electric shock 6 Do ...

Page 3: ...nit when it is moved from a cold place to a warm place after heating a cold room or under conditions of high humidity Do not use the unit for at least 2 hours to allow the inside to dry Information for Users on Disposal of Old Equipment European Union This symbol indicates that the electrical and electronic equipment should not be disposed as general household waste at its end of life Instead the ...

Page 4: ...eshooting and the relevant sections in the Instruction Manual the laser optical pickup unit may be dirty Consult your dealer or an authorized service centre for inspection and cleaning of the laser optical pickup unit AUTO HEAD CLEANING Automatically cleans video heads as you insert or remove a cassette so you can see a clear picture Playback picture may become blurred or interrupted while the TV ...

Page 5: ...g Back Discs 37 Information on Playing Back DVDs 37 Basic Playback 38 PBC Function for Video CDs 40 Special Playback 41 Search 44 Repeat Random Programme Playback Slide Show 45 Selecting the Format of Audio and Video 47 Editing 49 Disc Editing 49 Editing Discs in Video Mode 49 Editing Discs in VR Mode 52 Editing Original Titles in VR Mode 52 Editing the Playlist in VR Mode 54 Changing the Setting ...

Page 6: ...ound sound from discs recorded with the surround sound system Quick search You can easily find the part you want to watch using the search function Search for a desired point on a disc by title chapter or time Playback from Original or a Playlist VR mode You can play back titles using either the Original list or a Playlist Quick search for what you want to watch You can easily find the part you wa...

Page 7: ...operations can be carried out using the buttons on the front panel Symbol Description Available for DVD Videos Available for DVD RW discs in Video mode Available for DVD RW discs in VR mode Available for DVD R discs in Video mode Available for DVD RW discs Available for DVD R discs Available for Audio CDs Available for Video CDs Available for CD RW R discs with MP3 files Available for CD RW R disc...

Page 8: ...DVD VCR Press up or down to change the channel 16 Display DVD VCR Refer to Front Panel Display Guide on page 16 17 Remote control sensor Receives signals from your remote control so you can control the unit from a distance 18 VCR REC I button VCR Press once to start a recording Press repeatedly to start a one touch timer recording 19 VCR PLAY P button VCR Press to start a playback of a video tape ...

Page 9: ...OUT jacks DVD Connect to the audio input jacks on your TV Use commercially available Audio cables 6 S VIDEO OUT jack DVD Connect to the S Video input jack on your TV Use a commercially available S Video cable 7 ANTENNA IN DVD VCR Connect to an antenna or a cable 8 ANTENNA OUT DVD VCR Connect to the Aerial jack on your TV cable box or direct broadcast system Use the supplied RF cable Note Do not to...

Page 10: ...ss to confirm or select menu items 9 Cursor U D L P buttons DVD VCR Press to select items or settings 10 CM SKIP button DVD During playback press to skip 30 seconds See page 42 11 DVD REC I button Press once to start a recording Press repeatedly to start a one touch timer recording Press to activate the remote control in DVD mode See page 12 12 DUBBING button DVD VCR Press to start VCR to DVD DVD ...

Page 11: ... 24 MENU LIST button DVD Press to display the Disc menu during playback Press to change the Original and Playlist on the TV screen VR mode only 25 RETURN button DVD VCR Press to return to the previously displayed menu screen 26 B SKIP button DVD During playback press to skip to the previous chapter or track When playback is paused press to play reverse step by step F SKIP button DVD During playbac...

Page 12: ...e unit Replace the batteries when the operating range of the remote control reduces VCR DVD Recorder Switching Because this product is a combination of a VCR and a DVD recorder you must select first which component you wish to operate with VCR DVD on the front panel Press VCR on the remote control Verify that the VCR light is lit Press DVD on the remote control Verify that the DVD light is lit Not...

Page 13: ...4 Each icon means 5 Recording mode and remaining time 6 Status of the current disc Press VCR first Press ON SCREEN to display the On Screen display This is an example screen for explanation Displayed items are depending on the actual mode 1 Current time 2 Position number 3 Audio status of the receiving broadcast or external equipment 4 Audio status of the currently playing back video tape 5 Tape c...

Page 14: ...inserted into the unit If a DVD Video commercially available a new DVD R disc or a finalised DVD R disc is inserted into the unit you cannot select Disc CD Playback Mode is available only when an Audio CD Video CD or a CD RW R disc containing MP3 JPEG files is inserted into the unit Advanced Setting Menu You can make all the settings available as follows 1 Playback Set up the unit to play back a d...

Page 15: ...formatted in Video mode with this unit on other DVD recorders If you use the disc on other DVD recorders reformat the disc using that DVD recorder 3 Finalise Finalise a disc containing recorded titles 4 Disc Protect VR mode only Protect a disc from accidental over recording editing or erasing 5 Random Play Activate the random playback feature 6 Program Play except MP3 JPEG files Activate the progr...

Page 16: ...uring the timer recording Appears when DVD is in the timer standly mode Flashes when there is an error in programming DVD R Appears when a DVD R disc is inserted into the unit DVD RW Appears when a DVD RW disc is inserted into the unit VCR Appears when the timer recording is proceeding in VCR Appears when VCR is in the timer standby mode Flashes when there is an error in programming VCR DVD Appear...

Page 17: ...ilable S Video cable 3 Connect the AUDIO OUT jacks of this unit to the analogue Audio input jacks of your TV Use a commercially available Audio cable Connecting to External Equipment This unit has three input terminals AV1 or AV2 on the rear panel and AV3 on the front panel Be sure that all the units are off before making connections Recording from a DVD player VCR or other Audio Video equipment w...

Page 18: ...G to Stream in the audio menu See page 61 Connecting to an MD deck or DAT deck The audio source recorded in Dolby Digital 5 1 channel surround format cannot be recorded using an MD or DAT deck as a digital sound If not connected to a Dolby Digital decoder set Dolby Digital to PCM in the audio menu Playing back a DVD using incorrect settings may generate noise distortion and damage speakers Set Dol...

Page 19: ...l using Cursor U D then press ENTER 5 Select Auto Tuning using Cursor U D then press ENTER The unit will start storing channels available in your area Wait for several minutes to finish channel storing 6 Press SET UP to exit You can select only the channels memorized in this unit by using PR To select a channel You can select a channel using PR or directly enter the channel using the Number button...

Page 20: ... Cursor U D then press RETURN If you want to decode scrambled signals select Decoder using Cursor U D then press ENTER Select ON using Cursor U D then press RETURN To store another channel repeat steps 4 to 7 8 After completion press SET UP to exit To Select a Channel Notes on using the Number buttons Enter channel numbers as a two digit number for the quickest result For example to select channel...

Page 21: ...ss STANDBY ON I to turn off The Auto clock function is activated This unit will search for the time only when the power is off Leave the unit off for several minutes to give it time to set the clock Hint If you want to cancel Auto Clock Setting select OFF using Cursor U D and then press ENTER at step 5 Note The default setting of Auto Clock Setting is OFF The clock may set itself automatically aft...

Page 22: ... screen 4 3 standard or 16 9 wide screen TV 1 In stop mode press SET UP 2 Select Advanced Setting Menu using Cursor U D then press ENTER If it has already appeared proceed to step 3 3 Select Playback using Cursor U D then press ENTER 4 Select TV Aspect using Cursor U D then press ENTER 5 Select the desired option using Cursor U D then press ENTER 6 Press SET UP to exit Hint If you have a standard ...

Page 23: ...tandard new single sided 12 cm disc The recording times are estimates and actual recording time may differ The audio and video quality becomes poorer as the recording time gets longer Restrictions on Recording You cannot record copy protected video using this unit Copy protected video includes DVD Videos and some satellite broadcasts If copy protected material is detected recording will pause or s...

Page 24: ...VD R discs are finalised A title menu is created automatically Undo finalising is not possible Additional recording or editing is not possible After DVD RW Video mode discs are finalised A title menu is created automatically Undo finalising is possible See page 36 Additional recording or editing is possible if you undo finalise See page 36 After DVD RW VR mode discs are finalised A title menu is n...

Page 25: ...isc in VR mode Setting Auto Chapter The unit inserts a chapter mark periodically every 10 minutes by default during recording Using the Auto Chapter menu you can set this function off or change the time period 1 In stop mode press SET UP 2 Select Advanced Setting Menu using Cursor U D then press ENTER If it has already appeared proceed to step 3 3 Select Recording using Cursor U D then press ENTER...

Page 26: ...g once it has started Selecting the Sound Mode This unit can receive bilingual broadcasts You can switch between modes by pressing AUDIO on the remote control Each mode is indicated on the TV screen as follows During reception of bilingual broadcasts Setting External Input Audio When the external input audio is a bilingual broadcast or when copying a video tape to a DVD disc you can choose Stereo ...

Page 27: ... TV input is set on the unit This operation may take a few moments to complete 2 Press DVD 3 Select the recording speed using REC SPEED See page 23 Make sure that the recording format is set to the desired mode See page 25 4 Select the desired channel to record using PR or the Number buttons 5 Press DVD REC I to start recording The mark will be displayed for 5 seconds To pause the recording press ...

Page 28: ...PR or the Number buttons 5 Press DVD REC I repeatedly until the desired recording time 30 minutes to 8 hours appears on the TV screen One touch timer recording will start To change the recording length during one touch timer recording press DVD REC I repeatedly until the desired length appears To cancel one touch timer recording within the specified time press STOP S Hint The remaining recording t...

Page 29: ...TER when all information required is entered Your programme setting is stored To set another programme repeat steps 5 to 12 To exit press SET UP or PROG If the recording times of two or more programmes overlap Overlap and overlapped programme numbers are displayed See pages 30 and 32 13 Press TIMER The icon will appear on the front panel display and the unit enters to the timer standby mode Note I...

Page 30: ...e component DVD or VCR which is not currently used for the timer recording the programme will not be highlighted In this case you cannot select other programmings To Stop the Timer Recording in Progress On the front panel of the unit press DVD STOP S to stop the disc recording or VCR STOP EJECT S O to stop the tape recording Note STOP S on the remote control is not effective If the Timer Programmi...

Page 31: ...rammed correctly the incorrect timer setting stays in effect unless you cancel it To cancel an incorrect timer setting refer to Checking Cancelling or Correcting the Timer Programming Information on page 30 Timer Recording Using the SHOWVIEW System You can programme the timer using the SHOWVIEW programming numbers that are printed in your local TV guide magazine 1 In stop mode press the SHOWVIEW b...

Page 32: ...in the tray the DVD indicator on the front panel display will flash and timer recording will not occur Insert a recordable disc If there is no tape or a tape with a record tab is not in the cassette compartment the VCR indicator on the front panel display flashes and timer recording cannot be performed Please insert a recordable tape When all timer recordings are complete the icon flashes To play ...

Page 33: ...al Equipment Connect the external equipment using either the input jacks AV1 AV2 Rear or AV3 Front However for AV3 jacks you have to select S VIDEO input or VIDEO input jacks depending on the connected devices Use commercially available Scart S Video or Video cable and an Audio cable for this connection 1 In stop mode press SET UP 2 Select Advanced Setting Menu using Cursor U D then press ENTER If...

Page 34: ... STOPS on the unit to stop recording For tape Press VCR STOP EJECT S O on the unit to stop recording Note During recording if a signal other than PAL is detected such as NTSC recording is paused Dubbing Mode You can copy a DVD disc to a videotape or copy a videotape to a DVD disc This function will be available only if the DVD disc or the tape is not copy protected Before starting this function pr...

Page 35: ...ke sure to select a recording speed using REC SPEED See page 64 Rewind or fast forward the tape to the point where you want to start recording 8 Press DVD 9 Press DVD PLAY P on the unit and then press PAUSE p at the point you wish to start recording 10 Press DUBBING DVD to VCR duplication will start 11 Press STOP S to stop the recording Note When you turn off the unit after setting the Dubbing Mod...

Page 36: ...disc in Video mode automatically creates a title menu You can use the unit to record or edit a disc recorded in VR mode even after it is finalised After you finalise a disc recorded in Video mode you cannot edit or record anything else on that disc To reverse the finalisation of the disc select Undo Finalise at step 3 Note If you insert a DVD RW disc finalised with this unit Undo Finalise will app...

Page 37: ...ever it is also possible to play back DVDs using other colour systems such as NTSC Region Codes This unit has been designed to play back DVDs within Region Two 2 This unit can play back DVD discs labelled with the following region codes only You cannot play back DVDs that are labelled for other regions If these region symbols do not appear on your DVD you cannot play back the DVD in this unit The ...

Page 38: ...at are already finalised a title list will be displayed instead of thumbnails If you insert a DVD RW recorded in VR mode and it has a Playlist the Playlist is displayed You can resume playback from where you stopped playing back the disc Resume playback See page 41 for details Note Some discs may start playback automatically Playing Back a DVD Video CD Video CD 1 Follow steps 1 to 5 in Playing Bac...

Page 39: ...onstant Bit Rate 112 kbps to 320 kbps JPEG Size of picture Upper limit 6300 x 5100 dots Lower limit 32 x 32 dots Capacity limit less than 2 2 MB Hint During JPEG playback press Cursor P or Cursor L to rotate a picture 90 degrees clockwise or counterclockwise respectively Not available when the display menu appears Note MP3 files cannot be recorded as digital sound using an MD or DAT deck Files wit...

Page 40: ... playback control PBC function This enables you to play back interactive software using menu screens Refer to the information accompanying the Video CD Ver 1 1 without PBC function You can still enjoy playback of pictures and music from the CD Ver 2 0 with PBC function PBC ON will appear on the screen and Pbc will appear on the front panel display when playing back a Video CD with the PBC function...

Page 41: ...ume function is cancelled For MP3 and JPEG files playback will resume from the beginning of the track at which playback was stopped Fast Forward Fast Reverse 1 During playback press FWD f or REV r Each time you press FWD f or REV r the approximate speed will change as follows To output sound from DVDs during fast forward at x1 5 speed set Fast Forward with Audio to ON for the Playback setting in A...

Page 42: ...Press and hold F to continue going forward To continue going backward press and hold B 3 Press PLAY P to resume playback Note Only step by step forward is available when playing back Video CDs Slow Forward Slow Reverse Playback 1 During playback press PAUSE p then press SLOW or SLOW Each time you press SLOW or SLOW the approximate speed change as follows The sound will remain muted To return to no...

Page 43: ...later 1 During playback press ON SCREEN 2 Select the icon using Cursor L P then press ENTER Marker setup menu for DVD Video mode Marker setup menu for Audio CD mode 3 Select the desired marker number using Cursor U D When the disc reaches the desired point press ENTER The title track number and the time are displayed 4 To return to the marker later select the desired marker number using Cursor U D...

Page 44: ...splayed Track Search Using B F buttons 1 During playback press F to skip the current track and move to the next The unit moves to the next track one after the other To go back to the previous track press B repeatedly The unit moves backward one track at a time Using the ON SCREEN button 1 During playback press ON SCREEN 2 Select the icon using Cursor L P then press ENTER for the track number is hi...

Page 45: ...ired option to repeat using Cursor U D then press ENTER The selected repeat playback will start The following operations are available Title The current title will be played back repeatedly DVD only Chapter The current chapter will be played back repeatedly DVD only All The current disc will be played back repeatedly DVD RW VR mode CD Video CD MP3 and JPEG only A B The A B point will be played bac...

Page 46: ... the beginning of the current track Programme Playback You can programme the disc to play back in your desired order 1 Follow steps 1 and 2 in Random Playback 2 Select Program Play using Cursor U D then press ENTER 3 Select the desired track using Cursor U D then press ENTER or Cursor P 4 Press PLAY P to start programme playback Hint To erase tracks you selected press CLEAR You can make up to 50 t...

Page 47: ...ep 4 With an Audio CD Video CD or MP3 files The Audio channel will switch Example STEREO L ch R ch 4 Select the desired audio channel using Cursor U D then press ENTER The Audio channel will switch Note With some discs it is only possible to change the soundtrack from the disc menu Press TOP MENU or MENU LIST to display the disc menu Switching Subtitles Many DVD Videos have subtitles in one or mor...

Page 48: ...on is not displayed you can select the angle if the currently played back title has at least two multi angle scenes Reducing Block Noise 1 During playback press ON SCREEN 2 Select the icon using Cursor L P then press ENTER The Noise Reduction menu will appear 3 Select the desired option using Cursor U D then press ENTER This function reduces noise in the playback picture When playing back discs re...

Page 49: ...Mode You can edit the following disc items in Video mode Deleting Titles See below Editing Titles See page 50 Setting or Clearing Chapter Markers See page 51 Note After a disc is finalised editing the disc or recording on the disc is not possible except DVD RW discs in VR mode A Playlist is not available for DVD R or DVD RW discs in Video mode It is not possible to edit a disc recorded in another ...

Page 50: ...Editing Title Names on this page When you finish entering the title name press ENTER 4 Select Yes using Cursor U D then press ENTER The name you edited becomes the title 5 Press SET UP Writing on the disc starts It may take a while to write the data on a disc Guide to Editing Title Names Step 1 Select the desired character set using Cursor U D then press ENTER Step 2 Using the list below as a guid...

Page 51: ...ER 3 Select Title List using Cursor U D then press ENTER 4 Select the desired title using Cursor U D L P then press ENTER 5 Select Chapter Mark using Cursor U D then press ENTER 6 Select the desired interval using Cursor U D then press ENTER 7 Select Yes using Cursor U D then press ENTER Chapter markers are added If you select OFF at step 6 all the chapter markers are erased 8 Press SET UP Writing...

Page 52: ...s recorded originally If you want to keep the original as it is edit the Playlist to your preference Editing Original Titles in VR Mode Insert a recordable disc before editing Deleting Titles When a title is deleted from an original list in VR mode the available recording time on the disc will increase Note It is not possible to retrieve deleted titles Press DVD first 1 In stop mode press SET UP E...

Page 53: ...hole disc DVD RW VR mode only Select Disc Protect from the Disc menu then select Yes Refer to Setting a Disc to Protect on page 35 Hint The protected title is marked with a key icon in the original list Releasing Titles from Protecting You can cancel the title protection feature after it is applied Press DVD first 1 Follow steps 1 to 4 in Protecting Titles 2 Press ENTER 3 Press ENTER again The key...

Page 54: ...not increase Press DVD first 1 Follow steps 1 to 4 in Deleting Titles 2 Select Scene Delete using Cursor U D then press ENTER 3 Use B F REV r FWD f PLAY P and PAUSE p to find the start point then press ENTER Use B F REV r FWD f PLAY P and PAUSE p again to move to the end point and press ENTER The cursor will move to Preview You can check the preview by pressing ENTER The bar at the bottom of the s...

Page 55: ...s 2 Select Chapter Mark using Cursor U D then press ENTER 3 Use B F REV r FWD f PLAY P and PAUSE p to find the point where you will create a new chapter marker Or use B F to find a chapter marker that you wish to delete 4 Select Add or Delete accordingly using Cursor U D then press ENTER You cannot delete the first chapter of a title 5 Select Yes using Cursor U D then press ENTER A chapter marker ...

Page 56: ...e a title into two new titles Press DVD first 1 Follow steps 1 to 4 in Deleting Titles 2 Use B F REV r FWD f PLAY P and PAUSE p to find the point where you wish to divide the title 3 Select Title Dividing using Cursor U D then press ENTER 4 Select Yes using Cursor U D then press ENTER The title is divided into two new titles with the same title names The thumbnail you set is reset to the first pic...

Page 57: ...sing Cursor U D L P then press ENTER 4 Press SET UP Writing on the disc starts It may take a while to write the data on a disc Hint To delete a title from the Playlist refer to Deleting Titles on page 54 To delete the Playlist refer to Deleting a Playlist on this page Deleting a Playlist A Playlist can be deleted if it is no longer needed Press DVD first 1 Follow steps 1 to 3 in Deleting Titles 2 ...

Page 58: ...F Sets the subtitle language Display Setting page 60 OSD Language English Sets the On Screen display OSD language FL Dimmer Auto Sets the front display brightness Screen Saver 10 minutes Sets the idling time before the screen saver starts Audio Setting pages 60 61 Digital Out PCM 48kHz Sets whether sound recorded at 96 kHz is down sampled to 48 kHz or not Dolby Digital Stream Sets the digital audi...

Page 59: ...Aspect 4 3 Letter Box Parental Lock All Disc Menu Language English Audio Language Original Subtitle Language OFF Digital Out Dynamic Range Control ON Fast Forward with Audio ON Video Out Disc Menu Language English DVD Disc Menu Language English French Spanish German Italian Swedish Dutch Other Spanish Disc Menu Language English French Spanish German Italian Swedish Dutch Other Spanish DVD Playback...

Page 60: ...r U D then press ENTER Your setting is activated 48kHz If your amplifier decoder is NOT compatible with 96 kHz PCM select 48kHz Sound recorded at 96 kHz is down sampled to 48 kHz 96kHz If your amplifier decoder is compatible with 96 kHz PCM select 96kHz Sound is sampled at 96 kHz OSD Language English Deutsch Italiano Svenska Nederlands English OSD Language English Deutsch Italiano Svenska Nederlan...

Page 61: ...The Dynamic Range Control function is effective only with analogue audio connection Fast Forward with Audio Default ON Set to ON to output the sound during DVD playback at x1 5 fast forward Select a setting using Cursor U D then press ENTER Your setting is activated 5 Press SET UP to exit Dolby Digital conversion Default Stream Settings for MPEG Default PCM Digital Out Dolby Digital PCM Stream Str...

Page 62: ...ldren can be played back 7 to 2 Only DVD software intended for general use and children can be played back 1 Only DVD softwares intended for children can be played back Select Yes using Cursor U D then enter a new password using the Number buttons then press ENTER Your setting is activated If you select No proceed to Step 5 Enter the current password using the Number buttons Change the password Se...

Page 63: ...ut using Cursor U D then press ENTER 5 Press ENTER 6 Select the desired system setting using Cursor U D then press ENTER PAL Outputs a modified PAL signal for viewing discs recorded with the NTSC system on a PAL system TV Auto Changes the video system PAL NTSC automatically according to the format of the inserted disc 7 Press SET UP to exit Note With discs recorded using the PAL system a PAL signa...

Page 64: ...remote control There is a tape with a record tab in the unit The desired recording speed is selected in SP standard play or LP long play mode by pressing REC SPEED on the remote control Refer to page 29 for instructions on timer recording 1 Turn on the unit and insert a recordable tape Make sure that the TV input is set on the unit 2 Press VCR 3 Select the recording speed using REC SPEED The desir...

Page 65: ...ording is finished and the power is turned off the unit will switch to the timer standby mode automatically if a timer recording has been programmed Press TIMER to cancel the timer standby mode to use the unit continuously Search Index Search 1 Press VCR 2 Press VCR SEARCH so that the index search menu appears 3 Enter the number of recordings you wish to skip using the Number buttons within 30 sec...

Page 66: ...ng to the format of a prerecorded video tape during playback or the input signal from the tuner or external devices To change the video colour system manually press VCR SYSTEM Each time you press VCR SYSTEM the TV screen will change as follows Note If the playback picture on the TV screen is black and white change the video colour system manually When you change the video colour system manually be...

Page 67: ...ammes could affect picture quality Disconnect the playback equipment in question and connect it directly to your TV Nothing was recorded even though you set the timer setting correctly There was a power failure during recording The unit s internal clock stopped due to a power failure that lasted for more than 30 seconds Reset the clock See page 21 Unplug the mains cable from the AC outlet and plug...

Page 68: ...g back the disc automatically The DVD Video features an auto playback function Some functions such as Stop Search or Slow motion Playback cannot be performed Depending on the disc you may not be able to perform some of those operations See the instruction manual supplied with the disc The language for the sound track cannot be changed Multilingual tracks are not recorded on the DVD Video DVD R or ...

Page 69: ...unit does not play back the tape No video tape is inserted Recording does not start immediately after pressing VCR REC I Make sure the video tape has a record tab when you record to a video tape If needed cover the hole with cellophane tape The remote control does not function Check if a video tape is in the unit Press VCR Then try again The motor rotates even when playback recording is stopped Th...

Page 70: ...s not compatible with CPRM Insert a ver 1 1 or ver 1 2 DVD RW disc compatible with CPRM Recording Error This disc is protected and not recordable You are trying to record onto a disc that is set as protected in the Disc Setting menu Remove the disc protect setting in the Disc Setting menu See page 35 Recording Error Disc is full No area for new recording You are trying to record onto a disc that h...

Page 71: ...469 Kirghiz 5771 Kirundi 6460 Korean 5761 Kurdish 5767 Laothian 5861 Latin 5847 Latvian Lettish 5868 Lingala 5860 Language Code Lithuanian 5866 Macedonian 5957 Malagasy 5953 Malay 5965 Malayalam 5958 Maltese 5966 Maori 5955 Marathi 5964 Moldavian 5961 Mongolian 5960 Nauru 6047 Nepali 6051 Norwegian 6061 Occitan 6149 Oriya 6164 Afan Oromo 6159 Panjabi 6247 Pashto Pushto 6265 Persian 5247 Polish 625...

Page 72: ...VD RW discs with this unit JPEG Joint Photographic Experts Group JPEG is a method of compressing still image files You can copy JPEG files on CD RW R discs from a computer and play back the files on this unit MP3 MPEG Audio Layer 3 MP3 is a method of compressing files You can copy MP3 files on CD RW R discs from a computer and play back the files on this unit PBC Video CD only Playback Control Thi...

Page 73: ...065 1998 EN60825 1 Edition 1 2 2001 General System DVD Video DVD RW R DVD RW R CD DA CD RW R Video Cassette Tape VCR video heads Four heads Power requirements 220 240 V 10 50 Hz 0 5 Power consumption 35 W standby 5 0 W Weight 4 3 kg Dimensions width x height x depth 435 x 99 5 x 262 mm Operating temperature 5 C to 40 C Operating humidity Less than 80 no condensation TV format PAL B G Recording Rec...

Page 74: ...74 EN ...

Page 75: ...75 EN ...

Page 76: ...EN DR MV2SEU cov_H9770ED_EN fm Page 1 Tuesday July 26 2005 5 07 PM ...

Reviews: