background image

– 5 –

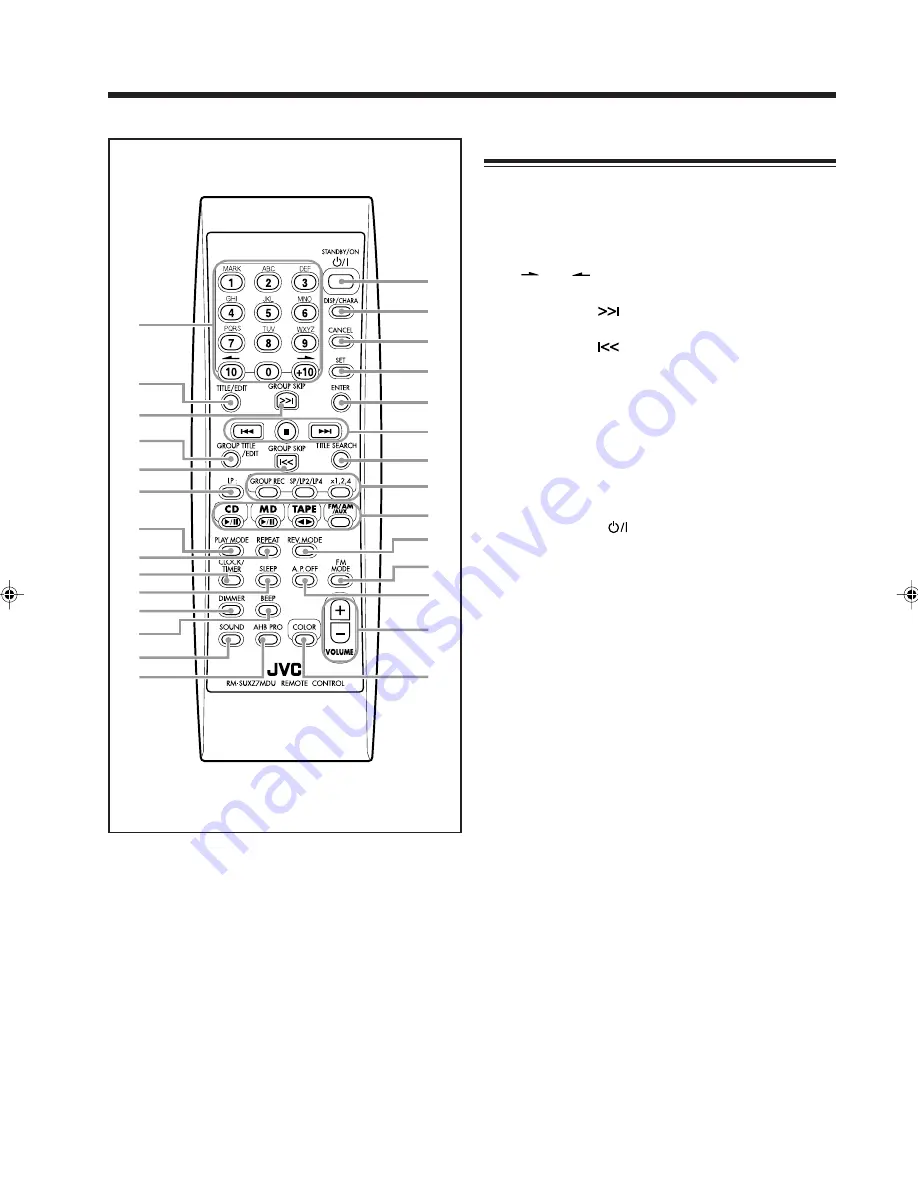
Remote Control

1

Number buttons
• 1 – 10, 0 and +10 buttons

(12, 18, 21, 25, 26, 44 – 46, 52 – 55)

• Character entry buttons (A – Z, 0 – 9) (28, 57)
• MARK button (28, 57)

 and 

 buttons (15, 28, 52, 56 – 58)

2

TITLE/EDIT button (52 – 56)

3

GROUP SKIP 

 button (27, 45 – 50)

4

GROUP TITLE/EDIT button (44 – 50, 56)

5

GROUP SKIP 

 button (27, 45 – 50)

6

LP: button (36)

7

PLAY MODE button (21, 22, 25 – 27)

8

REPEAT button (22, 27)

9

CLOCK/TIMER button (12, 60 – 62)

p

SLEEP button (63)

q

DIMMER button (12, 15)

w

BEEP button (11)

e

SOUND button (14)

r

AHB PRO (Active Hyper Bass PRO) button (14)

t

STANDBY/ON 

 button (11, 61, 62)

y

DISP/CHARA (display/character) button (12, 28, 57)

u

CANCEL button

i

SET button

o

ENTER button

;

Multi operation buttons

¢

7

 and 

4

 buttons

a

TITLE SEARCH button (28)

s

Recording mode setting buttons
• GROUP REC button (36)
• SP/LP2/LP4 button (36)
• x1,2,4 button (36)

d

Source selecting buttons
• CD 

3¥8

 (play/pause) button (11, 13, 20 – 22)

• MD 

3¥8

 (play/pause) button (11, 13, 24 – 28)

• TAPE 

2


3

 (play) button (11, 13, 30)

• FM/AM/AUX button (11, 13, 17, 18, 32)

Pressing one of these buttons also turns on the unit.

f

REV.MODE button (30, 39, 40)

g

FM MODE button (17)

h

A.P.OFF button (11)

j

/ – buttons (13)

k

COLOR button (9, 15)

4

5
6

7

8
9
p
q

w

e
r

t

y

u

i

o

;

a

s

d

g

h

j

k

1

2

3

f

EN01-09UX-Z7MD[A]f

02.7.31, 21:21

5

Summary of Contents for 0802MWMMDWJEM

Page 1: ...P UXZ7MD For Customer Use Enter below the Model No and Serial No which are located either on the rear bottom or side of the cabinet Retain this information for future reference Model No Serial No LVT0900 008A A MICRO COMPONENT MD SYSTEM TA News Info ...

Page 2: ...UTION Do not block the ventilation openings or holes If the ventilation openings or holes are blocked by a newspaper or cloth etc the heat may not be able to get out Do not place any naked flame sources such as lighted candles on the apparatus When discarding batteries environmental problems must be considered and local rules or laws governing the disposal of these batteries must be followed stric...

Page 3: ... LABEL ON EXTERIOR SURFACE 2 WARNING LABEL INSIDE THE UNIT 1 CLASS 1 LASER PRODUCT 2 CAUTION Invisible laser radiation when open and interlock failed or defeated Avoid direct exposure to beam 3 CAUTION Do not open the top cover There are no user service able parts inside the Unit leave all servicing to qualified service personnel ADVARSEL Usynlig laser stråling ved åbning når sikkerhedsafbrydere e...

Page 4: ...Keep the speakers away from the TV to avoid interference with TV DO NOT install the unit in a location near heat sources or in a place subject to direct sunlight excessive dust or vibration We would like to thank you for purchasing one of our JVC products Before operating this unit read this manual carefully and thoroughly to obtain the best possible performance from your unit and retain this manu...

Page 5: ...ck Tapes 29 Playing Back a Tape 30 Listening to External Equipment 31 Listening to External Equipment 32 Adjusting the Audio Input Level 32 Recording 33 Before You Start Recording on an MD 34 Setting MD Recording Modes 36 Recording CD onto an MD CD Synchronized Recording 36 Recording Other Sources onto an MD 37 Before You Start Recording on a Tape 38 Recording onto a Tape 39 Recording CD onto an M...

Page 6: ...NE TOUCH MD REC button 36 37 d ONE TOUCH TAPE REC button 39 f MD TAPE REC button 40 g PHONES jack 13 See pages in the parentheses for details 1 Disc tray 20 2 Display window 4 3 REV MODE button 25 30 39 40 4 MD 0 eject button 11 24 26 58 Pressing this button also turns on the unit 5 MD 8 play pause button 11 13 24 Pressing this button also turns on the unit 6 Standby On button and STANDBY lamp 11 ...

Page 7: ...ding indicator 36 GROUP 4 Tape operation indicators 30 39 40 reverse mode and 2 3 tape direction 5 TAPE indicator 30 REC indicator 39 40 6 CD MD play mode indicators 21 22 25 27 GROUP PRGM program and RANDOM 7 CD MD repeat mode indicators 22 27 and 8 TITLE SEARCH indicator 28 9 AHBPRO Active Hyper Bass PRO indicator 14 0 SOUND indicator 14 Timer mode indicators timer 60 63 DAILY Daily Timer 61 62 ...

Page 8: ...Hyper Bass PRO button 14 t STANDBY ON button 11 61 62 y DISP CHARA display character button 12 28 57 u CANCEL button i SET button o ENTER button Multi operation buttons 7 and 4 buttons a TITLE SEARCH button 28 s Recording mode setting buttons GROUP REC button 36 SP LP2 LP4 button 36 x1 2 4 button 36 d Source selecting buttons CD 3 8 play pause button 11 13 20 22 MD 3 8 play pause button 11 13 24 2...

Page 9: ...h the FM antenna to the FM 75 Ω COAXIAL terminal 2 Extend the FM antenna 3 Fasten it up in the position which gives you the best reception About the supplied FM antenna The FM antenna supplied with this unit can be used as temporary measure If reception is poor you can connect an outdoor FM antenna FM antenna supplied Outdoor FM antenna not supplied A 75 Ω antenna with coaxial type connector IEC o...

Page 10: ...ic parts of the unit connecting cords and the AC power cord AM antenna Connecting Speakers To connect speakers You can connect the speakers using the speaker cords 3 Vinyl covered wire not supplied AM loop antenna supplied 2 1 1 If cords are covered with insulation twist the core of the cord at the end of each cord then remove the insulation 2 Hold the clamp of the speaker terminal 3 Insert the en...

Page 11: ...lle Projections Holes To remove the speaker grilles The speaker grilles are removable as illustrated below To remove the speaker grille insert your fingers at the top of the speaker grille then pull towards you Also pull the bottom towards you To attach the speaker grille put the projections of the speaker grille into the holes of the speaker Caution on installation This unit is compact but high p...

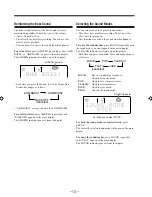
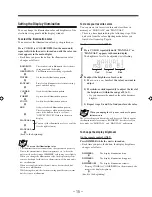
Page 12: ...t When you connect the AC power cord into a wall outlet the unit automatically starts display demonstration Automatic display demonstration Each time you press and hold COLOR DEMO or COLOR on the remote control for more than 2 seconds Automatic display demonstration turns on and off alternately To stop and cancel the display demonstration press COLOR DEMO or COLOR on the remote control during disp...

Page 13: ... 10 Basic and Common Operations The buttons emphasized in the illustration below are used and explained in this section pages 11 to 15 Remote control Main unit ...

Page 14: ... off BEEP OFF alternately The key touch tone is activated regardless of the volume setting and headphones connection Turning On the Power When you press one of the source selecting buttons the unit automatically turns on and starts playback if the source is ready On the remote control On the main unit Pressing CD 0 or MD 0 also turns on the unit To turn on the unit without playing press STANDBY ON...

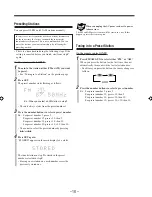
Page 15: ...r the unit is turned on or in standby mode On the remote control ONLY 1 Press CLOCK TIMER 0 00 appears in the main display with the hour digit flashing 2 Press or 4 repeatedly to adjust the hour When you press and hold the button the hour digit changes continuously You can also use the number buttons To adjust the hour to 5 press 5 To adjust the hour to 12 press 10 then 2 To adjust the hour to 20 ...

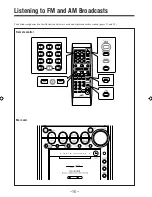
Page 16: ...ss FM AM AUX The unit automatically turns on when the unit is in standby and the last selected source appears in the main display Each time you press the button the source changes as follows On the main unit Press FM AM to select the tuner Each time you press the button the band alternates between FM and AM Press AUX DVD to select the external equipment For more detailed tuner operations see pages...

Page 17: ...und modes press SOUND repeatedly until FLAT appears in the main display The SOUND indicator goes off from the display Reinforcing the Bass Sound The richness and fullness of the bass sound is clearly maintained regardless of how low you set the volume Active Hyper Bass Pro This effect does not affect recording You can use this effect only for playback This function also effects the sound from head...

Page 18: ... is a characteristic of this unit and is not a malfunction When a strong light strikes the unit it may become dark but this is not a malfunction While using the unit the electronic swing panel becomes warm but this is not a malfunction To create your favorite colors You can create two favorite colors and store them in memory as MANUAL1 and MANUAL2 There is a time limit in doing the following steps...

Page 19: ... 16 Listening to FM and AM Broadcasts Remote control Main unit The buttons emphasized in the illustration below are used and explained in this section pages 17 and 18 ...

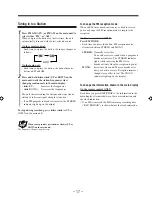
Page 20: ...tedly press or 4 or UP or DOWN on the main unit The frequency changes step by step To change the FM reception mode When an FM stereo broadcast is noisy or hard to receive you can change the FM reception mode to improve the reception On the remote control ONLY Press FM MODE Each time you press the button FM reception mode alternates between STEREO and MONO STEREO Normally select this You can hear s...

Page 21: ...number 20 press 10 then 10 For preset number 30 press 10 10 then 10 You can also select the preset number by pressing or 4 4 Press SET again STORED appears in the main display for a while The tuned station in step 1 is stored in the preset number selected in step 3 Storing a new station on a used number erases the previously stored one When you unplug the AC power cord or if a power failure occurs...

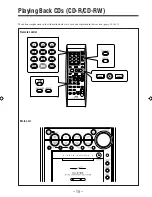
Page 22: ... 19 Playing Back CDs CD R CD RW Main unit The buttons emphasized in the illustration below are used and explained in this section pages 20 to 22 Remote control ...

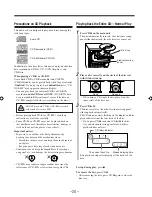
Page 23: ...cases and keep them in cabinets or on shelves Keep the unit s disc tray closed when not in use Continuous use of irregular shaped discs heart shape octagonal etc can damage the disc rotating mechanism CD RWs may require a longer readout time since the reflectance of CD RWs is lower than for regular CDs Playing Back the Entire CD Normal Play 1 Press CD 0 on the main unit The unit automatically turn...

Page 24: ...ck for a moment Press CD 3 8 The CD indicator and the elapsed playing time start flashing on the display When the key touch tone is activated see page 11 the unit keeps beeping while pausing To resume playback press CD 3 8 again To locate a particular point in a track during play Press and hold or 4 Fast forwards the track 4 Fast reverses the track To go to another track Press or 4 repeatedly Skip...

Page 25: ...y The RANDOM indicator lights up on the display Each time you press the button play mode changes as follows 4 Press CD 3 8 The tracks are played at random Random play ends when all the tracks are played once To skip the current track press You cannot go back to the previous tracks by pressing 4 To stop during playback press 7 To exit from Random play mode press PLAY MODE once or twice so that the ...

Page 26: ... 23 Playing Back MDs Main unit The buttons emphasized in the illustration below are used and explained in this section pages 24 to 28 Remote control ...

Page 27: ... the display When the key touch tone is activated see page 11 the unit keeps beeping while pausing To resume playback press MD 3 8 again To locate a particular point in a track during play Press and hold or 4 Fast forwards the track 4 Fast reverses the track Playing Back the Entire MD Normal Play 1 Press MD 0 on the main unit The unit automatically turns on the electronic swing panel slides upward...

Page 28: ... discs LOCKED appears to inform you that the Disc Lock is in use To cancel the prohibition and unlock the discs repeat the above procedure UNLOCKED appears in the main display for a while and the loaded discs both disc and MD are unlocked Programing the Playing Order of the Tracks Program Play You can arrange the order in which the tracks play before you start playing You can program up to 32 trac...

Page 29: ... the programed tracks are played once when Repeat play is not activated To stop during play press 7 The last programed track number and total playing time appear in the main display To exit from Program play mode press PLAY MODE repeatedly so that the unit enters another playback mode Random play Group play or Normal play mode before or after play To check the program contents Before playing you c...

Page 30: ...e repeat play Ejecting the MD or turning off the unit will also cancel the repeat play To stop during play press 7 Playing Tracks in a Group Group Play You can play back tracks in a group To make or edit groups see pages 42 to 50 On the remote control ONLY 1 Load an MD including a group s 2 Press MD 3 8 then 7 The source is changed to MD 3 Press PLAY MODE repeatedly so that MD GROUP appears in the...

Page 31: ... SEARCH END appears in the main display and Normal play mode resumes the TITLE SEARCH indicator goes off To skip the current playback and search for the next track press To cancel title searching press TITLE SEARCH When you press the button during playback or search Normal play resumes Available symbols are as follows Searching for Tracks to Play MD Title Search You can search for the tracks by th...

Page 32: ... 29 Playing Back Tapes Main unit The buttons emphasized in the illustration below are used and explained in this section page 30 Remote control ...

Page 33: ...hown before the clock indication The use of the C 120 or thinner tape is not recommended since characteristic deterioration may occur and this tape easily jams in the pinch rollers and the capstans You can also play back type II and type IV tapes however the sound quality tone may not be reproduced properly Playing Back a Tape You can play back type I tapes 1 Push PUSH OPEN The cassette holder ope...

Page 34: ... 31 The buttons emphasized in the illustration below are used and explained in this section page 32 Remote control Main unit Listening to External Equipment ...

Page 35: ...he sound is not loud enough To change the information shown in the main display On the remote control ONLY Each time you press DISP CHARA the information in the main display alternates between the source indication and the clock indication If an MD is inserted the MD remaining recording time REC REMAIN is shown before the clock indication Listening to External Equipment You can listen to external ...

Page 36: ...Recording Main unit The buttons emphasized in the illustration below are used and explained in this section pages 34 to 40 For recording operations you mainly use the buttons on the main unit Remote control ...

Page 37: ...ack This mark is called a track mark and the portion between two adjacent track marks is called a track When using CD synchronized recording a track mark is recorded at the beginning of each track You cannot put a track mark manually When recording from an analog source such as FM AM broadcasts no track mark is recorded on the MD This means that when playing this MD the MD recorder will regard the...

Page 38: ...reo Long Hour Recording MDLP On conventional MD recorders 2 times long hour recording on MDs has been possible only in monaural sound but this unit allows for 2 times or 4 times long hour recording without losing stereo sound With this feature songs tracks can be recorded on a single MD using different recording length modes SP Standard Play LP2 2 Times Long Play LP4 4 Times Long Play SP Signifies...

Page 39: ...tored for each source 1 Select the source to record 2 Press SP LP2 LP4 Each time you press the button the recording length mode changes as follows SP Records using standard hour stereo recording The SP indicator lights up on the display LP2 Records using 2 times long hour stereo recording The LP2 indicator lights up on the display LP4 Records using 4 times long hour stereo recording The LP4 indica...

Page 40: ...corded both the CD player and the MD recorder stop automatically To change the information shown in the main display On the remote control ONLY Press DISP CHARA Each time you press the button the recording indications the current track numbers of both the disc and the MD and the clock indication appear in sequence in the main display When recording from a CD R RW You cannot make a digital recordin...

Page 41: ...e tabs To re record on a protected tape cover the holes with adhesive tape Do not use type II and type IV tapes since the unit is not compatible with such tapes The use of the C 120 or thinner tape is not recommended since characteristic deterioration may occur and this tape easily jams in the pinch rollers and the capstans To keep the best recording and playback sound quality If the heads capstan...

Page 42: ... the front side of the tape ends in the middle of a track the recording on the reverse side starts from the beginning of that track if the reverse mode is set to However if the front side ends within 12 seconds from the beginning of a track recording on the reverse side starts from the previous track Recording onto a Tape You can use only type I tapes for recording 1 Prepare the source to record T...

Page 43: ...and tape recordings at the same time 1 Prepare a disc After placing a disc press CD 3 8 then 7 before going to the next step You can make a program see page 21 or select Random play mode see page 22 if you want 2 Insert a recordable MD into the MD loading slot and put a recordable cassette into the cassette holder For the MD Set the MD recording length mode LP prefix addition mode and Group record...

Page 44: ... 41 Editing MDs Remote control The buttons emphasized in the illustration below are used and explained in this section pages 42 to 58 Main unit ...

Page 45: ...ge 27 You can play back and repeat the desired group without making a program For example you can play back repeatedly genre B tracks by selecting Group 1 in the left figure Group recording see page 36 You can form a group while tracks are being recorded Group editing You can edit the groups using the following functions Forming a group FORM GR Adding a track to a group ENTRY GR Dividing a group D...

Page 46: ...nctions and Track editing functions From this page to page 50 the group editing functions are explained For details on the track editing functions see pages 51 to 55 Group 1 1 2 3 4 5 6 7 8 9 10 Group 1 Group 2 Group 3 1 2 3 4 5 6 7 8 9 10 11 12 13 14 15 11 12 13 14 15 Group 2 Group 1 Group 2 1 2 3 4 5 6 7 8 9 10 11 12 13 14 15 Group 3 11 12 13 14 15 Group 1 Group 2 1 2 3 4 5 6 7 8 9 10 Group 1 1 ...

Page 47: ...layback repeatedly 5 Press SET If the selected first track belongs to another group GROUP TRACK appears in the main display Select the track correctly in step 4 again If you want to form a group from the selected track only go to step 7 To cancel the setting press CANCEL then repeat from step 4 6 Press or 4 to select the last track of the new group You can select the track using the number buttons...

Page 48: ...R This function allows you to enter a track into a group The track will be added as the last track in the selected group The track numbers will be renumbered To stop any time during the editing process before step 8 press GROUP TITLE EDIT On the remote control ONLY In the following example the process is explained from the very first that is inserting a disc You can also edit an MD during playback...

Page 49: ...l group has a title two separate groups are reassigned the same title as the original group Once a new group is divided the other groups are renumbered To stop any time during the editing process before step 7 press GROUP TITLE EDIT On the remote control ONLY In the following example the process is explained from the very first that is inserting a disc You can also edit an MD during playback in No...

Page 50: ...up Once two groups are joined the other groups are renumbered To stop any time during the editing process before step 6 press GROUP TITLE EDIT On the remote control ONLY In the following example the process is explained from the very first that is inserting a disc You can also edit an MD during playback in Normal play mode 1 Insert an MD you want to edit into the MD loading slot 2 Press GROUP TITL...

Page 51: ...e step 8 press GROUP TITLE EDIT On the remote control ONLY In the following example the process is explained from the very first that is inserting a disc You can also edit an MD during playback in Normal play mode 1 Insert an MD you want to edit into the MD loading slot 2 Press GROUP TITLE EDIT repeatedly until MOVE GR appears in the main display If you want to stop this editing process press CANC...

Page 52: ...to select the group you want to dissolve 5 Press SET To cancel the setting press CANCEL then repeat from step 4 6 Press ENTER EDITING appears in the main display for a while then WRITING and the MD REC indicator flash while the editing you have made is being recorded on the MD Dissolving All Groups UNGR ALL This function allows you to dissolve all the groups You cannot erase the tracks using this ...

Page 53: ... renumbered To stop any time during the editing process before step 6 press GROUP TITLE EDIT On the remote control ONLY In the following example the process is explained from the very first that is inserting a disc You can also edit an MD during playback in Normal play mode 1 Insert an MD you want to edit into the MD loading slot 2 Press GROUP TITLE EDIT repeatedly until ERASE GR appears in the ma...

Page 54: ...You can erase up to 15 tracks at a time Erasing all tracks ALL ERASE Page 55 This function erases data on a disc entirely Erasing a portion of a track By combining DIVIDE ERASE and JOIN for example it is possible to erase only a part of an existing track Introducing Track Editing Functions The groups and tracks can be edited in many ways Group editing functions and Track editing functions From thi...

Page 55: ...r flash while the editing you have made is being recorded on the MD To join the divided tracks again see the JOIN function on page 53 Dividing a Track DIVIDE This function allows you to divide one track into two separate tracks It is useful for example when you want to add track marks at a certain point within a track or if you want to separate a recording When the original track has a title two s...

Page 56: ...roup Joining Two Tracks JOIN This function allows you to join two adjacent tracks into one track When the tracks have their own titles the title of the preceding track is reassigned to the joined track Once two tracks are joined the other tracks and or the groups are renumbered To stop any time during the editing process before step 6 press TITLE EDIT On the remote control ONLY In the following ex...

Page 57: ...s useful to change the order of the tracks as you like Once a track is moved the tracks and or the groups are renumbered To stop any time during the editing process before step 8 press TITLE EDIT On the remote control ONLY In the following example the process is explained from the very first that is inserting a disc You can also edit an MD during playback in Normal play mode 1 Insert an MD you wan...

Page 58: ...and the MD REC indicator flash while the editing you have made is being recorded on the MD BLANK DISC appears in the main display Erasing Tracks ERASE This function allows you to erase unwanted tracks You cannot resume the erased tracks Once tracks are erased the other tracks and or groups are renumbered You can erase up to 15 tracks at a time To stop any time during the editing process before ste...

Page 59: ...each track title 61 However the actual number you can enter may be slightly less than these maximum numbers due to the MD limitations see page 66 A space can be counted as one character When the stereo long hour recording LP2 or LP4 see page 35 method is used for recording the maximum number you can enter for a track title is automatically reduced since LP and a space are automatically added to th...

Page 60: ... as follows 2 Press the character entry button for a character you want to input Ex To enter an A or a press ABC once To enter a B or b press ABC twice To enter a C or c press ABC three times To enter a symbol press MARK repeatedly until the mark you want appears To enter a numeral press 0 9 To enter a space while entering a title press twice To move the character entry position while entering a t...

Page 61: ... track titles you have entered are automatically assigned to the tracks recorded on the MD in sequential order If you enter 17th track title or more they are ignored When you unplug the AC power cord or if a power failure occurs before step 8 The editing you have made is not recorded on the MD Available symbols are as follows Changing the Title You can make a correction or change the title 1 Follo...

Page 62: ... 59 Using the Timers The buttons emphasized in the illustration below are used and explained in this section pages 60 to 63 Remote control Main unit ...

Page 63: ...ng these timers make sure the built in clock is set correctly see page 12 When using the tuner as the source preset stations in advance see page 18 Using Recording Timer With Recording Timer you can make an unattended recording You can set Recording Timer whether the unit is turned on or in standby mode To correct a mis entry any time during the setting process press CANCEL To exit from the timer ...

Page 64: ...igit starts flashing 3 Press or 4 repeatedly to adjust the minute You can adjust the minute using the number buttons 4 Press SET The REC indicator stops flashing and remains lit The contents of this setting appear in the main display for your confirmation 7 Press STANDBY ON or on the main unit to turn off the unit if necessary 20 seconds before the timer on time the REC indicator and REC TIMER STA...

Page 65: ... off automatically in the following cases When you change the source When you enter the MD editing or title entry mode When you turn off the Daily Timer see above 3 Select the source to play back 1 Press or 4 repeatedly to select the source Each time you press the button the source changes as follows You can also use the source selecting buttons When you select CD MD or TAPE prepare it for playing...

Page 66: ...ndicators go off Sleep Timer will be also canceled in the following cases When you turn off the unit When you operate other timer settings When you adjust the clock To sleep with the Sleep Timer and wake up with the Daily Timer The unit turns off when the shut off time comes set by the Sleep Timer and turns on when the timer on time set by the Daily Timer comes 1 Set the Daily Timer as explained o...

Page 67: ... wipe it with a hard cloth DO NOT wipe it strong DO NOT wipe it with thinner or benzine DO NOT apply any volatile substance such as insecticides to it DO NOT allow any rubber or plastic to remain in contact with it for a long time Handling MDs Do not open the shutter The shutter is locked so that it will not open Trying to force it open will break the MD If the shutter opens accidentally close it ...

Page 68: ...ue developed for MD This technology cuts out faint sounds that would not be heard by the human beings This technology based on human sensitivity to sounds reduces recorded data volume up to about one fifth of the original data volume Furthermore this unit takes advantage of the latest ATRAC3 techniques which can reduce the amount of data to record to one 10th or one 20th of the original data volum...

Page 69: ...py Management System Now onto recordable MDs minidiscs you can record copy sound at a recording speed exceeding the normal speed This fact requires some restrictions for protecting copyrights On this unit you cannot re record at either high speed or normal speed a song track that has been recorded once from a CD at high speed until 74 minutes elapse after the first recording of the song started Fo...

Page 70: ...trying to enter the title on the MD which already has over 1 792 characters in total You are trying to record a CD in program play or random play mode using x4 speed recording The UTOC fails to be read There is no more space on the MD or there are over 254 tracks MD is write protected Solution Change the CD Place a disc on the disc tray This is not a malfunction You can play back finalized CD R RW...

Page 71: ...to edit or record on a playback only MD Digital copy of the 2nd generation is prohibited The room temperature is too low to record using x4 speed recording Solution Stop playback and eject the MD and re insert it This is not a malfunction There can be up to 99 groups on an MD This is not a malfunction See Forming a Group FORM GR on page 44 An internal timer works to protect copyrights Wait for 74 ...

Page 72: ...has been cut off while the tape was running Small tabs on the back of the cassette are removed The built in microprocessor has malfunctioned due to external electrical interference Action Check all connections and make corrections See pages 6 9 Unplug the headphones from the PHONES jack Change it with a recordable MD Unprotect the MD See page 34 Reconnect the antenna securely Change the position a...

Page 73: ...s Sampling frequency 44 1 kHz Audio compression system ATRAC Adaptive TRansform Acoustic Coding ATRAC3 Frequency response Normal type I 60 Hz 14 000 Hz Wow and flutter 0 15 WRMS Power requirement AC 240 V 50 Hz Power consumption At operation 65 W On standby 13 W 1 4 W in power save mode Dimensions approx 185 mm x 265 mm x 316 mm W H D Mass approx 5 9 kg See Unpacking on page 6 Type 2 way bass refl...

Page 74: ...J VC 0802MWMMDWJEM EN VICTOR COMPANY OF JAPAN LIMITED 2002 VICTOR COMPANY OF JAPAN LIMITED ...

Reviews: