


CHAPTER 4: Installing the Gateway
28
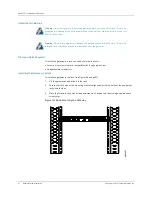
Installing the Cable Management brackets
Copyright © 2010, Juniper Networks, Inc.
Installing the Cable Management brackets
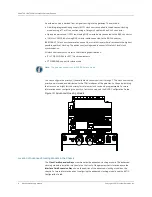
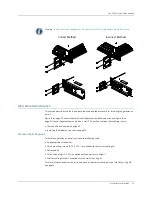
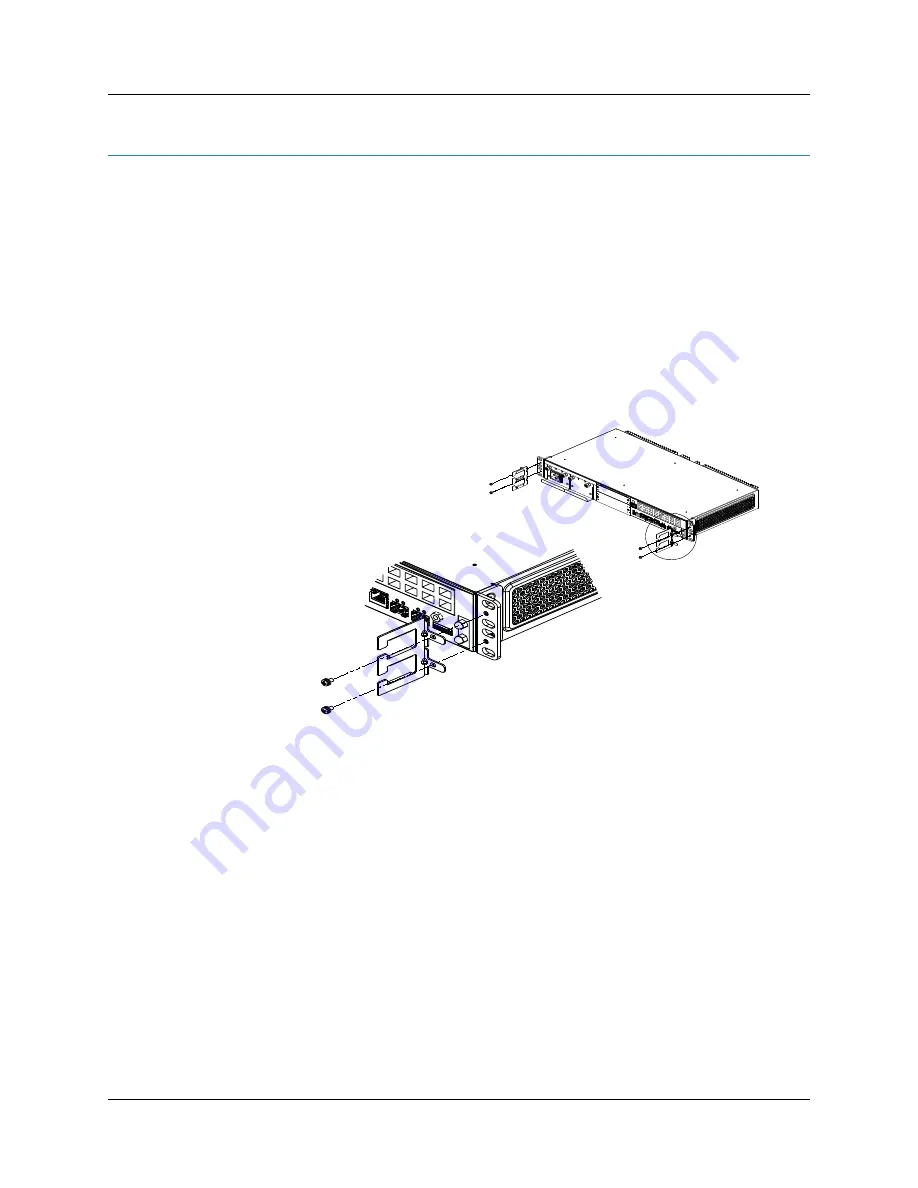
You attach the cable management brackets vertically to each side of the chassis at the front. Use
the cable management brackets to keep the cables organized. Avoid bending optical cables
beyond the proper bend radius. The cable management bracket evenly distributes the weight of a
cable so that the cable is not subjected to undue stress at the connector.
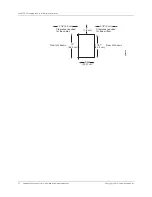
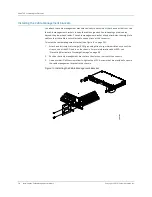
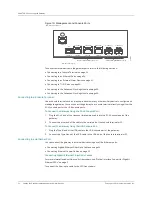
To install the cable management bracket (see Figure 14 on page 28):
1.
Attach an electrostatic discharge (ESD) grounding strap to your bare wrist and connect the
strap to one of the ESD points on the chassis. For more information about ESD, see
“Preventing Electrostatic Discharge Damage” on page 83.
2.
Position the cable management bracket into the slots on the front of the chassis.
3.
Use a number 1 Phillips screwdriver to tighten the M3 X 6 screws that are provided to secure
the cable management bracket to the chassis.
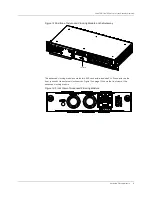
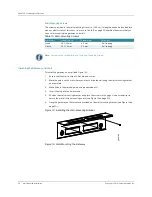
Figure 14 Installing the Cable Management Bracket
g002938
CLOCK CARD
EXP
ANSION B
AY
INTERF
ACE CARD
EXP
ANSION B
AY
Summary of Contents for BX7000
Page 10: ... x Copyright 2010 Juniper Networks Inc ...
Page 12: ... xii Copyright 2010 Juniper Networks Inc ...
Page 18: ...About This Guide xviii Requesting Support Copyright 2010 Juniper Networks Inc ...
Page 20: ... 2 Copyright 2010 Juniper Networks Inc ...
Page 66: ... 48 Copyright 2010 Juniper Networks Inc ...
Page 90: ... 72 Copyright 2010 Juniper Networks Inc ...
Page 122: ... 104 Hardware Compliance Copyright 2010 Juniper Networks Inc ...
Page 131: ...Copyright 2010 Juniper Networks Inc 113 Appendix E Declaration of Conformity ...
Page 132: ... 114 Copyright 2010 Juniper Networks Inc ...
Page 133: ...Copyright 2011 Juniper Networks Inc 115 PART 4 Index z Index on page 117 ...