


3-21
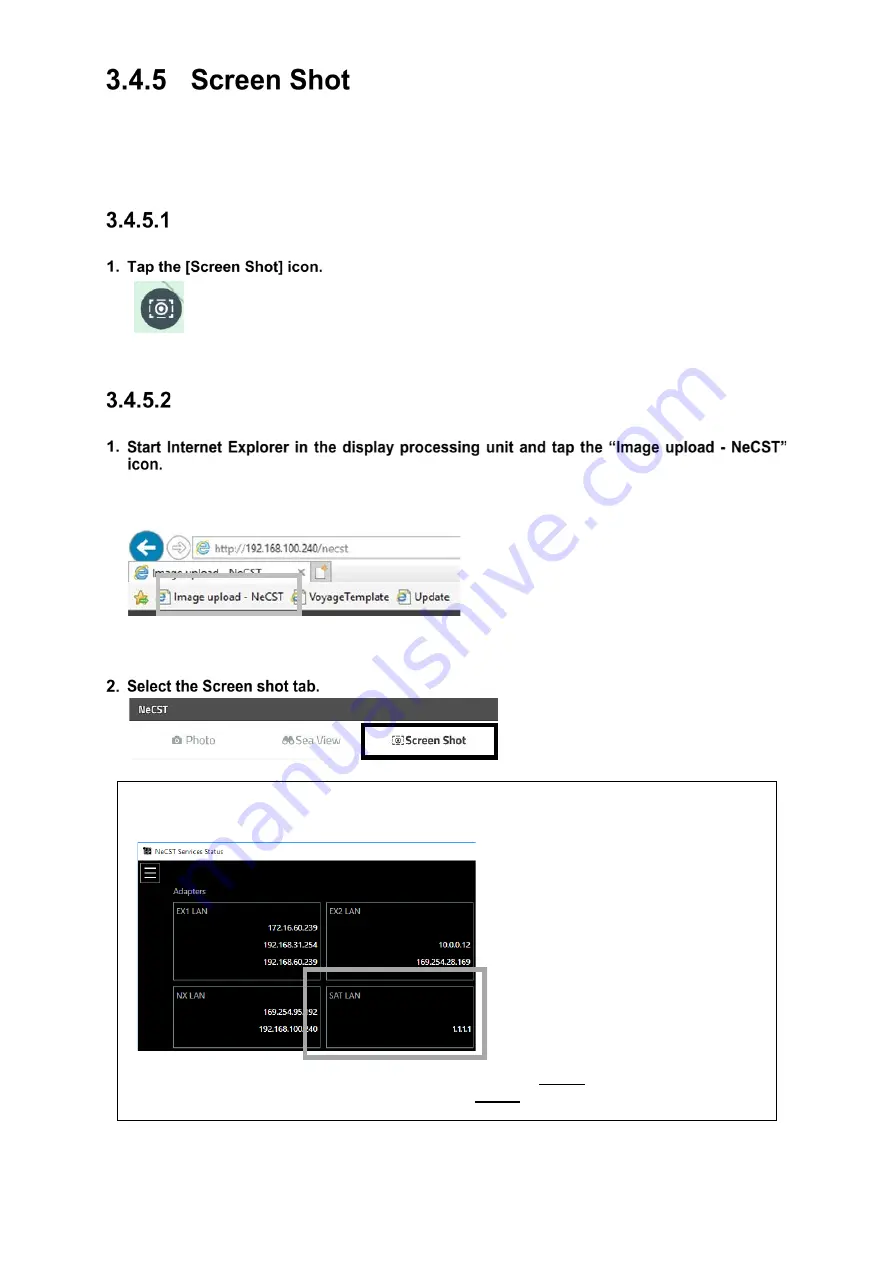
Tapping the [Screen Shot] icon enables capture of the screen shot.
Can save up to 100 screenshots.
Cannot save more than 100 screenshots. Delete unnecessary files.
Capturing Screen Shot
A screen shot is captured.
Checking Screen Shot
Access to “http://192.168.XXX.XXX/necst”
In “192.168.XXX.XXX”, the IP address of the data processing unit is set.
The default IP of data processing unit is 192.168.100.240
The Image-upload screen is displayed.
Memo
Operation is also possible from a PC connected to the same Internet environment as the
NeCST. Start Watcher, check the IP address of SAT-LAN and use it.
Example: Open the browser on another PC and enter “http://1.1.1.1/necst” in the address bar.
Enter the IP address set for SAT-LAN in 1.1.1.1.
Summary of Contents for J-Marine NeCST
Page 2: ......
Page 25: ...xxiii...
Page 33: ...2 6 External Views of HNS 00010 Display Processing Unit MASS APPROX 1 91kg UNIT mm 1 91kg mm...
Page 39: ...2 12 MASS APPROX 18 9kg UNIT mm 18 9kg mm External Views SMT1000I 171 00 219 00 439 00...
Page 40: ...2 13 External Views of AP9630...
Page 42: ...2 15 External Views of HJP 100 3 MASS 6 5kg UNIT mm 6 5kg mm...
Page 61: ...2 34 Figure 2 6 2f FURUNO ECDIS VDR connection diagram...
Page 67: ...3 6 Windows starts Then double tap the NeCST icon The NeCST app starts...
Page 91: ...3 30 Deleting WP of Route The tapped WP is deleted Editing Route Data...
Page 100: ...3 39 The route data of JAN 470 is displayed on ECIDS...
Page 128: ...3 67 Deleting Circle The selected circle is deleted...
Page 143: ...3 82 JAN 701B 901B The Handwritten data is displayed on ECDIS...
Page 152: ...3 91 JAN 701B 901B The Handwritten data is displayed on ECDIS...
Page 155: ...3 94 An addition to a created memo can be made The mode switches to the Edit mode...
Page 181: ...3 120 If Success is displayed and Chart process is displayed Running update is completed...
Page 182: ...3 121 Starting the Chart Import Software The chart import software starts...
Page 217: ...3 156 The photo list is displayed The selected photo and icon are displayed...
Page 275: ...6 2...
Page 287: ...7 12...
Page 290: ......
Page 291: ......


