background image

C – 14

16026923

© 2006 Maytag Services

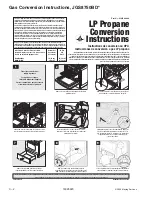
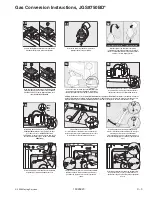
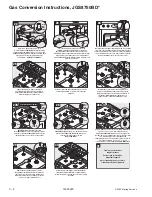
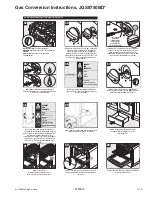
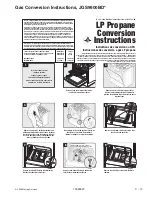
Gas Conversion Instructions, JGS9900BD*

1

14

3

2

1.42mm

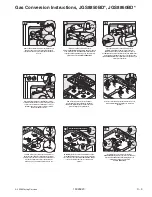
Remove 1.42 natural broil orifice hood./Retirez la tête

du gicleur de gril n° 1,42 pour gaz naturel./Retire la

caperuza del orificio de gas natural 1.42 del quemador

de asar..

15

2

.038

.038

1

16

2

1

Install .038 LP broil orifice hood.

(4-5 turns-DO NOT OVERTIGHTEN)/Installez la tête du

gicleur de gril, .038 pour GPL. (4 à 5 tours – NE SERREZ

PAS TROP)/Instale la caperuza de 0,038 para gas LP del

orificio del quemador de asar.

(4 a 5 vueltas – NO APRIETE DEMASIADO)

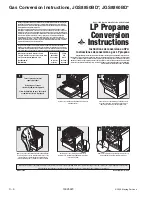
Place the broil burner on the broil orifice hood.

CAUTION: Carefully insert burner pin in oven back./

Mettez le brûleur de gril sur la tête du gicleur de gril.

ATTENTION : Insérez soigneusement le tenon du brûleur

dans le four./Coloque el quemador de asar en la

caperuza del orificio.PRECAUCIÓN: Inserte

cuidadosamente el pasador en la parte trasera del horno.

Reverse steps 6 through 9

to reassemble oven.

Pour assembler à nouveau le four, 

suivez les étapes 6 à 9 en inversant 

leur ordre.

Invierta los pasos 6 al 9 para 

reensamblar el horno.

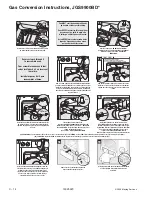
12

13

Caution: Burner igniter is fragile./
Attention : L’allumeur de brûleur est fragile./
Precauci

ó

n: El encendedor del quemador es frágil.

Remove screw and slide the broil burner forward until the

pin clears rear wall./Enlevez la vis et faites glisser en avant

le brûleur de gril jusqu'à ce que le tenon se trouve dégagé

de la paroi arrière./Retire el tornillo y deslice el quemador

de asar hacia adelante hasta que el pasador quede libre de

la pared trasera.

Slip the broil burner off the broil orifice hood./Sortez

le brûleur de gril de la tête du gicleur de gril./Deslice

el quemador de asar para sacarlo de la caperuza del

orificio.

17

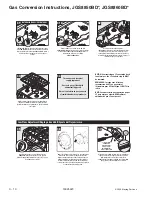
Reposition the broiler burner and tighten screw. Re-

assemble oven. (See steps 2-4)/Remettez en place le

brûleur de gril et serrez la vis. Remontez le four.

(Voyez les étapes 2-4)/Vuelva a colocar ei quemador

de asar en su lugar y apriete el tornillo. Vuelva a

ensamblar el horno. (Vea los pasos 2 al 4.)

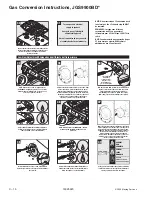
18

1

2

19

2

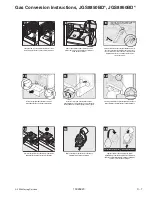
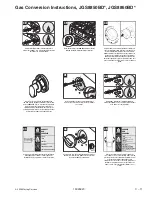
Remove access panel./Retirez le panneau

d’accès./Retire el panel de acceso.

Locate regulator from the front./Repérez le détendeur

à l'avant./Ubique el regulador desde la parte

delantera.

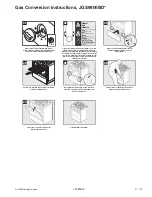
*

CAUTION: Pin MUST be inserted into back of hole on oven to secure burners (C5)./

*

ATTENTION : Le tenon DOIT être introduit à l'arrière du trou du four pour bien loger les brûleurs

(C5)./

*

ATENCIÓN: El pasador DEBE ser introducido en la parte trasera del agujero en el horno para asegurar los quemadores (C5).

1

2

3

1/2"  

(12.5 cm) 

#50 

#50

10 

1

11

2

.047/

0,047/

.047

Orange/
Orange/
Naranja

3

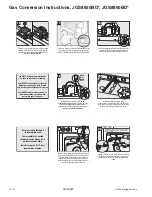
Remove brass orifice hood./Retirez la tête de gicleur

en laiton./Retire la tapa de bronce del orific

Replace orifice hood. DO NOT OVER TIGHTEN./

Remettez la tête de gicleur SANS TROP LA SERRER./

Reemplace la tapa del orificio. NO APRIETE

DEMASIADO.

You MUST start bake and broil hoods 

by hand to avoid cross threading.

Vous DEVEZ insérer les têtes de gicleur 

de cuisson et de gril à la main afin 

d’éviter qu’un filetage ne soit faussé.

Usted DEBE iniciar el enroscado de las 

tapas de horneado y asado a mano 

para evitar dañar las roscas.

Summary of Contents for JGS8750BD Series

Page 1: ...cific models This manual includes but is not limited to the following Service This manual is to be used by qualified appliance technicians only Maytag does not assume any responsibility for property damage or personal injury for improper service procedures done by an unqualified person JGS8750BD JGS8850BD JGS8860BD JGS9900BD Gas Slide In Range ...

Page 2: ...ervicers and Consumers WARNING To avoid risk of severe personal injury or death disconnect power before servicing working on appliance to avoid electrical shock To locate an authorized servicer please consult your telephone book or the dealer from whom you purchased this product For further assistance please contact Customer Service Support Center CAIR Center Web Site Telephone Number WWW JENNAIR ...

Page 3: ...ly Removal Select Models 24 SparkModuleReplacement 25 ManifoldAssemblyRemoval 25 ControlPanelAssemblyRemoval 25 ElectronicControlReplacement 25 Burner Switch Replacement 25 MeatProbeReceptacleReplacement Select Models 25 BackPanelRemoval 25 CoolingFanReplacement 26 Downdraft Blower Motor Removal Select Models 26 ConvectionMotorRemoval SelectModels 26 ConvectionElementReplacement SelectModels 26 Ba...

Page 4: ...te of California to cause cancer birth defects or other reproductive harm To reduce the risk from substances in the fuel or from fuel combustion make sure this appliance is installed operated and maintained according to the instructions in this manual Due to the nature of cooking fires can occur as a result of overcooking or excessive grease Although a fire is unlikely if one occurs proceed as fol...

Page 5: ...tall range directly over carpeting Using the Oven Do not leave children alone or unattended where a range is hot or in operation They could be seriously burned Do not allow anyone to climb stand or hang on the door They could damage the range and cause severe personal injury Wear proper apparel Loose fitting or hanging garments should never be worn when using oven Flammable material could ignite i...

Page 6: ...y Devices Safety devices and features have been engineered into the product to protect consumer and servicer Safety devices must never be removed bypassed or altered in such a manner as to defeat the purpose for which they were intended Listed below are various safety devices together with the reason each device is incorporated in the gas ranges Pressure Regulator Maintains proper and steady gas p...

Page 7: ... 9 0 0 B D B Brand A Amana C Magic Chef G Graffer Sattler H Hardwick J Jenn Air M Maytag N Norge U Universal Y Crosley Product Type A Accessory Cartridge C Cooktop Updraft Countertop D Downdraft Cooktop or Warming Drawer E Eyelevel Range G Grill L Range 20 M Range 36 P Drop In 24 Q Wall Oven 27 R Range Free Standing 30 S Slide In 30 T Range Hood V OTR W Wall Oven Y RV Range Z RV Top Fuel B Butane ...

Page 8: ...ag product call 1 800 688 9900 or visit the Web Site at www jennair com For Amana product call 1 800 843 0304 or visit the Web Site at www jennair com For product inCanada call 1 800 688 2002 When contacting provide product information located on rating plate Record the following Model Number ___________________ Manufacturing Number ___________________ Serial or S N Number ___________________ Date...

Page 9: ...CTION may be made to a properly grounded two prong wall receptacle by the use of a UL listed adapter available at most hardware stores Larger slot on adapter must be aligned with larger slot in the wall receptacle to provide proper polarity WARNING Attaching adapter ground terminal to wall receptacle cover screw does not ground appliance unless the cover screw is metal and not insulated and wall r...

Page 10: ...r Bake Burner Storage or Warming Drawer Convection Fan and Element Shut off Valve Pressure Regulator Backside of Range Electronic Control and Touchpad Top Surface Burners and Grates Model Number Rating Label Burner Control Valves Burner Control Valves Oven Cavity ...

Page 11: ...No spark or only random spark at one ignitor Check for cracked ignitor pinched wire Poor continuity to burner cap Bad ground connection or lack of continuity to ground or ignitor Cracked or broken ignitor extension lead Replace ignitor lead or electrode Clean burner cap and lead Tighten ground connection and correct any breaks in ground path from ignitor path to unit ground path Replace ignitor le...

Page 12: ...ext step Check motor winding for continuity Check for a frozen motor shaft Check for broken wiring between motor and neutral terminal block Oven smokes odor first few times of usage Normal Minor smoking and or odor is normal the first few times of oven usage Failure Codes Electronically Controlled See Fault Code Chart Oven not operating Programming error Power outage Unit in Sabbath mode Switch ra...

Page 13: ...ntrol 1c2c Membrane keyboard disconnected Ensure ribbon cable is securely connected inspect ribbon cable and connector shorts breakage corrosion etc If OK replace control 1c4c Board to Board communication failure Replace control 1c6c EEPROM hardware fault Replace control 1c7c Control not calibrated Replace control 1c8c EEPROM CRC error User Options Replace control 1c81 EEPROM CRC error Cook Profil...

Page 14: ...77 C Temperature F C Resistance Ohms 100 38 1143 200 94 1350 300 149 1553 350 177 1654 400 204 1753 500 260 1949 600 316 2142 700 371 2331 800 427 2516 900 483 2697 1000 538 2874 MEAT PROBE Type NTC Thermistor Calibration 9938 Ω 150 F 65 5 C Temperature F C Resistance Ohms 32 0 163300 68 20 62450 95 35 32660 122 50 18020 158 70 8760 185 85 5360 212 100 3400 COOLING FAN TEMPERATURES MODE FAN ON TEM...

Page 15: ...s OFF Switch down Oven valve Verify gas supply is turned on at regulator Attached to pressure regulator Gas ON Switch up at regulator Gas OFF Switch down at regulator Broil burner Verify gas is supplied Orifice adjusted for Natural or LP Check for obstructions or contamination in ports Factory set to Natural Gas Adjust as necessary Air shutter opening set to 281 to 343 Replace if punctured or torn...

Page 16: ...5 to 105 F 35 to 41 C Closed 79 to 91 F 26 to 33 C Infinite Continuity Spark switch Test for voltage at terminals Disconnect wiring and check for continuity in LITE position 120 VAC Continuity in LITE position Spark ignition electrode Test for resistance of spark lead Test ignitor to chassis Continuity No continuity from ignitor to chassis Top surface burner 5 K btu 9 2 K btu 16 K btu Verify gas i...

Page 17: ... 7 4 12 5 8 5 6 4 6 4 7 3 9 3 10 3 11 3 12 4 8 Measurement Continuity Continuity Continuity Continuity Continuity Continuity Continuity Continuity Continuity Continuity Continuity Continuity Continuity Continuity Continuity Continuity Continuity Continuity Continuity Continuity Continuity Continuity Continuity Continuity Switch membrane assembly NOTE To avoid equipment damage use caution when chec...

Page 18: ...ty Continuity Continuity Continuity Continuity Continuity Continuity Continuity Continuity Continuity Continuity Continuity Continuity Switch membrane assembly NOTE To avoid equipment damage use caution when checking electronic control circuitry JGS9900BD Closed circuitry resistance defined as continuity 2000 Max Ω Pins 1 10 are shorted together for control configuration purposes Detail B See Deta...

Page 19: ... the left ATM pad to select AM or the right ATM pad to select PM Press Setup to exit Day of Week Determines day of week Monday thru Sunday to display on control Press the Setup pad then the left ATM pad then press the right ATM pad until DAY displays Press the left ATM pad to set the day of the week Press the right ATM pad until the correct day displays then press the left ATM pad to select Press ...

Page 20: ... 5 minutes the control enters into a sleep mode Press the Setup pad then press the right ATM pad until ENERGY SAVER displays Press the left ATM pad to select ENERGY SAVER mode settings Press the left ATM pad to enter the energy saver mode or the right ATM pad to exit the energy saver mode Demo Mode Enables a 1 watt standby feature If no pad is pressed within 5 minutes the control enters into a sle...

Page 21: ...VEN LIGHT IDLE r r r r r BAKE RAPID PREHEAT O r r r r BAKE PREHEAT O r r r r BAKE r r r r HIGH BROIL PREHEAT r O r r r HIGH BROIL r r r r LOW BROIL PREHEAT r O r r r LOW BROIL r r r r CLEAN PREHEAT r r r CLEAN r r r KEEP WARM PREHEAT O r r r r KEEP WARM r r r r WARMING DRAWER HIGH r r r r O WARMING DRAWER LOW r r r r O CONVECT ROAST PREHEAT r r O r r CONVECT ROAST r r O r CONVECT BAKE RAPID PREHEA...

Page 22: ...ase the applicable pad to deactivate the associated response The control automatically enters the engineering mode so visual feedback of relay operations is available on the control display Any time a load is activated the cooling fan is activated When the load is deactivated the cooling fan is also deactivated Display will indicate the following Pad Response BAKE Bake relay activated BROIL Broil ...

Page 23: ... Membrane keyboard disconnected Ensure ribbon cable is securely connected inspect ribbon cable and connector shorts breakage corrosion etc If OK replace control 1c4c Board to Board communication failure Replace control 1c6c EEPROM hardware fault Replace control 1c7c Control not calibrated Replace control 1c8c EEPROM CRC error User Options Replace control 1c81 EEPROM CRC error Cook Profile Replace ...

Page 24: ...rocedures to reassemble NOTE Perform gas leak test Removing and Replacing Range 1 Turn off power and remove gas supply from unit 2 Slide range forward from installation position 3 Unplug power cord and disconnect gas line from unit 4 Disconnect downdraft blower motor and remove flex ducting to the blower and range select models NOTE To avoid countertop damage do not move range forward until range ...

Page 25: ... the spark module 4 Remove screws securing spark module to unit chassis 5 Replace and reverse procedure to reassemble Manifold Assembly Removal 1 Remove maintop see Maintop Assembly Removal procedure NOTE If replacing manifold only skip step 2 2 Loosen and disconnect fittings securing surface burner tubing to burner assembly and manifold 3 Remove bolt s securing surface valve s to manifold 4 Remov...

Page 26: ...o rear oven cavity wall 5 Label and disconnect wire terminals from element 6 Reverse procedure to reinstall convection element Bake Burner and Ignitor Removal 1 Turn off electrical power and gas to the range 2 Disconnect gas and power from unit 3 Remove oven door racks and oven bottom 4 Remove screws securing bottom bake cover 5 Raise the back of the bake burner cover and slide cover back to relea...

Page 27: ...nit 2 Open oven door and locate oven light 3 Grasp lens cover and pull outward on one side to gain access to the bulb 4 Carefully remove old bulb by lifting bulb straight out of base 5 When installing the new bulb place cover over socket so the cut out in the glass cover aligns with the base on the socket NOTE To avoid damaging the new bulb and decreasing life of the bulb do not touch new bulb wit...

Page 28: ...awer Removal Select Models 1 Slide strorage drawer out until drawer stops 2 Press tabs up or down depending on side on storage drawer stops to release drawer from slide track 3 Slide storage drawer completely out of slide track 4 Reverse procedure to reinstall storage drawer Storage Drawer Track Disassembly Select Models 1 Remove storage drawer see Storage Drawer Removal Select Models procedure 2 ...

Page 29: ...Models 1 Remove warming drawer see Warming Drawer Removal Select Models procedure 2 Place door on a protected surface 3 Remove screws securing front panel to glass panel 4 Remove screws front panel to warming drawer 5 Remove screws securing sliding tracks to warming drawer 6 Reverse procedure to reassemble warming drawer Warming Drawer Disassembly 1 Remove warming door see Warming Drawer Removal S...

Page 30: ...ess testing requires power and or gas Door Gasket Door Lining Oven Door Insulation Door Trim and Frame Door Handle Upper Shield Glass Frame Inner Glass Outer Glass Door Glass Lower Shield Door Baffle Access Panel Select Models WarmingDrawer Storage Drawer Select Models Front Panel Glass Panel Oven Door Warming Drawer Storage Drawer and Access Panel Disassembly ...

Page 31: ...on information provided in this service manual is representative of a limited number of models Reference the customer s Installation literature included with the product order a copy if needed or consult Jenn Air s website for the specific model www jennair com ...

Page 32: ...he appliance INSTALLATEUR Laissez ces instructions avec l appareil INSTALADOR Deje estas instrucciones con el electrodoméstico Jenn Air Updraft Gas Slide In Range Installation Instructions Instructions d installation Instrucciones de Instalación Cuisinière à gaz encastrable à circulation ascendante Jenn Air Estufa deslizante a gas de corriente ascendente Jenn Air ...

Page 33: ...floor or wall The bracket must be installed to engage the RIGHT rear leveling foot Install the bracket as shown in step 2 MOBILE HOMES The installation of a range designed for mobile home installation must conform with the Manufactured Home Construction and Safety Standard Title 24 CFR Part 3280 formerly the Federal Standard for Mobile Home Construction and Safety Title 24 HUD Part 280 or when suc...

Page 34: ...n front frame behind storage drawer Your range may not be equipped with some of the features referred to in this manual Gas Supply Installation of this range must conform with local codes or in the absence of local codes with the National Fuel Gas Code ANSI Z223 1 latest edition In Canada the range must be installed in accordance with the current CGA Standard CAN CGA B149 Installation Codes for Ga...

Page 35: ...binets in a domestic home are protected with fireproof materials in accordance with American National Standards National Fuel Gas Code or in mobile homes when they are protected with fireproof materials in accordance with the Federal Standard for Mobile Home Construction and Safety To eliminate the risk of burns or fire by reaching over heated surface units cabinet storage space located above the ...

Page 36: ... 2 cm 30 po peut être réduite à pas moins de 61 cm 24 po lorsque les armoires murales d une résidence sont protégées par des matériaux ignifuges conformément aux normes de l American National Standards National Fuel Gas Code Code national des combustibles gazeux ou lorsque les armoires murales d une maison mobile sont protégées par des matériaux ignifuges selon la norme fédérale Mobile Home constr...

Page 37: ...by the normal safe operation of a self clean range Discoloration or delamination may occur To avoid possible damage we recommend increasing the 30 cabinet opening to 31 1 4 minimum and using heat shield CABKIT V The countertop cut out must remain 30 ATTENTION Certaines armoires de couleur blanche et de style européen sont équipées de façades de porte et de tiroir en vinyle blanc fragile Le vinyle ...

Page 38: ...9mm 2 or ou o Drill 1 8 3mm holes Mount ANTI TIP bracket to wall or floor with 2 screws Percez des trous de 1 8 po 3 mm Installez le support ANTIRENVERSEMENT au mur ou au sol avec deux vis Taladre agujeros de 1 8 3 mm Instale el soporte ANTIVUELCO en la pared o en el piso usando 2 tornillos Included Compris Se incluye Not Included Non inclus No se incluye Tools Needed Outils nécessaires Herramient...

Page 39: ...GAS AL PRODUCTO 2 4 1 3 Apply pipe thread compound approved for LP gas to all threads Always hold the regulator in stable position while attaching gas supply line Appliquez sur tous les filetages un composé à joints approuvé pour le GPL Tenez toujours le détendeur en position stable lors du raccordement de la conduite d alimentation en gaz Aplique compuesto para roscas de tuberías aprobado para ga...

Page 40: ...niture Deslice la estufa a su lugar definitivo Instalador tenga cuidado de no dañar el piso No incline la estufa de lado a lado se podría dañar el marco del borde 11 Gas À gaz Gas Electric Électrique Eléctrica Make sure flexible connector and electrical cord are not kinked Assurez vous que le raccord flexible et le cordon d alimentation ne sont pas entortillés Asegúrese de que el conector flexible...

Page 41: ...re information provided in this service manual is representative of a limited number of models Reference the customer s Use and Care literature included with the product order a copy if needed or consult Jenn Air s website for the specific model www jennair com ...

Page 42: ...B 2 16026923 2006 Maytag Services Use Care JENN AIR GAS DOWNDRAFT SLIDE IN RANGE USE CARE GUIDE ...

Page 43: ...should go out during a cooking operation and the burner does not reignite itself turn the burner off If a strong gas odor is detected open a window and wait five minutes before relighting the burner Be sure all surface controls are set in the OFF position prior to supplying gas to the range NEVER touch cooktop until it has cooled Expect some parts of the cooktop especially around the burners to be...

Page 44: ... seep underneath the cooktop However the burner should be cleaned after each use The cap portion of the burner is easily removed for cleaning See page 7 for cleaning directions The burner caps must be correctly placed on the burner base for proper operation of the burner High Performance Burner There is one 16 000 BTU high speed burner on your range located in the right front position This burner ...

Page 45: ...is a permanent type and should be cleaned when soiled Clean in sink with warm water and detergent or in dishwasher IMPORTANT DO NOT OPERATE SYSTEM WITHOUT FILTER Filter should always be placed at an angle As you face the front of the range the top of the filter should rest against the left side of the vent opening The bottom should rest against the right side of the vent chamber at the bottom Impo...

Page 46: ...programming process Control panel features vary by model Oven display above is programmed for a bake operation A B C D E F G H Control Panel Quickset Pads Quickset pads are located on each side of the display window and are used to select the desired function or option in the display window To select the option or function press the Quickset pad next to the word Important Four seconds after enteri...

Page 47: ...displayed times on the Quickset pads repeatedly until the desired time is entered OR 3 Press the number pads to enter the new desired time 4 Press Enter pad Canceling the Timer 1 Press the TIMER 1 or TIMER 2 pad twice If both Timers are active If the desired Timer is already in the foreground press once for edit mode and twice to cancel the Timer If the desired Timer is not in the foreground follo...

Page 48: ...own 6 When the delay time has expired the oven will begin heating COOK TIME the cook time countdown PREHEAT BAKE and the actual oven temperature will be displayed CAUTION Do not use delayed baking for highly perishable foods such as dairy products pork poultry or seafood Cook Hold and Delay options are available when baking When using the Cook Hold option the oven begins to heat immediately after ...

Page 49: ...s pressed Cont Convect Roast To set Convect Roast 1 Place food in the oven 2 Press the Convect pad Rapid Preheat Use to decrease preheating time when using Bake or Convect Bake Use for all foods when baking on one rack After Bake or Convect Bake has been programmed and activated press the Rapid Preheat pad 1 RACK ONLY will display after 10 seconds the display will show RAPID and PREHEAT To return ...

Page 50: ...e without excessive browning Expect broil times to increase and browning to be slightly lighter if the appliance is installed on a 208 volt circuit Food should be turned halfway through broiling time Broil times may be longer when lower broiling temperatures are selected Notes For best results use rack position 2 or 3 when using the Rapid Preheat option For optimum baking and browning results Rapi...

Page 51: ...ature using the Quickset or number pads To set Delay Bake 1 Follow Delay steps 1 4 see above 2 Select from the displayed temperatures or use the number pads to enter the temperature 3 Select the time to cook from the displayed times or use the number pads to enter the cooking time 4 The display will show DELAY TIME the selected function the preset temperature and the delay time countdown When the ...

Page 52: ... displayed 7 Select BAKE or CONVECT 8 Set the oven temperature by selecting one of the displayed temperatures or enter the temperature using the number pads Meat Probe Using the probe supplied with your oven assures excellent roasting results every time 1 Insert the probe into the food item For meats the probe tip should be located in the center of the thickest part of the meat and not into the fa...

Page 53: ...s Favorites pad 2 Select RECIPE LIST 3 Select desired recipe on screen or press arrow key to scroll to the desired recipe 4 Once the recipe is selected oven will begin preheating to the set program You may press the More Options pad to add COOK HOLD or DELAY 5 When finished press the CANCEL pad and remove food from the oven To Save the Last Recipe Completed Bake Convect Bake Convect Roast Broil Ke...

Page 54: ... The language of the screens in the display window can be set to English French or Spanish To change the display language from English 1 Press Setup pad 2 Select LANGUAGE 3 Use the arrow to scroll to next screen if needed 4 Select the desired language 5 Press Setup pad to exit the Setup menu 2 Press arrow key to scroll 3 Select EDIT RECIPE 4 Select desired recipe to edit You may need to press arro...

Page 55: ...factory It is normal to notice some baking time or browning differences between a new oven and an old one As ovens get older the oven temperature can shift You may adjust the oven temperature if you think the oven is not baking or browning correctly To decide how much to change the temperature set the oven temperature 25 F higher or lower than the temperature in your recipes then bake The results ...

Page 56: ...the arrow to scroll 3 Select VOLUME 4 Select HIGH for the highest volume OR Select MEDIUM for medium volume OR Select LOW for the lowest volume 5 Press the Setup pad to exit 12 HR Shutoff The oven will automatically turn off at the end of 12 hours if you accidentally leave it on To turn off this feature 1 Press Setup pad 2 Use the arrow to scroll 3 Select 12HR SHUTOFF 3 Select ON or OFF using the ...

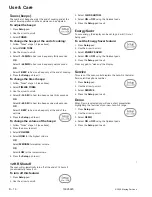
Page 57: ... 2006 Maytag Services 16026923 C 1 Appendix C ...

Page 58: ...serial plate states which gas it was adjusted for at the factory To convert the unit to either Natural gas or LP gas will require replacement of the oven orifice hoods and the top burner orifice hoods and adjustment of the oven burner shutters and the appliance pressure regulator converter cap Cette cuisinière est équipée de gicleurs fixes sur tous les brûleurs et d un détendeur convertible La pla...

Page 59: ...u dessus de la tête de gicleur Coloque el quemador del horno sobre la caperuza del orificio del quemador del horno Reposition bake burner and replace tighten bake burner screws Repositionnez le brûleur de cuisson et remettez puis resserrez les vis du brûleur de cuisson Cambie de posición el quemador del horno y vuelva a instalar apretar los tornillos del quemador del horno 19 20 1 21 3 2 52 Remove...

Page 60: ... con caperuzas de orificios de gas LP NO APRIETE DEMASIADO Remount burner heads and replace screws Hand tighten Réinstallez les têtes de brûleur et remettez les vis Serrez les à la main Vuelva a instalar las cabezas de los quemadores y vuelva a colocar los tornillos Apriete a mano Carefully remove gas orifice hoods and convert one burner at a time Enlevez soigneusement les têtes de gicleur pour ga...

Page 61: ...ariencia correctas de la llama 1 2 2 41 Replace oven bottom Remettez le panneau inférieur du four Vuelva a instalar el panel inferior del horno Replace oven bottom screws Remettez les vis de la sole du four Vuelva a instalar los tornillos inferiores del horno 37 Replace knobs Turn OFF burners Remettez les boutons Mettez les brûleurs sur OFF ARRÊT Vuelva a instalar las perillas APAGUE los quemadore...

Page 62: ... Cette cuisinière est équipée de gicleurs fixes sur tous les brûleurs et d un détendeur convertible La plaque signalétique de cet appareil indique le réglage fait à l usine pour un certain gaz La conversion de l appareil au gaz naturel ou au GPL nécessite le remplacement des têtes de gicleur du four et des têtes de gicleur du brûleur supérieur ainsi que le réglage des obturateurs de brûleur du fou...

Page 63: ... un lado y levántelo para sacarlo del orificio 10 11 1 2 12 Remove warming drawer Retirez le tiroir de réchauffage Retire el cajón de calentamiento Remove screws from panel and then remove panel Retirez les vis du panneau puis le panneau lui même Retire los tornillos del panel y retire el panel Locate regulator from the front Repérez le détendeur à l avant Ubique el regulador desde la parte delant...

Page 64: ...el quemador del horno sobre la caperuza del orificio del quemador del horno 21 Remove screw and slide the broil burner forward until the pin clears rear wall Enlevez la vis et faites glisser en avant le brûleur de gril jusqu à ce que le tenon se trouve dégagé de la paroi arrière Retire el tornillo y deslice el quemador de asar hacia adelante hasta que el pasador quede libre de la pared trasera Rev...

Page 65: ...ácelas con caperuzas de orificios de gas LP NO APRIETE DEMASIADO Carefully remove gas orifice hoods and convert one burner at a time Enlevez soigneusement les têtes de gicleur pour gaz naturel et convertissez un brûleur à la fois Retire cuidadosamente las caperuzas de los orificios de gas y convierta un quemador a la vez 1 25 2 1 Place the broil burner on the broil orifice hood CAUTION Carefully i...

Page 66: ... pour les brûleurs simples NOTA Repita los pasos 37 a 39 para los quemadores sencillos Adjust each single surface burner one at a time Light burner and turn to lowest setting Remove knob Ajustez chaque brûleur de surface simple un par un Allumez le brûleur et réglez le au niveau le plus bas Retirez le bouton Ajuste los quemadores superiores sencillos uno a la vez Encienda el quemador y ajústelo al...

Page 67: ... du brûleur double NOTA Para este tipo de perilla DEBE retirar el marco de la perilla para realizar los ajustes de las llamas del quemador doble 1 4 CORRECT BON CORRECTO YELLOW JAUNE AMARILLA BLUE LIFTING FLAMME BLEUE SE SOULEVANT AZUL QUE SE SEPARA DEL QUEMADOR 43 44 CORRECT BON CORRECTO YELLOW Open shutter to correct JAUNE Ouvrez l obturateur pour rectifier AMARILLA Abra el obturador para correg...

Page 68: ...talar el panel y los tornillos 48 Replace warming drawer Replacez le tiroir de réchauffage Vuelva a instalar el cajón de calentamiento Move hinges into the first stop position Placez les charnières à la première position d arrêt Mueva las bisagras al primer tope 49 Replace oven door Replacez la porte du four Vuelva a instalar la puerta del horno 50 Close oven door Complete Fermez la porte du four ...

Page 69: ... Invierta este procedimiento para convertir el producto de gas LP a gas natural This range is equipped with fixed orifices on all burners and a convertible appliance regulator The unit serial plate states which gas it was adjusted for at the factory To convert the unit to either Natural gas or LP gas will require replacement of the oven orifice hoods and the top burner orifice hoods and adjustment...

Page 70: ...uemador de asar hacia adelante hasta que el pasador quede libre de la pared trasera Slip the broil burner off the broil orifice hood Sortez le brûleur de gril de la tête du gicleur de gril Deslice el quemador de asar para sacarlo de la caperuza del orificio 17 Reposition the broiler burner and tighten screw Re assemble oven See steps 2 4 Remettez en place le brûleur de gril et serrez la vis Remont...

Page 71: ...L GAS NATURAL 1 09 mm 1 40 mm 1 95 mm 27A Red Rouge Rojo 1 14 mm Blue Bleu Azul 64 mm 91 mm 80 mm 1 65 mm 28 NATURAL NATUREL GAS NATURAL IMPORTANT Remove and keep old natural gas orifice hoods IMPORTANT Retirez et conservez les anciennes têtes de gicleur pour gaz naturel IMPORTANTE Retire y conserve las tapas usadas de los orificios de gas natural Replace with LP gas orifice hoods DO NOT OVERTIGHT...

Page 72: ...a altura de la llama con el destornillador Verify proper flame height and appearance Vérifiez la taille des flammes et leur apparence Verifique la altura y apariencia correctas de la llama Low Flow Adjustment Réglage bas débit Ajuste del flujo minimo 30 Replace burner caps Replace grates Remettez les chapeaux de brûleur Remettez les grilles Vuelva a instalar las tapas de los quemadores Vuelva a in...

Page 73: ...t flames Secure shutter opening with screw Au besoin ajustez les deux obturateurs du brûleur du four pour obtenir les flammes appropriées Fixez l obturateur avec la vis De ser necesario ajuste ambos obturadores del quemador del horno para obtener la llama correcta Fije la abertura del obturador con el tornillo Replace access panel Remettez le tiroir de rangement Vuelva a instalar el cajón de almac...

Reviews: