· 9 ·
REF. 53970
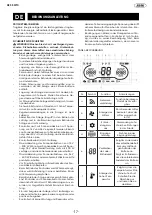
CHARGING MODE
Connect the quick charger to the input of the solar
power generator
Please connect the charger correctly when the power of
the device is low The input power (d) displays the char-
ging power, the atmosphere light (l) displays cyclically,
and the remaining time (e) displays the remaining char-
ging time After 60s, all indicator lights on the back pa-
nel are off and enter standby mode. Please unplug the
charging cable in time to avoid waste of electric energy
1
Fast wall charger (54V 10A) takes 3-4 hours to re-
charge
2
Standard solar charger (54V 7.5A max) with 36V
400W solar panels takes 4-5 hours to recharge
depending on the solar conditions
3
Solar panel (not included)
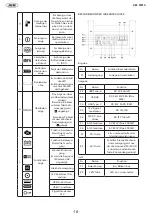
SOLAR CONTROLLER SPECIFICATIONS
CONTROLLER OPERATION AND STATUS INDICATION
After the connection of the whole system is correct, if the
sunlight is sufficient, the LED light will flash several times
and then the digital screen will light up, the controller will
start to work, the screen will display the system para-
meters in a cycle, and the LED light will indicate green
normally
Status indication, as shown in the table below:
Red light off
The solar panel voltage is lower than 12V
Red light on
The solar panel voltage is greater than 12V
Green light on
The solar controller is charging the battery
Green light off
Controller stops charging
1) The voltage of the photovoltaic panel is
insufficient, and the controller does not start
2) When the battery is full, stop charging
3) The battery connection terminal is not
connected properl
b
Controller output voltage (battery voltage)
c
Controller input voltage (solar panel voltage)
d
Controller input current (solar panel current)
FUSE
It is not a button; its function is reverse protection of
controller output If the output terminal of the contro-
ller is connected reversely, the fuse will blow to protect
the controller from damage To unscrew the fuse, turn it
counterclockwise
NOTE: Two fuses are included so that the customer can
replace them if necessary
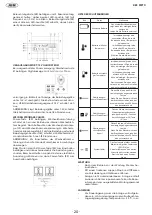
LIGHTING FUNCTION
Press the lighting button (K2), the illumination LED (L8) li-
ghts up; press the lighting button (K2) again, the illumina-
tion LED (L8) turns off.
Press the illumination button (K2) and stay 2s, the illumi-
nation LED (L8) flashes (frequency 3Hz), press the lighting
button (K2) again, the illumination LED (L8) turns off, and
it can be cycled
b
c
d
LED LIGHTS
Indicaciones de capacidad de la
batería
Battery capacity indications
OPERATION
Under the power off state, press the DC Button (K1) to
observe the remaining battery capacity through the
battery indicator LED (j/k) It will shut down again if the
Standby Button (K1) is pressed again


