· 8 ·
REF. 53970
ASSEMBLY
Connect the solar controller to the solar power generator
input After this, connect the opposite end of the solar
controller to the solar panels (not included)
.
l
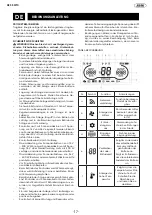
Operation
light
In charge mode, the
light blinks
In discharge mode,
the light is fixed.
m
Overload
indicator
Shows that there
is an overload
problem
If it is a problema in
the direct current
output, it will display
If it is a problema
in the alternating
current output, it will
display
n
Indicadores
de función
Function no availa-
ble in this model
Function no availa-
ble in this model
Alternating current
output
It will display the
frequency (50 or
60Hz).
Direct current output
12V port, direct
current
USB-A port
USB-C port
Cigarette plug, 12V
k
Battery level
indicator
Shows the charge
level of the battery
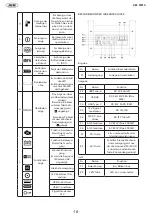
CHARGING PORTS DESCRIPTION
Input
No
Name
Function/specifications
P1
Charging input
port
Connect the charger
Output
No
Name
Function
P2
USB Type-A
DC 5V 2.4A (x2)
P3
USB QC
DC 3.6V~20V 3.3A (Max.
65W)
P4
USB Type-C
DC 20V 5A PD 100W
P5
12V Cigarette
plug
DC 12V 10A
P6
12V DC port
DC 12V 10A (x2)
P7
AC socket
AC 220V (Max. 3000W)
P8
AC socket
AC 220V (Max. 3000W)
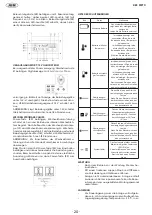
K1
DC button
Turn on/off the direct current
power
K3
AC button
Turn on/off the alternating
current power To change
the frequency (50/60Hz),
keep the button pressed for
5 seconds
Light
No
Name
Function
P9
Lighting
On/Flashing/Off
K2
LED button
Turn on/off the light


