background image

ENGLISH

05

EN

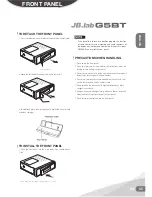
FrOnt panel

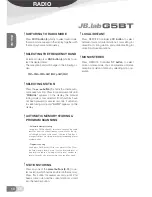
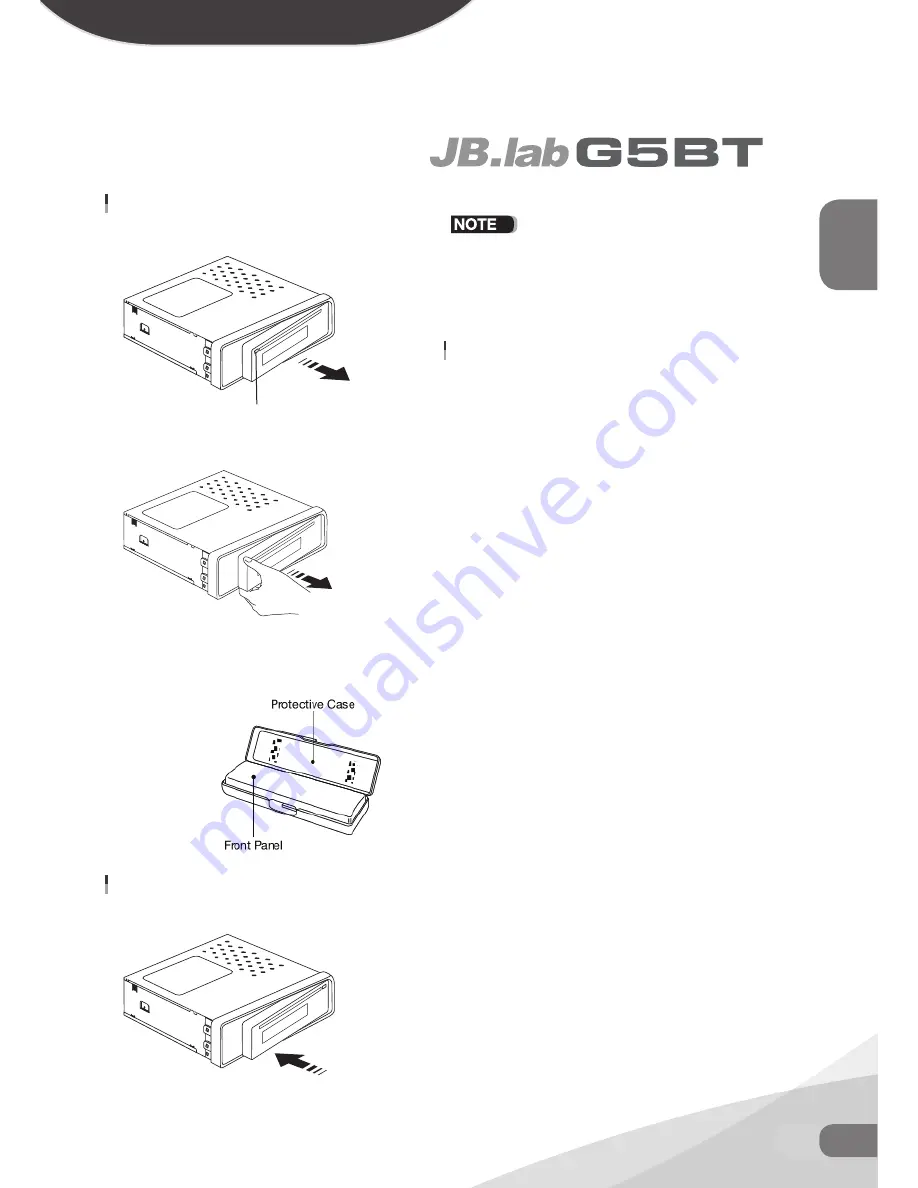
tO DetaCH tHe FrOnt panel

1. Press the release button to release the panel from the left side

2. Grasp the left side of the panel and pull to remove it.

3. Immediately place the front panel in its protective case for safe 
and clean storage.ㅇㅇㅇㅇ

tO inStall tHe FrOnt panel

1. Push the front panel into the main body. You should hear a 
“Click”.

If the panel fails to lock into position properly, the function 
of some controls may be impaired and some segments of 
the display may not become illuminated. If this occurs, press 
RELEASE and reinstall the front panel.

preCautiOnS WHen HanDlinG

1. Do not drop the front panel.

2. Do not put pressure on the display or control buttons when de

taching or re-installing the front panel.

3. Do not touch the contacts on the front panel or on the main unit 

body. It may result in poor electrical contact.

4. If any dirt or foreign substances adhered on the contacts, they 

can be removed with a clean and dry cloth.

5. Do not expose the front panel to high temperatures or direct 

sunlight in anywhere.

6. Keep away any volatile agents (e.g. benzene, thinner, or insecti

cides) from touching the surface of the front panel.

7. Do not attempt to disassemble the front panel.

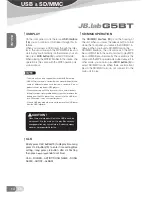
Release button

push panel into main unit until you hear a “click”

Summary of Contents for G5BT

Page 1: ...ENGLISH KOREA Operation Manual http www jbshop kr...

Page 2: ...operation 10 Switching to radio mode 10 Selecting the frequency band 10 Selecting station 10 Automatic memory storing program scanning 10 Station storing 10 Local distant 10 Mono stereo 10 MP3 WMA ope...

Page 3: ...nly Before install the unit please remove the two screws DIN FRONT MOUNT Method A Installation Opening This unit can be installed in any dashboard having an opening as shown below Installing the unit...

Page 4: ...front panel REMOVING THE UNIT 1 Make sure the ignition is turned off then disconnect the cable from the vehicle battery s negative terminal 2 Remove the metal strap attached the back of the unit if at...

Page 5: ...s RELEASE and reinstall the front panel Precautions when handling 1 Do not drop the front panel 2 Do not put pressure on the display or control buttons when de taching or re installing the front panel...

Page 6: ...is securely held in the mounting collar Turn on the ignition to check the unit for proper operation If you have difficulties consult your nearest authorized professional installer for assistance CAUT...

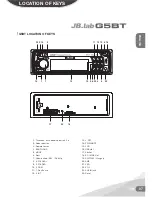
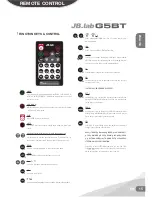
Page 7: ...mote sensor 4 BAND LOUD 5 MODE 6 Eject 7 Volume knob SEL Pick Up 8 6 FOLDER 9 5 FOLDER 10 4 RDM 11 1 Play Pause 12 3 INT 13 2 RPT 14 PWR MUTE 15 LCD 16 USB slot 17 Socket 18 SD MMC slot 19 CLK DISP Ha...

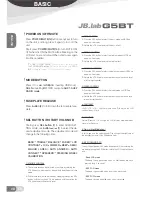
Page 8: ...ed and then rotate the VOL knob to adjust the sound level 2 BASS CONTROL A Press the SEL button to select the bass mode until BAS ap pears on the display B Rotate the VOL knob to adjust the bass effec...

Page 9: ...again to release this function DISPLAY INFORMATION Press DISP button 19 to change the display mode EQUALIZATION Press EQ button 22 to turn on equalization func tion and to select desired audio mode T...

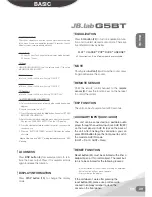
Page 10: ...checks the sig nal strength until one cycle search is finished And then 6 strongest stations are stored into the corresponding preset number button Program scanning Short press AMS button 20 to scan p...

Page 11: ...n the current folder And RPT will appear on LCD Press it again will exit this mode PLAYING ALL TRACKS IN RANDOM Press RDM button 10 to play all tracks on USB SD in random order and RDM will appear on...

Page 12: ...st among the 8 paired devices is replaced by the new one When recognition of the unit by the device to be con nected is deleted PAIRING The system supports Bluetooth function the unit can be connected...

Page 13: ...PHONE G5 If you want to make a call on mobile phone during the talking mode press the SEL button for a long time to transfer the phone call between the mobile phone and the unit And TRANSFER will be d...

Page 14: ...sure not to remove the USB driver from the USB interface CAUTION When there are important files in the USB device do not connect it to the main unit to play Because any wrong operation may cause file...

Page 15: ...LOCAL DISTANT function CLK ID3 Press DISP to change the display information When reading MP3 WMA files press it to display the corresponding informa tion such as folder file song title artist and albu...

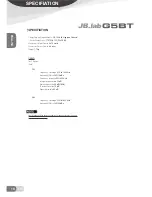
Page 16: ...ight 1 7Kg RADIO For 2 Bands Asia FM Frequency Coverage 87 5 to 108 MHz Sensitivity S N 30dB 10 dBu Frequency response 30Hz 15KHz Image response ratio 50dB Stereo separation 30 dB 1KHz IF response rat...

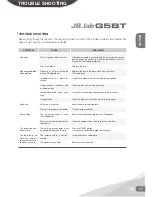
Page 17: ...an 30 degrees The disc is extremely dirty or de fective disc The built in microcomputer is not operating properly due to noise The antenna cable is not con nected The signals are too weak SOPLUTION If...

Page 18: ...32 32 32 32 33 Bass Treble Balance Fader Beep P Volume 33 EQ LOUD 33 34 34 Local DX 34 34 35 MP3 WMA 36 36 36 37 37 38 SD 38 USB 38 38 38 38 39 ID 3Tag 39 40 40 40 41 iOS 42 43 44 44 45 45 46 47 48 US...

Page 19: ...KOREA 19 KO...

Page 20: ...KOREA 20 KO...

Page 21: ...21 KO KOREA G7...

Page 22: ...KOREA 22 KO...

Page 23: ...23 KO KOREA...

Page 24: ...KOREA 24 KO G5 G5...

Page 25: ...25 KO KOREA...

Page 26: ...KOREA 26 KO...

Page 27: ...27 KO KOREA...

Page 28: ...KOREA 28 KO...

Page 29: ...29 KO KOREA 1 2 3 1 1 2 3 4 5 6 7...

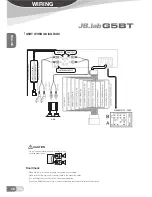
Page 30: ...KOREA 30 KO G5BT WHEEL GROUND BLACK WHEEL KEY2 BROWN WHEEL KEY1 GREY AUTO ANTENNA PINK AMP...

Page 31: ...3 4 BND LOUD 4 5 5 6 LOC 7 SELL 8 FOLDER 6 9 FOLDER 5 10 4 11 1 12 3 13 2 14 15 LCD 16 USB 17 18 SD MMC 19 20 7 21 22 EQ 23 AUX 24 G5BT LOCATION OF KEYS 17 24 18 2 22 14 1 7 15 19 3 11 13 12 6 16 10 9...

Page 32: ...5 CLK SD USB ID3 TAG CLK CLK 3 CLK CLK 8 CLK CLK CLK 7 RADIO RADIO USB SD AUX1 AUX2 SD USB SD USB RELEASE SYSTEMSETTING 1 BASS 10 10 EQ EQ EQ BASS 2 TREBLE 5 5 EQ EQ TREBLE 3 BALANCE 5 5 0 4 FADER 10...

Page 33: ...10 24HOUR 24 12 11 AREA USA EUROPE ASIA LATIN 12 Steering Wheel Calibration BASS STEERING WHEEL CALIBRATION 3 4 BUTTON STORED 0 1 2 49 50 EQ EQ 4 FLAT POP ROCK CLASSICS EQ EQ EQ BASS TREBLE BND LOUD...

Page 34: ...KOREA 34 KO BND BAND FM AM FM 3 AM 2 6 MANUAL FM 5 AUTO ST STEREO MONO LOCAL DX LOC LOCAL DX LOCAL DX LOC LOCAL LOC DX FM MON AMS...

Page 35: ...7 F 8 R 1 F 3 R 28 DATA GND 1 13 C11 14 F 12 R 13 C11 8 F 7 R GND 14 12 13 13 20 F 21 R 2 F 4 R 27 1 2 3 4 2 3 4 5 6 7 7 8 9 10 XD XG XG EF NF TG HD I 30 NF TG 08 CD AV 08 08 08 08 2 A V A V SM7 SM5...

Page 36: ...36 KO KOREA MP3 WMA...

Page 37: ...37 KO MP3 WMA KOREA 1 ROOT FOLDER 1 FOLDER 3 FOLDER 5 FOLDER 6 FOLDER 7 FOLDER 8 MP3 FOLDER 2 FOLDER 4 MP3 1 01 11 ID3 FOLDER 2 FOLDER 4 MP3 AMS...

Page 38: ...38 KO KOREA MODE RADIO USB SD AUX 1 AUX 2 USB SD RADIO AUX USB SD SD SD SD SD SD SD SD SD USB READING USB USB USB USB PAUSE INT INT INT INT MP3 WMA INT 2 INT RPT RPT RPT SD...

Page 39: ...39 KO KO KOREA MP3 WMA RPT 2 RPT RPT RPT RDM RDM RDM RDM 2 RDM 5 6 10 10 ID3 TAG CLK MP3 ID3 Tag MP3 ID3 TAG ID3 TAG ID3 TAG NO TITLE NO ARTIST NO ALBUM G5...

Page 40: ...G Special Interest Group PC 2 45 10 100m 2 II 10m A2DP HSP AVRCP HSP Hands Free Profile A2DP Advanced Audio Distribution Profile AVRCP Audio Video Remote Control Profile Bluetooth 1 2 3 3 4 KOREA 40 K...

Page 41: ...41 KO KOREA PAIRING G5BT 1m G5BT 1 BLUETOOTH PAIRING MODE 2 3 CAR KIT 0000 4 BLUETOOTH READY 5 6 MEMORY RESET BLUETOOTH READY DEVICE CONNECTED...

Page 42: ...iOS iPhone iPod iPad iOS Bluetooth iOS 0000 CAR KIT 0000 KOREA 42 KO iOS iPhone iPod iPad CAR KIT iPhone CAR KIT CAR KIT CAR KIT...

Page 43: ...43 KO KOREA S s 0000 CAR KIT S CAR KIT...

Page 44: ...G5BT SEL SEL BASS TREBLE AUTO ANSWER ON OFF AUTO CONNECT ON OFF SPEAKERS FRONT ALL AUTO ANSWER 5 AUTO CONNECT PC G5BT SPEAKERS FRONT SIM T MENU ENTER NUMBER 0 9 KOREA 44 KO...

Page 45: ...45 KO KOREA RECENT 10 G5BT SEL TRANSFER SEL A2DP G5BT P 42 43 A2DP AVRCP PC 1 2 1 A2DP Advanced Audio Distribution Profile 2 AVRCP Audio Video Remote Control Profile...

Page 46: ...RCA 3 5 3 PC AUX AUX 1 3 5 3 AUX PC AUX AUX AUX 2 RCA PC AUX MODE RADIO USB SD AUX1 AUX2 BLUETOOTH USB SD RADIOAUX USB SD AUX EQ LOUD AUX 2 1 2 3 5 ST 3 MP3 PC AUX 46 KO KOREA...

Page 47: ...LUETOOTH LOUDNESS 3 MP3 WMA 10 10 LOC LOCAL DISTANT MP3 WMA EQ FLAT CLAS POP ROCK USER SET 2 MP3 WMA 4 MP3 WMA SEL BASS TREBLE BALANCE FADER LCD CONTRAST LCD DIMMER BEEP DEMO 24HOUR AREA AUTO ANSWER A...

Page 48: ...d Chassis Dimensions 178 W x 155 D x 50 H RADIO For 2 Bands Asia FM Frequency Coverage 87 5 to 108 MHz Signal noise ratio 60 dB Usable sensitivity 10 dBu Frequency response 30Hz 15KHz Image response r...

Page 49: ...41 KO KO KOREA 49 KO KO KOREA...

Page 50: ...50 KO KOREA G7 G7BT...

Page 51: ...51 KO KO KOREA...

Page 52: ...copyright DS interationnal Corporation All right reserved 1470 21 806 051 806 1170 1 A S 051 806 1170 4 http www jbshop kr FAX 051 806 1151 Corporation 8th Floor ACE HIGHTECH21 B D Digital Zone Centur...

Reviews: