background image

4 - 20 

emVIEW-12T/D


(

User's Manual

)     Use of emVIEW-12T/D


© 

Janz Tec AG


Rev. 1.3 


4.3 

Adjusting the display 

 
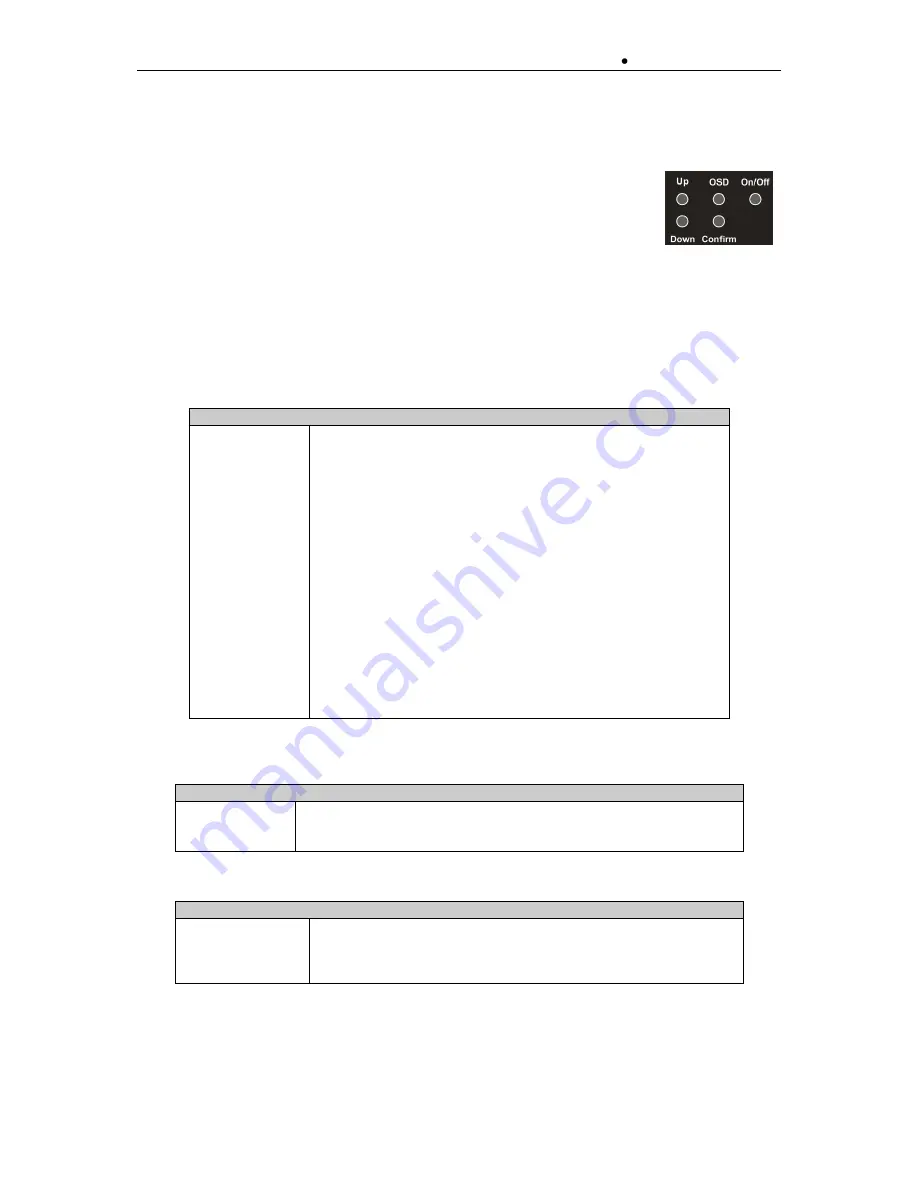
On  the  backside  of  the  emVIEW-12T/D  there  are  five  buttons.  The  first  button  is 

On/Off

, it controls the backlight and display controller. The serial interface and the 

USB  interface  are  kept  alive.  Second  is  the 

OSD

  button,  it  activates  the  OSD 

menu. Third is a 

confirm

 button to save and exit the OSD menu. The two others 

(

Up

/

Down

) are to navigate within the OSD menu. 

 
There  are  two  ways  for  adjusting  the  display.  The  first  is  the  OSD  menu  and  a  second  is  a  Quick 
Settings window.  
 

4.3.1 

Using the OSD menu 

 
Once the OSD Button is activated, the OSD is displayed. The main menu has six tabs 
 

Main menu 


Input select 

This  menu  item  is  the  default  tab  and  the  input  VGA  or  DVI  is 
selectable. 

Note

: These items are selectable only if there is a signal source 

at every connector. 

Brightness 

This  menu  item  shows  four  submenu  items  to  control  the 
brightness,  contrast,  backlight  and  one  for  stepping  up  to  the 
main menu 

Color settings 

This menu controls the colour settings; to adjust the colours the 
wizard is used. Secondary the colour temperature is adjustable. 

Note

: If using the DVI input the wizard is disabled.  

Image settings 

This  menu  controls  the  position  of  the  image.  It  contains  a 
wizard,  the  width,  phase,  horizontal  and  vertical  position  and 
exit. 

Note

: This item is accessible with the VGA input only. 

Tools 

This menu contains tools for controlling the OSD, sharpness and 
overlapped  mode  and  a  factory,  color  and  position  reset  are 
possible. 

Exit 

To exit the OSD. 

table 6: Main menu 


Input select menu 
DVI 

Selects the digital input, if a digital signal source is connected. 

VGA 

Selects the analogue input, if a analogue signal source is connected 

Exit 

To exit this menu. 

table 7: Input select menu 


Brightness menu 
Brightness 

Adjusts the brightness of the display with buttons 

Up/Down

Contrast 

Adjusts the contrast of display with buttons 

Up/Down

Backlight 

Adjusts the backlight of display with buttons 

Up/Down

Exit 

To exit this menu. 

table 8: Brightness menu 


Summary of Contents for emVIEW-12T/D

Page 1: ...Y NOTICE All rights reserved by Janz Tec AG No parts of this technical manual may be modified copied or reproduced in any form or by any means for commercial use without the prior written permission of Janz Tec AG Germany All instructions information and specification contained in this manual are for reference only and remain subject to change without announcement Preliminary ...

Page 2: ...e HW emPC emView 12_Zoll emVIEW_abgesetzt doc ma nual_emview_12td doc Pattern j as entwicklung formulare entwicklung ew ew_manual dot Created ime 07 01 2009 Last Update ime 05 03 2013 Janz Tec AG 2009 2013 Tel 49 5251 1550 0 FAX 49 5251 1550 190 email support janztec com Internet www janztec com figure 1 emVIEW 12T D front view ...

Page 3: ...S232 12 3 2 3 Universal serial bus USB 12 3 2 4 Analogue Video VGA 12 3 2 5 Digital video DVI 12 3 2 6 Display 13 3 3 Driver installation 13 3 3 1 Windows XP driver installation for touch screen on RS232 or USB 13 3 3 2 Ubuntu Linux driver installation for touch screen on RS232 or USB 16 4 Use of emVIEW 12T D 17 4 1 Using and calibrating the touch screen on Windows XP 17 4 2 Calibrating the touch ...

Page 4: ... 21 table 11 Tools menu 21 table 12 VGA quick settings 21 table 13 DVI quick settings 21 About this Manual This is the hardware manual for the emVIEW 12T D It gives all necessary information to users and programmers of the emVIEW 12T D We have tried to keep it compact so there are no special sections for users and programmers I e everything that can be said about the serial port is said in one pla...

Page 5: ...dicates that death or severe personal injury may result if proper precautions are not taken CAUTION Indicates that minor personal injury can result if proper precautions are not taken NOTICE Indicates that damage to equipment can result if proper precautions are not taken Indicates information that we think you should have read to save your time by avoiding common problems Important suggestions th...

Page 6: ...ze 14 32 V DC power supply Fan less cooling concept Protection rating of the front is IP54 Fast and easy mounting High grade aluminium front Customizable design of the front panel 1 2 Functional Overview EmVIEWs are normally delivered with a touch screen To use the touch screen the emVIEW 12T D must be connected to a standard RS232 or USB port of a computer system e g an emPC and a driver must be ...

Page 7: ...emVIEW 12T D User s Manual Introduction 1 7 Rev 1 3 Janz Tec AG figure 2 emVIEW 12T D side view ...

Page 8: ...er or operate the product until you have closed the housing and tightened all screws WARNING Electrical Shock The IO interfaces connectors of the product are only suited to be connected to SELV circuits Use interfaces connectors for their intended use only 2 2 Ambient and Environmental Conditions WARNING This product does NOT fulfil the requirements for a fire enclosure according to EN 60950 1 in ...

Page 9: ...ckside The package also contains a terminal plug for the power connector The emVIEW 12T D needs a power source in between 14 to 30V DC for operation The installation of this equipment is allowed for qualified service personnel only Auxiliary existing rules for installation of electrical equipment must be attended to 3 1 Dimensions and mounting information figure 3 emVIEW 12T D measures The needed ...

Page 10: ...Installation Janz Tec AG Rev 1 3 figure 4 emVIEW 12T D cut out and holes Not true to scale Refers to drawing drill_jig_emv12_rev1 320 mm 260 mm 240 mm 300 mm 8 mm 252 mm 8 mm 109 mm 312 mm 211 mm Hole for M5 screws 130 mm 10 mm 10 mm ...

Page 11: ...tive bonding conductor PE must be connected table 2 shows the measured power dissipation Resolution Picture source Interface used Voltage V Current mA Power W 800x600 VGA RS232 32 04 302 9 68 800x600 VGA RS232 28 04 342 9 59 800x600 VGA RS232 24 04 394 9 52 800x600 VGA RS232 19 02 494 9 39 800x600 VGA RS232 14 05 661 9 29 800x600 DVI RS232 24 04 400 9 64 800x600 VGA USB 24 04 389 9 35 1024x768 VGA...

Page 12: ...nect the touch screen to a host computer the USB can be used too The connector is USB Type B so a standard USB Type A to Type B cable can be used to connect the touch screen with the host The length of USB cable must not exceed 5 m 3 2 4 Analogue Video VGA There are two ways to apply video data One of them is an analogue video signal over the VGA connector High density 15 pin female SUB D Analogue...

Page 13: ...ace only the PenMount DMC 9000 driver has to be installed Is the USB interface used the PenMount driver must be installed as well and an auxiliary driver for the USB transceiver chip FT 232R with virtual COM port VCP must be installed A Linux kernel newer than version 2 4 20 contains the VCP driver Both drivers are receivable for several operating systems visit the driver developer homepages PenMo...

Page 14: ...3 14 emVIEW 12T D User s Manual Installation Janz Tec AG Rev 1 3 The license agreement must be confirmed The location where the driver will be installed to must be chosen ...

Page 15: ...12T D User s Manual Installation 3 15 Rev 1 3 Janz Tec AG After choosing the location the driver will be installed and the device is searched Is the device found the installation is finished by clicking Finish ...

Page 16: ...r V2 2 tar After unzipping the archive a folder pmlinux ubuntu8 04 remains Jumping into it with cd pmlinux ubuntu8 04 and installing the driver with sudo pm setup Choosing the model 4 PenMount 9000 Now the difference is coming when installing the touch screen with RS232 choose the correct device e g dev ttyS0 while using COM1 When the touch screen is connected to USB choose 5 for other serial devi...

Page 17: ... configuration is displayed as shown in figure 7 There are four tabs in the control panel Device Multiple Monitors Tools and About On the device tab a field with found device is shown By selecting one of these devices it can be configured While using more than one monitor with touch screen the Multiple Monitors tab helps to map the touch screens at will The Tools tab shows miscellaneous small tool...

Page 18: ...n screen Further steps are displayed After hitting all the red squares the calibration is done and the touch screen is operational Note The shown example is for calibrating the touch screen on Windows XP system on other Microsoft operating systems or Linux it is similar 4 2 Calibrating the touch screen on Ubuntu 8 04 The function of the touch screen can be checked by looking into the device with c...

Page 19: ...emVIEW 12T D User s Manual Use of emVIEW 12T D 4 19 Rev 1 3 Janz Tec AG The calibration screen is looking like that The calibration is finished by clicking the red squares ...

Page 20: ...ontrol the brightness contrast backlight and one for stepping up to the main menu Color settings This menu controls the colour settings to adjust the colours the wizard is used Secondary the colour temperature is adjustable Note If using the DVI input the wizard is disabled Image settings This menu controls the position of the image It contains a wizard the width phase horizontal and vertical posi...

Page 21: ... Tools menu 4 3 2 Using the Quick Settings The dialog is activated by the UP button The adjustable options a different from the type of video signal VGA or DVI Video signal VGA Brightness Adjusts the brightness of the display with buttons Up Down Contrast Adjusts the contrast of display with buttons Up Down Backlight Adjusts the backlight of display with buttons Up Down Adjust Phase Adjusts the sa...

Page 22: ... MHz or UXGA 1600x1200 at 60 Hz It is recommended that the native resolution of the display is used DVI Source signal which appears on the screen Resolution up to 165 MHz UXGA at 60 MHz It is recommended that the native resolution of the display is used Display Area 246 0x184 5 mm Number of dots 800 x3 H x 600 V RGB vertical stripe Pixel Pitch 0 3075 H x 0 3075 V Brightness 450 cd m typically Cont...

Page 23: ...initial version V1 1 09 12 2009 ate New inverter V1 2 28 06 2010 ime New inverter V1 3 01 03 2011 ime New inverter new touchscreen V1 4 04 11 2012 tme New display panel new front panel V1 5 15 05 2012 ime New Backlight control added dimming functionality 6 1 Manual History Version Release Date Name Changes V1 0 15 12 2008 ime Initial document for the Prototype V1 1 22 06 2009 ime Added technical d...

Reviews: