background image

3

GB - Content

Safety Information 

3

General Information 

5

Certificate of Conformity  

5

Communications Regulations  

5

Disposal information  

5

Technical data | Box contents | Highlights  

5

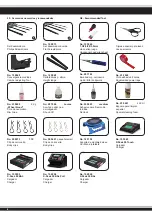
Recommended Tool 

6

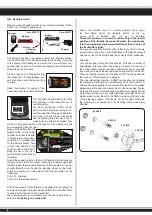
Getting Started 

8

Transmitter 

9 - 14

Controller 

15 - 17

Instructions for the use of Batteries 

19 & 21

Troubleshooting 22

Assembly 

23 - 26

Suspension Settings / Setting points 

27 - 31

Spare parts 

32 - 35

Tuning parts 

36

Luise tyres and rims 

37

Car LED signal lights 

38

Battery power diagram 

39

Service centre 

40

Safety Information

This radio control model is not a toy!

Suitable for persons over 14 years!

Note: 


Not suitable for children under 36 months.


Risk of suffocation.


Contains small parts which can be swallowed. 

WARNING!

•  Read the instructions carefully before using the model.

  Keep the instructions and packing after reading it.

Operating Safety Instructions

•   This device is not intended for use by individuals (Including

  children) with reduced physical sensory, mental abilities, lack

  of experience and / or knowledge, unless they are supervised

  in how the device is to be used.

•   Keep the model away from Children in case it is not

  appropriate to be used by a Child (see note of age).

•   Read carefully and fully understand the instructions before 

  commencing assembly.

•   Take enough safety precautions prior to operating this model. 

  You are responsible for this model’s assembly and safe 

 operation!

•   When assembling this kit, tools including knives are used. 

  Extra care should be taken to aviod personal injury.

•   Read and follow the instructions supplied with paints and/or

  Qcement, if used (not included).

•   Always keep this instruction manual ready at hand for quick

  reference, even after completing the assembly.

•   Keep hands, hair and loose clothing away from rotating and

  heated parts.

•   Never allow anything to come into contact with rotating parts.

•   The model can only be flown in good weather. Do not fly in

  wind, rain or thunder storms.

•   Find a place to fly which complies with any laws, and is free

  from obstacles.

•   Do not operate your model near radio stations, power lines,   

  transformer boxes or similar facilities! This can result in radio  

  interference, causing loss of control over the model.

•   Make sure that no one else is using the same frequency in 

  your running area. Using the same frequency at the same 

  time can cause seriou accidents, whether it’s driving.

•   The model should not be changed in any way, doing so will

  invalidate the guarantee.

•   Do not expose the model or batteries to direct sunlight, always

  keep them in the shade.

General Safety Instructions

•   Assemble this kit only in places out of children’s reach! The kit 

  contains small parts which may cause choking if swallowed, 

  keep away from small children.

•   NEVER fly your model over people and never operate the 

  model in way which may endanger people, small children or 

 animals.

•   Never operate the model on rain or over damp surfaces, this

  may damage the electronics. If R/C unit, motor, or battery get 

  wet, clean and dry thoroughly in a dry shaded area.

•   If this model is the first radio controlled model which you are

  attempting to build or run, you should secure the assistance of

  an experienced model pilot. Your local dealer will be able to

  assist you in locating your local model model sport club or

  experienced pilots in your area.

•   Inspect the model before and after every drive for damage 

  and loosing screws and plug connections. The operator is

  responsible for any damage caused by the operation of flying

 models.

•   Remember that your model is made from such materials as 

  plastic and rubber and as such is inflammable. Keep it away 

  from any open flame, or high temperatures.

•   When operating the model, switch on the transmitter first and 

  then the model, switch off in the reverse order.

•   Always ensure that the throttle stick is in the low position

  before you switch on.

Important Information for use of batteries and battery packs

•   Adhere to the specification of how the batteries should be

  taken out or placed into the product.

•   Do not recharge disposable batteries!

•   Rechargeable batteries should be taken out of the model 

  before charging (if applicable)!

•   Only charge rechargeable batteries under adult supervision!

•   Different types of batteries or new and used batteries should

  not be used together!

•   Adhere to correct polarity!

•   Remove spent batteries from the device!

•   Do not short circuit connection terminals!

•   The included battery is not charged! Charge before use!

•   Do not charge the battery pack immediately after use! If the

  battery pack becomes warm during use, leave it to cool down

  before charging!

•   Avoid short circuits! This could in the worst case cause fires 

  and in any case it will reduce the battery life.

•   Only recharge battery packs with same capacity and

  specifications as the supplied battery pack if you intend to use

  the supplied charger.

•   Keep batteries away from small children!

Information on how to charge the battery pack

•   Connect the battery to the charger.

•   Plug the charger into the socket.

•   Once fully charged, unplug the charger from the wall socket

  and disconnect the battery from the charger! The battery is 

  now ready to use!

Summary of Contents for Cocoon EP RTR 2,4 GHz

Page 1: ...Cocoon EP RTR 2 4 GHz Ref Ord No 05 3240 Cocoon EP 2 4 GHz 05 3241 Cocoon EP LiPo 2 4 GHz ES Instrucciones de montaje GB Instruction ES GB Autorizado en Permittend in EU CH...

Page 2: ...que nadie usa la misma frequencia ya que pueden suceder accidentes Se proh be cualquier modificaci n de la estructura del modelo ya que anular la garant a inmediatamente No deje nunca el modelo el mot...

Page 3: ...model or batteries to direct sunlight always keep them in the shade General Safety Instructions Assemble this kit only in places out of children s reach The kit contains small parts which may cause ch...

Page 4: ...yendo sin limitaciones el montaje el proceso de carga el uso de hasta la elecci n de la zona de aplicaci n Por favor consulte las instrucciones de uso y funcionamiento contiene in formaci n y avisos i...

Page 5: ...arts Highlights Powerful 540 motor Waterproof lipo capable speed controller 40 A Pivot Ball System front Alu Chassis Carbon Design Adjustable suspension Horizontal stearing servo Adjustable oil pressu...

Page 6: ...060 Cinta adhesiva 2 caras Doublesided power tape No 23 0409 20 g Wheel blood Cola de neumatico Rim Glue No 28 1904 Louise Aceite de silicona p amortiguador Shock Oil No 23 2423 medium Adhesivo para f...

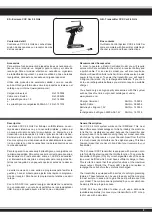
Page 7: ...Cuando se suministra est desactivado Se coloca la palanca del acelerador en posici n neutral v ase el cap tulo A Prueba de Fallas Se presiona el bot n a prueba de fallas en el receptor hasta que enci...

Page 8: ...even though no command was given through the transmitter then also the thrott le needs to be trimmed on the transmitter We encourage you now to activate your receiver s built in Fail safe unit On deli...

Page 9: ...ro lado sin embargo la conexi n de un receptor para el canal asociado es absolutamente necesa ria La emisora con dos canales hace todas las direcciones con la m s alta calidad Para la operaci n es nec...

Page 10: ...s se carguen en la red indepen diente del cargador desconecte el enchufe Si se queda el modelo mucho rato sin utilizar retire las bater as de la emisora del modulo Y para o cargador de la emisora 1 ni...

Page 11: ...4 Car transmitter can be quickly and simply programmed Both channels can be trimmed and the direction changed Fur thermore the transmitter is equipped with a Dual Rate system and a red LED indicates...

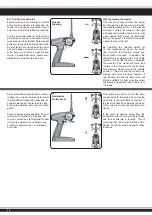
Page 12: ...duales que deben ser operados GB Binding the receiber to the transmitter As with all modern 2 4GHz R C systems the receiver must be bound to the transmitter to ensure that the receiver will only react...

Page 13: ...el servo o el controlador ESC en posici n neutral d Presione el bot n de ajuste el LED va a parpadear por 3 segundos V ase en la gura de la izquierda e Suelte el bot n de ajuste Termina el ajuste 3 Pr...

Page 14: ...function When this function is activated the wheels of the model will move less relative to the movement of the transmit ters steering wheel around the middle position This will allow the model to be...

Page 15: ...agarlo sucede lo mismo en el orden contrario Solamente use conectores y cables de calidad Aseg rese de la buena ventilaci n del regulador Bajo ning n concepto debe envolverlo en gomaespuma o similar S...

Page 16: ...hmica baja y procure tener buena aislamiento usando fundas de termo retr c til Mantenga la distancia entre motor y regulador igual que entre bater a y regulador lo mas corta posible Una vez realizadas...

Page 17: ...po de interferencias F jese tambi n en los servos conectados Temblores en los servos u oscilaciones no deseadas tambi n son un indicio de interferencias Si quiere activar el freno mientras el modelo v...

Page 18: ...cualquier responsabilidad sobre los da os causado o derivados por un manejo err neo de las bater as NiMh Una utilizaci n inadecuada puede hacer que las bater as exploten o se incendien Pueden provoca...

Page 19: ...nd or powder Safety Policy JAMARA accepts no responsibility for any damage caused by or to its products which is caused by failing to follows these ins tructions The incorrect use of these cells can l...

Page 20: ...nos cuidados m nimos La empresa Jamara e K de manera explicita declina cualquier responsabilidad sobre los da os causado o derivados por un manejo err neo de las bater as Litio Una utilizaci n inaprop...

Page 21: ...ls indequate When using the battery incorrect there is a risk of getting fire or acid injuries Overcharging too high power or discharging at low level destroys the cell Protect from mechanical stress...

Page 22: ...a Soluci n El modelo no responde La bater a o las bater as est n vac as o defectuosas Cargue la bateria o sustituyala motor defectuosas Sustituya el motor Cable Flojo o da ado Reconecte el cable o sus...

Page 23: ...iferencial trasero Rear gear assembly diagram 50 5072 50 5076 50 5071 50 5071 50 5071 50 5074 07 9989 50 5073 50 5075 50 5071 50 5074 50 5024 50 5023 50 5166 50 5024 50 5073 07 9989 50 5076 No 50 5155...

Page 24: ...spensi n del delantera Steering assembly diagram Montaje del suspensi n trasera Rear shaft mount assembly 50 5080 50 5081 50 5054 50 5082 50 5097 50 5087 50 5054 07 9989 07 9996 07 9996 50 5079 07 998...

Page 25: ...25 Montaje del amortiguadores Shock assembly Montaje del servo set Buffer assembly 50 5064 50 5029 50 5029...

Page 26: ...26 Montaje de radio placa Upper plate assembly Montaje del soporte del motor Motor assembly 07 4430 07 9841 50 5027 50 5167 50 5093 13 0550...

Page 27: ...The following settings are possible toe in toe out A Toe in The responsiveness of the steering is less direct and the vehicle tends to oversteer but it has better directional stability B Toe out More...

Page 28: ...l ve h culo GB Suspension Settings Front caster high low Less caster Less caster has a worse directional stability but provides a better steering on corner entries High caster A higher caster has a be...

Page 29: ...enos o m s Suspensi n muelle pinza menos o m s Spring tension less or more clip Camino muelle atr s arriba Camino muelle Shock angle Inclinaci n atras Inclinaci n delante Track front Inclinaci n Caste...

Page 30: ...Puntos de ajustes GB Setting points Suspensi n muelle Spring tension Camino muelle Shock angle Camino muelle Shock angle Camino muelle Shock angle Inclinaci n s lo tornillo interior Camber only inner...

Page 31: ...31 ES Puntos de ajustes GB Setting points Suspensi n muelle Spring tension Camino muelle Shock angle Camino muelle Shock angle Camino muelle Shock angle Camino muelle Shock angle...

Page 32: ...tial bevel gear set B No 50 5090 Eje Wheel axle No 50 5027 Bandeja radio Radio tray set No 50 5098 Soporte carroceria Shock tower set No 50 5064 Amortiguador Shock set No 50 5072 Arbol de pinoneria Ma...

Page 33: ...del amortiguador Shock mount No 50 5079 Munon de eje Steering hub set No 50 5080 Engranaje Ball head nut No 50 5081 Tornillo cabeza rotonda Ball heat screw No 50 5082 Munon de eje atras Rear shaft hub...

Page 34: ...5 x 11 x 4 Cojinetes Roll bearing No 26 6400 M3 x 8 Tonillo Conter sunk screw No 50 5046 4 mm E clip No 07 0806 5 x 10 x 4 Cojinetes Roll bearing No 50 5059 M3 x 10 Prisionero Set screw No 50 5053 M3...

Page 35: ...Carroceria claro Body clear No 50 5107 Carroceria Body No 07 4430 AQUA7 MG Servo Servo No 50 5166 Engrenage principal Main Gear No 50 5148 Lexan Tapa p engranaje Gear covering No 08 1805 LiPo Safe LiP...

Page 36: ...onnector No 08 1456 Brushless Set Car Brushless Car set No 36 0110 1 10 Car Liposet Liposet No 50 5187 1 10 Monster Neumatico Llante Wheels rims No 50 5094 1 10 Neumatico Llante Wheels rims No 50 5115...

Page 37: ...2856 12 mm No 05 2857 12 mm 1 2OS No 05 2858 Soporte p rodamiento a bolas Direct intake for ball bearings Neum ticos pegados a la llanta Tyres glued on rims ST Jumbo 100 mm No 05 2868 12 mm No 05 286...

Page 38: ...oyector Spotlight No 50 5284 19 mm Montaje Izquierdo Derecho Por ejemplo para parachoque y bastidor de tubo Funci n Luz permanente 4 LEDs Left Right pin through mounting e g for impact projoection tub...

Page 39: ...a y la constante corriente de la bater a se aumenta la po tencia de conduccion Por eso es importante en los Lipo s de activar la baja tensi n de su reguldor Speed mirra el manual porque la bater a se...

Page 40: ...info modellbauversand de Web www modellbauversand de Web www jamara ersatzteile de Extra Trade Lindenstra e 82 66787 Wadgassen Tel 06834 9604952 Fax 06834 9604963 E Mail info extra trade de Web www e...

Reviews: