ADpcmcia adapter
ADwin
26
ADwin
Installation, manual version 2.1, December 2005
5.1 Initialization of the drivers
The installation is different, depending on the Windows operating system:
Windows NT
Shut down your PC.
Under Windows NT the
ADpcmcia
adapter must be installed or removed only
when the computer is shut down.
Insert the
ADpcmcia
adapter into the PCMCIA slot. Do not yet connect the
ADwin
system.
Start your computer. Because the
ADwin
CDROM has already been installed,
the adapter will automatically be recognized and can be used.
Skip some paragraphs and continue reading with the paragraph: ADconfig
(see below).
Windows 9x, ME, 2000, XP
Insert the
ADpcmcia
board into the PCMCIA slot. Do not yet connect the
ADwin
system.
The operating systems Windows 9x, ME, 2000 and XP recognize the new
hardware and start the device manager in order to install the drivers. If the
operating system does not react, restart Windows.
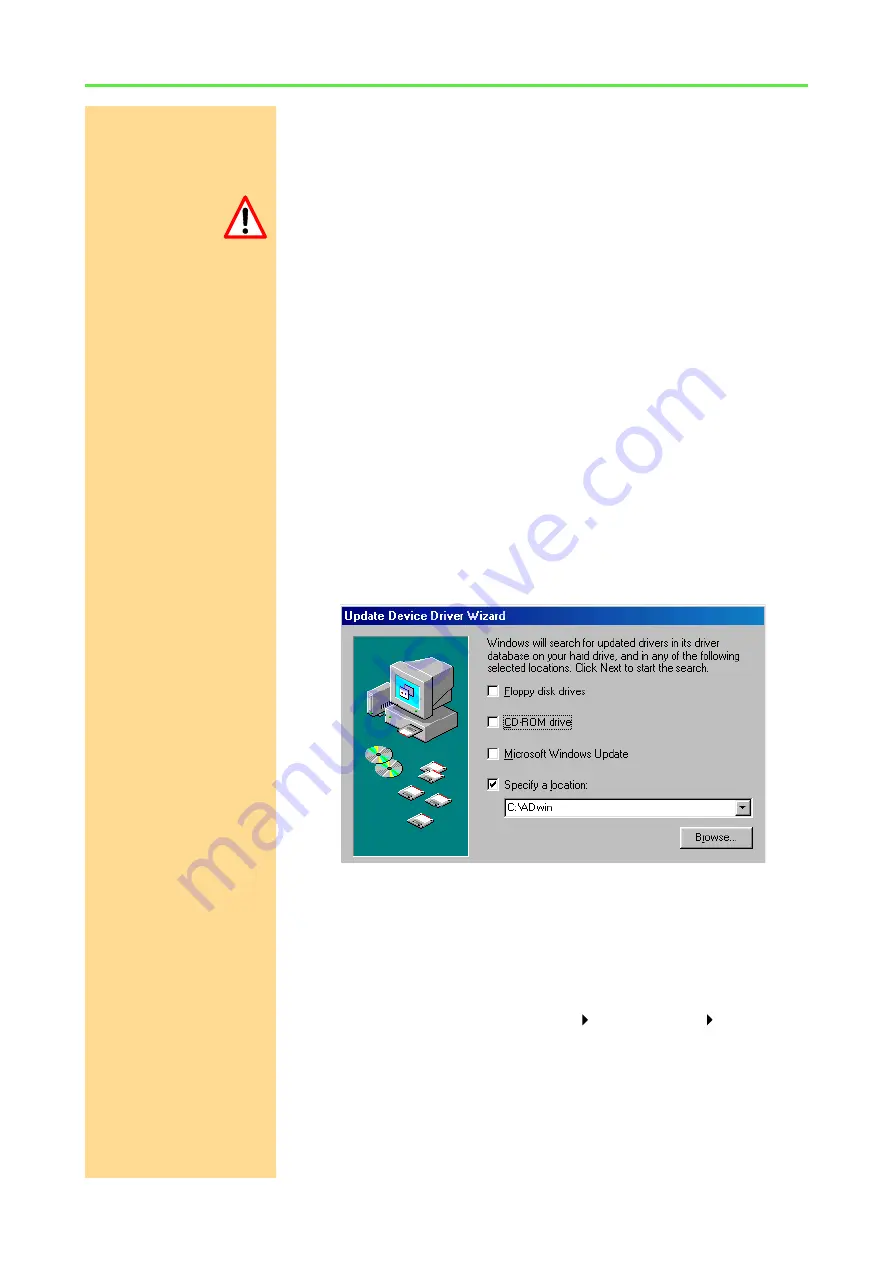
Driver installation from
standard directory
Windows looks for the best driver (default) and asks for a source directory. With
standard installation starting from the
ADwin
CDROM version 3.00.2300, enter
<C:\ADwin>
(else
<C:\ADbasic3>
with older versions). Confirm your input
with „
Next
“.
The device manager automatically finds the driver file fitting for the operating
system
– Windows 9x, ME:
<ADwin.inf>
. It doesn’t matter, if the file selection
dialog shows a different file name.
– Windows 2000, XP:
<ADpcmW2K.inf>
.
Driver update
If the driver installation has not been successful, you can activate the driver
later in the Windows startmenu:
Settings
Control
panel
System
. Start
the "
Device Manager
" under the tab "
Hardware
".
The device manager marks every device which is recognized, but not installed
properly with a question mark or a prohibitory sign. Select the corresponding
ADwin
hardware. In the next screen: "
Properties…
“ select: "
Driver
" and
then: "
Update
d
river
“. Continue as is described above.


