


J-Dream Owner’s Manual
7.
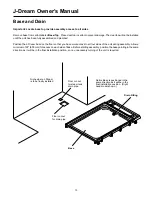
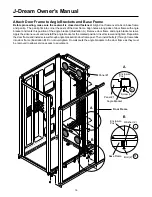
Adjust the levelling screws in the J-Dream base feet and lock them in position.
8.
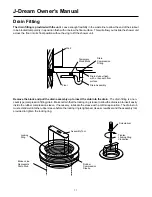
Recheck fit of drain plumbing.
9.
Secure J-Dream in position using clamps provided as shown.
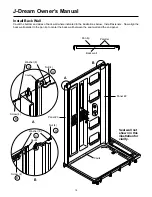
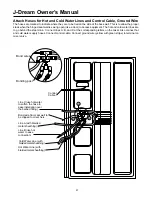
10. Connect showerhead hose to wall outlet and snap drain cover into place.
Move J-Dream into Final Position and Complete Connections
1.
Make sure electric power is OFF at main breaker.
2.
Static test water supply hoses for leaks.
3.
Plug power cord into GFCI protected wall outlet.
4.
Move the assembled J-Dream into final position.
5.
Connect 2" shower drain (see page 12).
6.
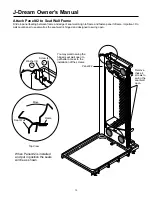
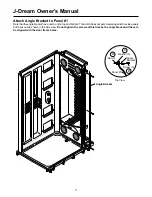
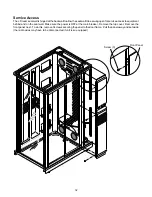
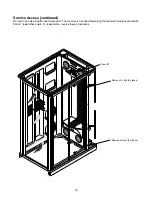
Swing the hinged equipment seat wall open (steps A, B, C below) to connect the
3/4" diameter flexible copper steamer/reservoir drain line (see also page 22).
A. Remove 3 screws along door frame post (see page 33)
B. Remove 4 hex head bolts along seat wall (see page 33)
C. Swing seat wall with panel towards back wall
Close seat wall, reinstall fasteners, continue with step 7.
(Right hand shown;
left hand opposite.)
Adjustable foot
Floor clamp
Lag bolt
Secure J-Dream in position on
floor using clamps (provided)
on two front feet.
Velcro
®
Front
Back Wall
A
24


