2
En
g
lis
h
3
En
g
lis
h
!
Thank you
Thank you for purchasing the Jabra JX10 Bluetooth® Headset. We hope you enjoy it!
This instruction manual will get you started and ready to make the most of your headset.
Remember, driving comes first, not the call!
Using a mobile phone while driving can distract you and increase the likelihood of an
accident. If driving conditions demand it (such as bad weather, high traffic density,
presence of children in the car, difficult road conditions), pull off the road and park
before making or answering calls. Also, try to keep conversations short and do not make
notes or read documents.
Always drive safely and follow local laws.
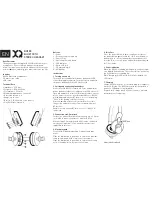
About your Jabra JX10
1.
LED light
• Blue indicates mode (pairing, active or standby)
• Red/green indicates battery level (low, charging, or charged)
2.
Volume up (+), volume down (-)
3.
Charging socket
4.
Pairing button –
press
to put headset
into pairing mode
5.
Answer/end button
• Press
to turn headset on
(blue flash burst indicates success)
• Press and hold
to turn headset off
(blue flash burst indicates success)
• Tap
to answer or end a call
1
What your headset can do
Your Jabra JX10 lets you do all this (dependent on your phone supporting the function:
•
Answer calls
•
End calls
•
Reject calls
•
Voice dialing
•
Last number redialing
•
Call waiting
•
Put call on hold
Specifications
•
Up to 6 hours talk time/standby time up to 200 hours
•
Rechargeable battery with charging option from AC power supply, PC via USB
cable, desktop charger or car charger (not included)
•
Less than 1/3 ounce (10 grams)
•
Operating range up to 33 feet (10 meters)
•
Headset and hands-free Bluetooth profiles
•
Bluetooth specification (see
glossary
) version 1.2
GETTING STARTED
The Jabra JX10 is easy to operate. The answer/end button on the headset performs
different functions depending on how long you press it.
Charge your headset
Make sure that your Jabra JX10 headset is fully charged before you start using it. Use the
AC power supply to charge from a power socket, or charge directly from your PC with the
USB cable provided. Connect your headset as shown in fig. 2. When the LED is solid red,
your headset is charging. When the LED is green, it is fully charged.
Charge from your desktop holder
Connect your USB cable/AC power supply to the desktop holder. Place your JX10 in the
cradle as shown in fig. 3
Instruction:
Duration of press:
Tap
Press briefly
Press
Approx: 1 second
Press and hold
Approx: 5 seconds


