


Mobi 3
No
Identification
Explanation
18
USB 2.0
The USB port allows you to connect USB-compatible devices and
peripherals such as a mouse, keyboard, printer, ...
19
USB 2.0
The USB port allows you to connect USB-compatible devices and
peripherals such as a mouse, keyboard, printer, ...
20
Reset
This button is used to reset the device.
21
Speakers
The device has a number of powerful loudspeakers.
22
Mounting plate
DAESSY mounting system mounting plate
23
Camera (optional)
The device can be equipped with an optional camera for taking photos
and videos.
24
Infrared receiver and transmitter
The infrared receiver is used to record the infrared codes. Via
the infrared transmitter, the programmed infrared signals can be
transmitted to other devices.
2
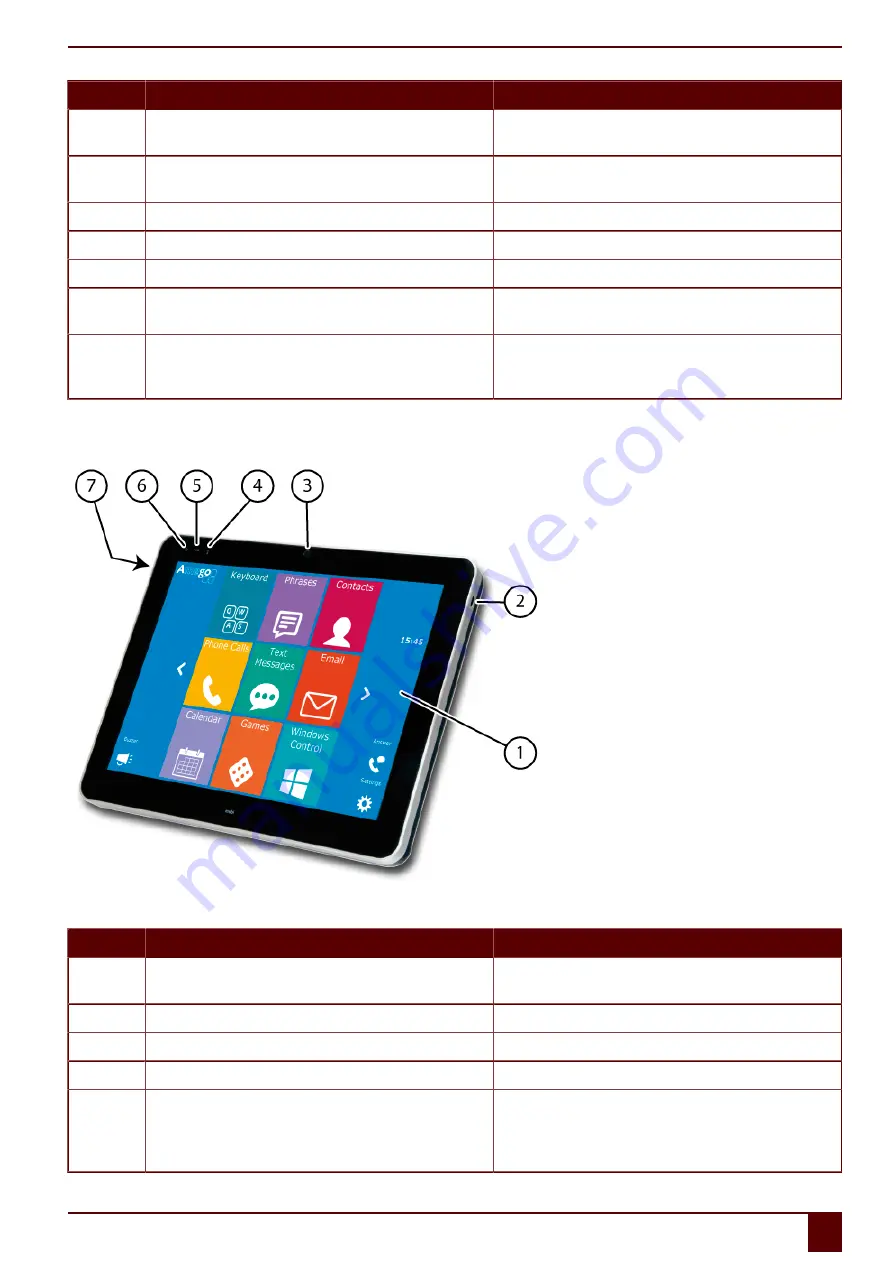
Getting to know the Mobi (capacitative)
Figure 3: Mobi front view
No
Identification
Explanation
1
Touch screen
The device has a 12.1 inch capacitative touch screen. See
on page 12.
2
On/off button
This allows you to switch the device on/off or revert to sleep mode.
3
Webcam
The device has a front camera for taking photos and videos.
4
Infrared receiver
The infrared receiver is used to record the infrared codes.
5
Battery charge indicator
The battery charge indicator lights up as soon as the device is
connected to the mains through the supplied power adapter. The
indicator is amber while charging. The indicator changes to green as
soon as the battery is charged.
B
Description and operation
2
Getting to know the Mobi (capacitative)
9
Summary of Contents for Mobi 3
Page 1: ...Mobi 3 ...
Page 5: ...Mobi 3 A Introduction 3 ...
Page 8: ...Mobi 3 B Description and operation 6 ...
Page 15: ...Mobi 3 C Safety 13 ...
Page 17: ...Mobi 3 D Getting started 15 ...
Page 20: ...Mobi 3 E Control 18 ...
Page 35: ...Mobi 3 F Settings 33 ...
Page 44: ...Mobi 3 G Maintenance and troubleshooting 42 ...
Page 49: ...Mobi 3 H Decommissioning and disposal 47 ...
Page 54: ...Mobi 3 52 ...


