10
.
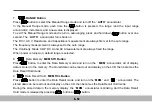
RS232C
Button
(
The
function
of
communication
is
optional
by
user
.)
Press
button
to
enter
the
communication
.
You
will
find
that
the
RS232C
sign
be
it
lit
on
the
display
.
Fixed
one
side
of
cable
to
the
meter
and
connect
the
9
pin
?
s
terminal
of cable to communication
port
1
or
port
2
of
personal
computer
.
Execute
the
software
to
take
the
data
for
you
necessary
.
Buzzer
Output
2kHz
buzzer
sound
is
output
in
following
cases
:
1
.
When
operate
the
key
.
2
.
When
occur
the
over
-
range
.
Except the measurement mode of Resistance
(
Ω
),
Frequency
(
Hz
),
Continuity
( )
and
Diode
(
).
3
.
When
the
continuity
measurement
result
is
less
than
40
Ω
.
4
.
When
the
relative
mode
is
released
.
5
.
When
the
mode
is
changed
from
manual
to
autor ange
by
operating
the
.
Please
refer
the
timing
chart
for
the
timing
.
Low
Battery
Indication
The
""
mark
is
displayed
when
the
battery load voltage drops
below
accurate
operating
level
.
1-10
Summary of Contents for M9803R
Page 1: ...Bench Multimeter Users Manual M9803R...
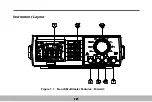
Page 8: ...Instrument Layout Figure 1 1 Bench Multimeter Features Forward 1 2...
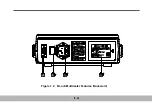
Page 9: ...Figure 1 2 Bench Multimeter Features Backward 1 3...
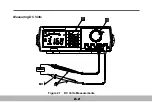
Page 18: ...Measuring DC Volts Figure 2 1 DC Volts Measurements 2 2...
Page 20: ...Measuring AC Volts Figure 2 2 AC Volts Measurements 2 4...
Page 22: ...Measuring DC and AC Amps Figure 2 3 Amps Measurements 2 6...
Page 24: ...Measuring DC and AC Milliamps Figure 2 4 Milliamps Measurements 2 8...
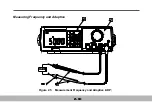
Page 26: ...Measuring Frequency and Adaptive Figure 2 5 Measurement Frequency and Adaptive ADP 2 10...
Page 28: ...Measuring Capacitance Figure 2 6 Capacitance Measurements 2 12...
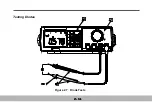
Page 30: ...Testing Diodes Figure 2 7 Diode Tests 2 14...
Page 32: ...Measuring Resistance and Continuity Figure 2 8 Resistance and Continuity Measurements 2 16...

