HIL
1
–
USER
MANUAL
23
Important
Notice
Always
use
the
Ipteq
AC
adaptor
that
was
included
with
your
HIL1,
or
use
AC
adaptors
specified
by
Ipteq
to
avoid
any
risk
of
fire
or
other
damage
to
the
HIL1.
Use
of
an
incompatible
AC
adaptor
could
cause
fire
or
damage
to
the
HIL1
possibly
resulting
in
seriousinjury.
Ipteq
assumes
no
liability
for
any
damage
caused
by
use
of
an
incompatible
adaptor.
Never
plug
the
AC
adaptor
into
a
power
source
that
does
not
correspond
to
both
the
voltage
and
the
frequency
specified
on
the
regulatory
label
of
the
unit.
Failure
to
do
so
could
result
in
a
fire
or
electric
shock,
possibly
resulting
in
serious
injury.
Always
use
or
purchase
power
cables
that
comply
with
the
legal
voltage
and
frequency
specifications
and
requirements
in
the
country
of
use.
Failure
to
do
so
could
result
in
a
fire
or
electric
shock,
possibly
resulting
in
serious
injury.
When
you
connect
the
AC
adaptor
to
the
HIL1,
always
follow
the
steps
in
the
exact
order
as
described
below.
Connecting
the
plug
to
a
live
electrical
outlet
should
be
the
last
step.
Otherwise,
the
DC
output
plug
could
hold
an
electrical
charge
and
cause
an
electrical
shock
or
minor
bodily
injury
when
touched.
As
a
general
safety
precaution,
avoid
touching
any
metal
parts.
Never
place
your
HIL1
or
AC
adaptor
on
a
wooden
surface,
furniture,
or
any
other
surface
that
could
be
marred
by
exposure
to
heat
since
the
HIL1
base
and
the
AC
adaptor's
surface
increase
in
temperature
during
normal
use.
Always
place
your
HIL1
or
AC
adaptor
on
a
flat
and
hard
surface
that
is
resistant
to
heat
damage.
Turning
on
the
power
Press
the
Power
button
to
turn
on
the
HIL1.
The
HIL1’s
touch
panel
will
be
illuminated
and
the
HIL
logo
will
appear
on
the
screen.
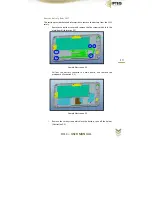
Initial
Setup
At
startup
the
HIL
logo
is
displayed
on
the
screen
followed
by
an
animation
that
runs
during
the
whole
loading
process.
At
the
end
of
the
loading
process,
the
Setup
Screen
will
be
the
first
screen
displayed
(only
when
you
turn
on
the
power
the
first
time
and
until
you
complete
the
setup
procedures).
Setup
your
HIL1
according
to
the
following
steps:
1.
Language
Setup:Choose
your
preferred
system
language
Summary of Contents for HIL1
Page 1: ......

