background image


FALCO Instrument User Manual V1.2R 


Unrivalled Gas Detect

ion.

          Page 33 of 46 


ionscience.com


Press the 

Enter


key to return to the previous screen (above). Then move the cursor to the “set” 

symbol 

 and apply the gas to the PID sensor.  After 2 minutes press the 

Enter

   key. The status 

light will ’blink’ briefly to confirm the setting has been changed.


4)


Remove the span gas cylinder. 

5)


Press the   button to exit span 1 mode. 


Span 2


Span 2 is used to calibrate span 2 of the Falco. 

1)


Attach the span gas cylinder to the Falco. 

2)


Enter span 2 mode by moving the cursor to the span 2 icon 

  and then press the


Enter   

key

.


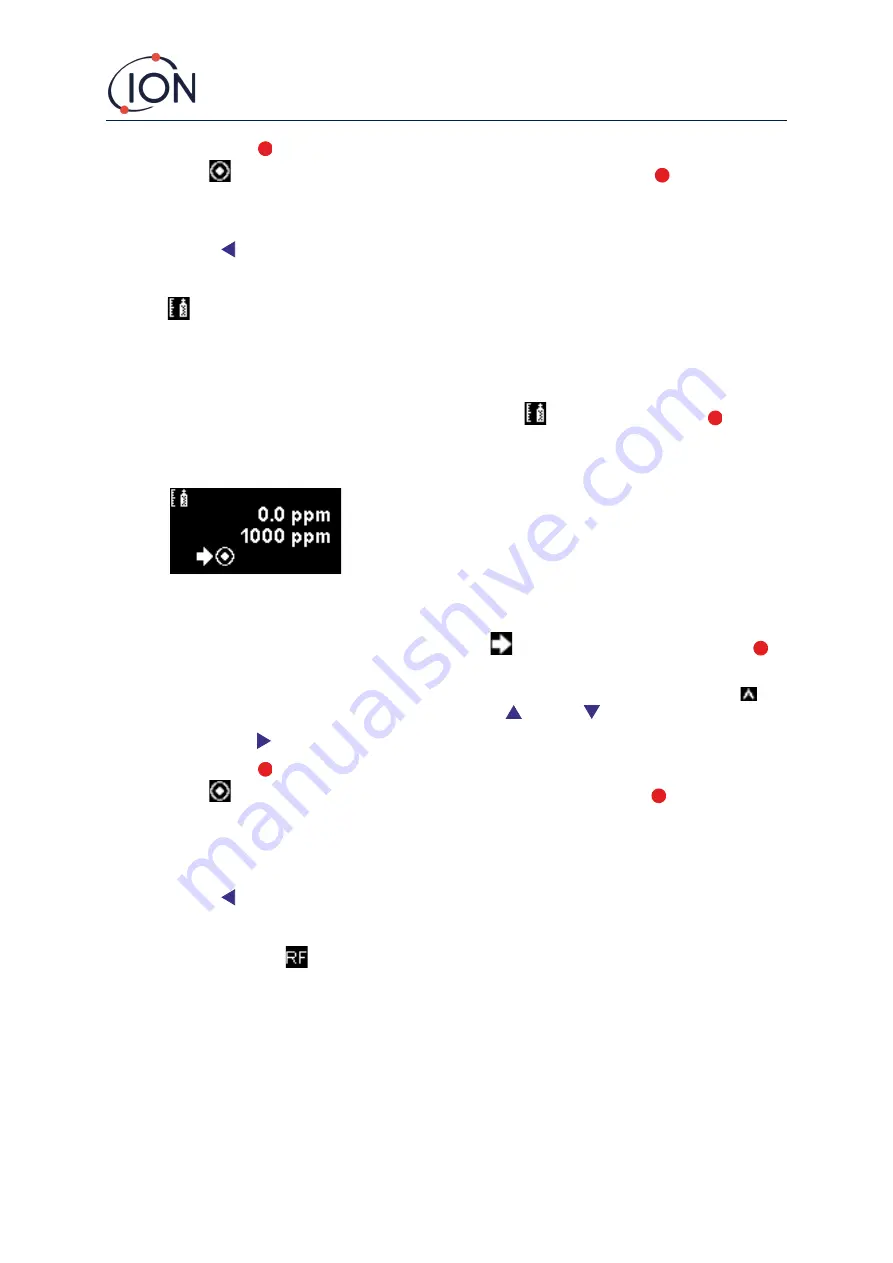
The 

span 2 screen is described below: 


The top value is the live ppm reading from the Falco (based on previous 
calibration) 


The lower value is the span 2 concentration (1000 ppm in this example). 


3)


If the span 2 concentration is not the same as the calibration gas concentration it must be changed.  

To change the span 2 concentration, move the cursor 

 to the lower value and press the 

Enter


key. A new screen with that value is then displayed. 

Change this value to match the level specified on the calibration gas bottle as follows. A cursor 

 is 

displayed under the first digit of the value. Press the 

Up


 or 

Down


 key to change it. 

Press the 

Right

   key to move to the next digit. Repeat the above procedure to change it as required.  

Press the 

Enter


key to return to the previous screen (above). Then move the cursor to the “set” 

symbol 

 and apply the gas to the PID sensor. After 2 minutes press the 

Enter

   key. The status 

light will 

’blink’ briefly to confirm the setting has been changed.


4)


Remove the span gas cylinder. 

5)


Press the   button to exit Span 2 mode. 


RF (Response Factor)    

Response factor adjustment is accessed from Menu i2 


PIDs are typically calibrated with isobutylene.  However, not all VOC have the same response.  The difference 

in response can be accounted for by multiplying the reading by the VOC’s response factor.  If a response factor 

is applied the concentration displayed on the Falco will represent the concentration of the VOC. 

For example, if the RF is 00.50, and 100ppm is detected based on an isobutylene calibration: 

100 ppm x 00.50 = 50 ppm is the value displayed 

Summary of Contents for FALCO

Page 1: ...Register your instrument online to receive your extended Warranty FALCO and FALCOTAC Instrument User Manual V1 2R Unrivalled Gas Detection ionscience com 30 AÑOS AL SERVICIO DE LA INDUSTRIA ...

Page 2: ...ment online for extended warranty Thank you for purchasing your Ion Science instrument The standard warranty of your FALCO 1 2 VOC Monitor is for one year To receive your extended warranty you must register your instrument online within one month of purchase terms and conditions apply Visit www ionscience com ...

Page 3: ...1 Quality Assurance 11 Warranty 11 Service 11 Introduction to FALCO 11 Technical Specification 12 Un Packing 13 System Description 13 Outputs and Communications 13 RS485 Modbus Interface 14 Installation Requirements 15 Location Requirements 15 Power Requirements 15 Cable and Gland Requirements 15 Installation 16 Preparation for Installation 16 Dimensions for Installation 16 Installing the Housing ...

Page 4: ...art Up Routine 25 Logo Screen 25 Info screen 1 25 Info screen 2 25 Warm up 25 Normal Running Mode Screen 26 Software Screens 26 Software Flow Chart 26 Lock Screen 27 Navigating the Menus and Selecting Menu Options 27 Menu i1 28 Menu i2 28 Menu i3 29 Menu i4 29 Menu i5 29 Menu i6 30 Menu i7 30 Menu i8 30 Pump Operation 31 Calibration 31 Zero 31 Span 1 32 Span 2 33 RF Response Factor 33 Detection Un...

Page 5: ...Options 37 Relay 2 Options 37 4 20 mA 37 4 20 mA Enable Disable 37 4 20mA Range 38 Modbus Address 38 Status Light Brightness 38 Service Mode 38 Password Lock 39 Servicing 40 Cleaning the MiniPID 41 Use of PID Lamp Cleaning Kit A 31063 42 Fault Diagnostics 42 Alarm and Fault Indications 42 Fault Conditions 43 Manual Log 45 Warranty 45 ION Science Contact Details 46 ...

Page 6: ...ED TO INDICATE DANGER WARNINGS WHERE THERE IS A RISK OF INJURY OR DEATH Caution Used to indicate a caution where there is a risk of damage to equipment Information Important information or useful hints about usage Recycling Recycle all packaging WEEE Regulations Ensure that waste electrical equipment is disposed of correctly Warnings Cautions and Information notifications The following Cautions ap...

Page 7: ...ess Protection Continuous exposure to wet weather conditions should be limited to less than one day and harsh water spray conditions should be avoided Proper Use If the equipment is used in a manner not specified by the manufacturer the protection provided by the equipment may be impaired The following Warnings Cautions and Information notifications appear later in this manual where they are appli...

Page 8: ... displayed Disposal The equipment does not include any toxic materials but if it has been contaminated by toxic materials then exercise due care and follow the appropriate regulations when disposing Always adhere to local regulations and procedures when disposing of the equipment Ion Science Ltd offers a take back service Please contact us for more information RECYCLING Recycle all Packing WEEE RE...

Page 9: ...FALCO Instrument User Manual V1 2R Unrivalled Gas Detection Page 9 of 46 ionscience com Certification FTZÚ ...

Page 10: ...FALCO Instrument User Manual V1 2R Unrivalled Gas Detection Page 10 of 46 ionscience com Declaration of Conformity ...

Page 11: ...ndard That ensures that the equipment is designed and assembled reproducibly from traceable components calibrated to the stated standards before it leaves our factory Warranty To receive your 2 Year Warranty you must register within one month of purchase Terms and Conditions apply You will then receive a confirmation email that your Warranty Period has been activated and processed Full details alo...

Page 12: ...s servicing and calibration in a hazardous environment without having to isolate the power supply Technical Specification Name VOC Analyser Falco 1 2 Dimensions h 291 mm w 180 mm d 125 mm Weight 3 3 kg Nominal Voltage 12V to 40Vdc Powered from Safety Extra Low SELV Maximum Current 0 56 A at 12 V 6 6 W 0 28 A at 24 V 6 7 W 0 2 A at 40 V 8 W Maximum Power 8W Typical Power 2W depending on the LED int...

Page 13: ... Ion Science Ltd Ion Science will not be responsible for discrepancies not reported within ten days of your receipt of the shipment Every FALCO new units and those returned from a Service Centre must have a Certificate of Calibration before you install it System Description Outputs and Communications FALCO has six communication outputs The on board LCD and LEDs on the faceplate 4 20 mA Current Loo...

Page 14: ... 16 bit Signed Integer 32768 to 32767 1 182 LED Brightness 3 Read Holding Registers 16 bit unsigned Integer 0 to 100 1 1003 Hardware Version 3 Read Holding Registers 16 bit unsigned Integer 1 to 255 Default value 1 1 1005 Measurement Unit 3 Read Holding Registers Character p or g Default value p 1 1010 Response Factor 3 Read Holding Registers 32 bit Float 0 1 10 00 2 1012 Sensor Range 3 Read Holdi...

Page 15: ... not in areas likely to flood In a location that has easy access for servicing For further guidance please consult the relevant local standards or local occupational health representatives INFORMATION If the VOCs being detected are known to be lighter than air install the FALCO unit as high on the wall as is practical If the VOCs being detected are known to be heavier than air install the FALCO un...

Page 16: ...e FALCO unit thoroughly read the technical specification contained in this User Manual Preparation for Installation Before you install the FALCO refer to the Instrument User Manual Location Requirements Power Requirements Cable and Gland Requirements Dimensions for Installation RS485 Interface Requirements Dimensions for Installation ...

Page 17: ...he Front Cover Unbolt the three bolts holding the control module 4 from the ExD Housing Module 2 Disconnect the Control Module from its Ribbon Connector to get access to the terminal blocks 3 Feed the cables through the glands 1 and make the connections to the terminal blocks as you require Refer to Configurations of the current loop on the following pages 4 Seal the cables in the cable glands Ref...

Page 18: ...ump Test to verify that the sensors respond correctly to the test gas at the concentrations programmed for Set Points 1 and 2 A Bump Test does not calibrate the sensors If the instrument does not display the gas concentration given by the bottle do a calibration to give the correct readings Installation in Zones with Explosive Atmospheres The wiring diagram for the Falco is shown below that covers...

Page 19: ...ents there are several possible configurations see the following block diagrams and DIP switch settings to suit the application All configurations are galvanically isolated from the 8 40 Vdc power supply used to power the Falco instrument This DIP switch can be found near the ribbon cable and is labelled 4 20mA LOOP Falco Current Loop Configuration 1 active current loop using internal power supply...

Page 20: ...ience com Falco Current Loop configuration 2 passive current loop externally powered current source When using this configuration ensure that the current loop circuit has voltage is between 8 5 V and 12 V at Loop after the resistances of the line have been taken into consideration ...

Page 21: ...ience com Falco Current Loop Configuration 3 passive current loop externally powered current source When using this configuration ensure that the current loop circuit has voltage is between 8 5 V and 12 V at Loop after the resistances of the line have been taken into consideration ...

Page 22: ...ALCO Instrument User Manual V1 2R Unrivalled Gas Detection Page 22 of 46 ionscience com Falco Current Loop Configuration 4 active current loop using internal power supply connected to the current source ...

Page 23: ...erial e g PTFE PVDF This prevents VOC s Sticking to the inside walls of the tubing and causing false readings Removal of the Control Module The removal of the Control Module will only be necessary if the module is no longer required in its detecting position or if there is a module malfunction The FALCO has an externally located intrinsically safe sensor allowing for quick and easy servicing witho...

Page 24: ... numeric values and settings up and down Left and Right Moves the cursor left and right and steps between menu screens Left is also used to escape settings screens e g exit a menu or sub menu Enter Used to enter features e g settings screens and to confirm specified settings INFORMATION The Enter key and the Left key when being used to escape must be pressed and held briefly to operate them The ot...

Page 25: ... power is applied the Status Light goes yellow The FALCO will then display the following screens in this order Logo Screen After the power is turned on the FALCO displays the Ion Science logo for 3 seconds and the status light is green Info screen 1 Info screen 1 then appears for 3 seconds It displays the following Fir Firmware version Adr Modbus address RF Response factor The status light goes am...

Page 26: ...the Enter key Normal Running Mode Screen The screen then appears continuously and shows the PID reading and units The Status Light colour depends on the status INFORMATION The hour glass symbol will appear on the screen for the remaining warm up time if it has been skipped The brightness of the display will also slowly pulsate to indicate that the warm up period has been skipped Software Screens T...

Page 27: ... be displayed If not the LED status indicator will change to red The Lock screen remains displayed and the user can attempt to enter the password again INFORMATION Entering 4321 at the Lock screen will always enable access to the menus This can be used if for example the actual password has been forgotten Navigating the Menus and Selecting Menu Options The six screens are navigated through using t...

Page 28: ...ed the power to the MiniPID is turned off The current setting is indicated by a symbol indicates the MiniPID is off indicates the MiniPID is on From here you can also put the Falco into test mode This means the Falco will simulate its output behaviours To configure the Falco to display a fixed output level select To set the Falco to output a sawtooth wave select Menu i2 Alarm level 1 Used to set t...

Page 29: ...Relay 2 output See above Relay NO NC Configures the relays for normally open NO or normally closed NC Menu i4 Detection units Used to change the detection units from the default of ppm to mg m3 The current units are displayed PID status light mode Used to switch the status light between steady illumination and slow pulsing when alarming The current setting is indicated by a symbol Alarm brightness...

Page 30: ...dbus slave address Password lock Used to set the password lock on and off and to change the password number The symbol for this option indicates whether the lock is on or off Firmware version Displays the current firmware version of the instrument UID Microcontroller unique ID Menu i7 Flow Error Setpoint The flow level in ml min below which the unit will raise an error Note Do not change blow 80 m...

Page 31: ...urement cycles the instrument will display Error code 6 Flow System Blocked Calibration The calibration options are accessed from Menu i1 INFORMATION 0 10 and 0 50 ppm Falco require 2 point calibration Zero and Span 1 0 1000 and 0 3000 ppm Falco require 3 point calibration Zero Span 1 and Span 2 For best performance it is recommended to use a gas concentration near your alarm point Before starting...

Page 32: ...t to the set symbol The only function the user can carry out is to press the Enter key to set the zero level to the current ppm reading Span 1 Span 1 is used to calibrate Span 1 of the Falco 1 Attach the span gas cylinder to the Falco 2 Enter Span 1 mode by moving the cursor to the Span 1 icon and then press the Enter key The Span 1 screen is described below The top value is the live ppm reading f...

Page 33: ...nter key A new screen with that value is then displayed Change this value to match the level specified on the calibration gas bottle as follows A cursor is displayed under the first digit of the value Press the Up or Down key to change it Press the Right key to move to the next digit Repeat the above procedure to change it as required Press the Enter key to return to the previous screen above Then...

Page 34: ...tting change and return to the i4 menu The status light will then blink briefly to confirm the setting has been made Press the Esc key to return to the i4 menu without saving the change to the setting Used to change the detection units from the default of ppm to milligrams per meter cubed mg m3 The default units are ppm and there is an option to display the readings in milligrams per meter cubed m...

Page 35: ...ached the status bar will go amber and Alarm 2 is reached the status bar will go red Alarm 1 Used to set the ppm level at which Alarm 1 amber is triggered When accessed the screen displays the current level Set the level as follows A cursor is displayed under the first digit of the alarm level Press the Up or Down key to change it Press the Right key to move to the next digit Repeat the above proc...

Page 36: ...ode Change the percentage brightness as required Alarm brightness may also be set to AUTO mode Auto mode will measure the ambient light on the face of the instrument and adjust the brightness of the LED s The LED s will become brighter if the instrument is in high LUX conditions bright sunshine and dimmer during low LUX conditions While in the screen the Status Light will change to red and will ch...

Page 37: ...ng press the Up or Down key to browse through the 4 settings The symbol will change as appropriate Press the Enter key to save the setting change and return to the i3 menu Press the Esc key to return to the i3 menu without saving the change to the setting Relay 2 Options Used to specify which of 4 conditions will trigger the Relay 2 output See the description of the Relay 1 options setting for det...

Page 38: ...d to set the brightness of the Status Light during normal operation from 0 to 100 or to AUTO mode Change the percentage brightness as required Status light brightness may also be set to AUTO mode Auto mode will measure the ambient light on the face of the instrument and adjust the brightness of the LED s The LED s will become brighter if the instrument is in high LUX conditions bright sunshine and...

Page 39: ...ing output test mode is displayed To change the setting press the Up or Down key The symbol will change as appropriate Press the Up or Down key again to reverse the setting Press the Enter key to save the setting change and return to the i1 menu Press the Esc key to return to the i1 menu without saving the change to the setting See below for how to change these settings INFORMATION Alarm levels ca...

Page 40: ...6FOXU2 MiniPID2 Falco TAC MP6SXLFTXU2 5 Pump Housing O Ring Pump Housing O Ring 6 Pump Replacement Kit A 873228 7 MiniPID lamp LA4SFL3 2 8 Orange electrode stack with seal 50 and 3000ppm A 846629 9 MiniPID removal tool 873250 FalcoTAC electrode stack 50ppm A 846767 Electrode stack removal tool Used to remove stack from the MiniPID Sensor 846216 PID Lamp Cleaning Kit Contains Alumina powder and 40 ...

Page 41: ...this cotton bud to polish the PID Lamp window Use a circular action applying light pressure to clean the lamp window Never touch the lamp window with fingers Continue polishing until an audible squeaking is made by the cotton bud with compound moving over the window surface usually within fifteen seconds Remove the residual powder with short blast of air from the can of air duster INFORMATION Cont...

Page 42: ...4 28 1 The Compound has a TVL TWA of 10 mg m3 and a full material safety data sheet MSDS is available on request from Ion Science Ltd The key issues are listed below Hazard identification May cause irritation of respiratory tract and eyes Handling Do not breathe the vapour dust Avoid contact with skin eyes and clothing Wear suitable protective clothing Follow industrial hygiene practices Wash face...

Page 43: ...ditions The FALCO is equipped with a number of diagnostics to ensure instrument faults are detected and communicated The table gives a fuller description of each fault and lists some possible causes and corrective actions you can try If the fault continues or is repeated contact your Service Centre ...

Page 44: ... reading reappears The lamp is not lit during a measurement cycle or PID is not installed Replace Lamp or insert PID The analogue to digital converter has stopped working Contact Service Centre If error 3 occurs the Falco s lamp hasn t struck Make sure the Sensor Cover is screwed on correctly Replace lamp if error persists Low System Flow Rate Check the sample line for blockages Also check the hyd...

Page 45: ...ion on hydrophobic filter 14 02 2020 2 1d n a 12R Updated Declaration of Conformity 18 12 2020 2 1d n a Disclaimer Information in this manual document is subject to change without notice and does not represent a commitment on the part of Ion Science No claims promises or guarantees are made about the accuracy completeness or adequacy of the information contained herein Warranty Register your instr...

Page 46: ...Emilia 51 c 40011 Anzola Emilia Bologna ITALY Tel 39 051 0561850 Fax 39 051 0561851 Web www ionscience com it Email info ionscience it French Office ION Science France 41 Rue de Etoiles 83240 Cavalaire sur Mer FRANCE Tel 33 6 13 50 55 35 Web www ionscience com fr Email info ionscience fr India Office ION Science India 1 90 B B 3 1 Charmy Vittal Rao Nagar Image Hospital Lane Madhapur Hyderabad 500 ...

Reviews: