


Page 13 of 14 2475DA1 - Rev: 1/21/2014 7:52 AM
Troubleshooting
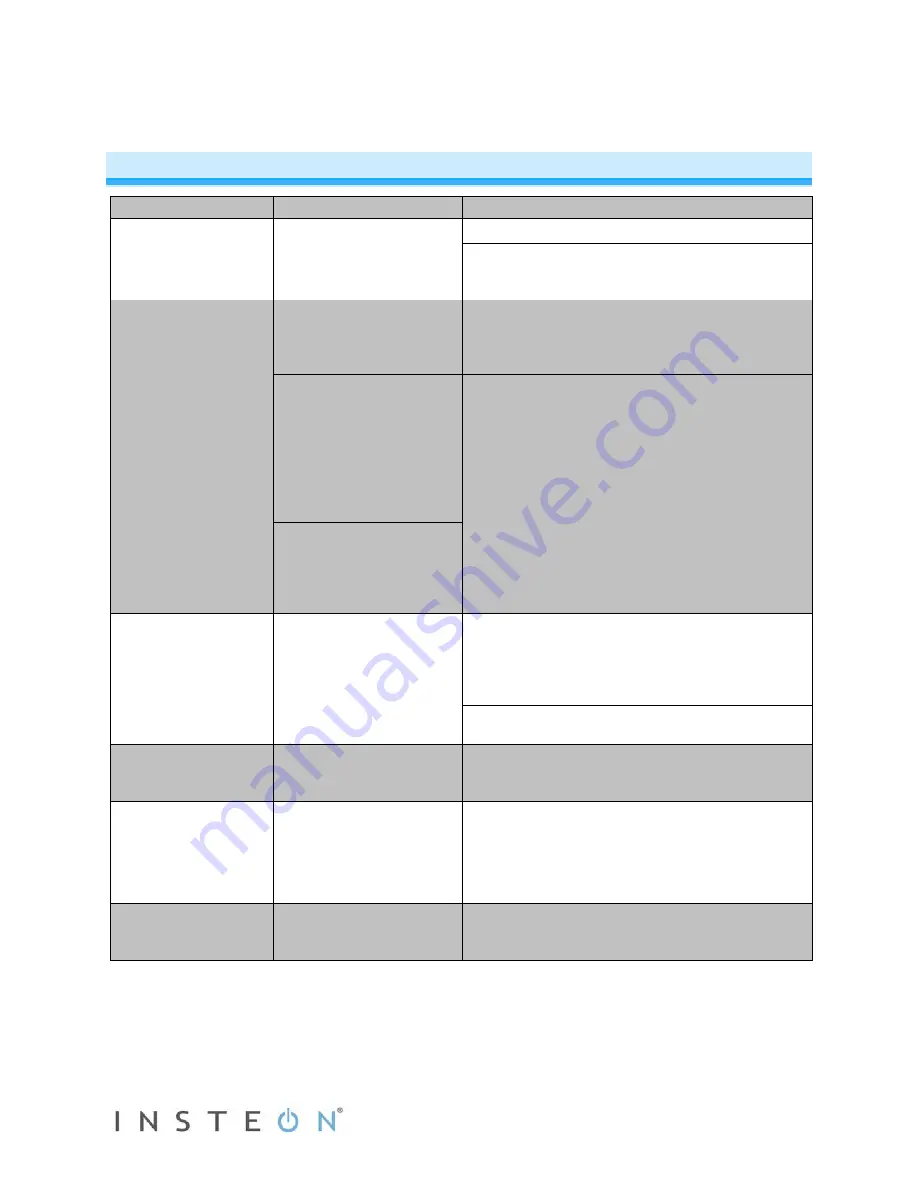
Problem
Possible Cause
Solution
In-LineLinc Dimmer
won’t control the load
and the Status LED is
not turning on.
In-LineLinc Dimmer may
not be getting power.
Make sure the circuit breaker is turned on.
Check the junction box wires to ensure all
connections are tight and no bare wires are
exposed.
In-LineLinc Dimmer
won’t add to a scene
or respond to a
controller.
The controller might have
been reset without
removing In-LineLinc
Dimmer from a scene.
Re-add In-LineLinc Dimmer to the controller.
The INSTEON signal may
be too weak.
Add additional INSTEON devices or move around
existing INSTEON devices. All INSTEON devices
act as INSTEON network repeaters
Large appliances such as
refrigerators or air
conditioners may be
producing electrical noise
on the powerline.
Install a powerline noise filter (FilterLinc #1626-10)
to filter electrical noise and minimize signal
attenuation.
Other electrical devices,
such as computers,
televisions, or power
strips, may be absorbing
the INSTEON signal.
In-LineLinc Dimmer is
taking a long time to
respond to a
controller.
The controller may be
sending commands to a
responder that is no
longer in use. Commands
for the unused responder
are being resent and
loading down the signal.
Remove any unused responders from the
controller.
HINT: If you are using home automation software
such as HouseLinc, you can easily check scene
membership and eliminate any unnecessary links.
If the above doesn’t work, perform a factory reset
on the controller.
The load turned on by
itself.
Another controller or timer
could have triggered In-
LineLinc Dimmer.
Perform a factory reset. See
Factory Reset.
The controller can turn
off In-LineLinc Dimmer
but it doesn’t turn on.
In-LineLinc Dimmer may
be added to a scene at its
off state.
Re-add In-LineLinc Dimmer to a scene on the
controller while the load is on. See
Adding In-
LineLinc Dimmer to a Scene as an INSTEON
Responder
.
In-LineLinc Dimmer is
locked up.
A surge or excessive
noise on the powerline
may have glitched it.
Temporarily remove power from In-LineLinc
Dimmer, usually by opening the breaker feeding it.
If you have tried these solutions, reviewed this manual and still cannot resolve an issue you are having
with In-LineLinc Dimmer, please call the INSTEON Support Line at 800-762-7845.


