background image

82

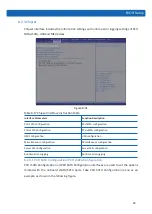
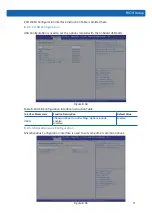
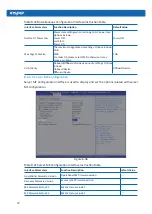
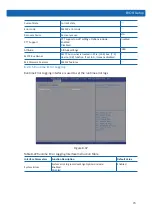
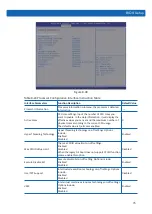
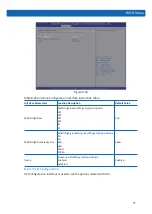
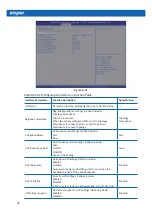
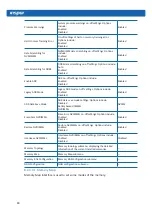
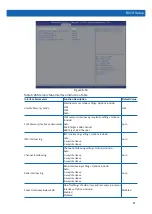
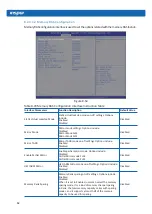
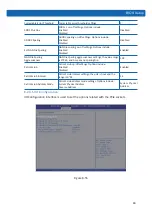
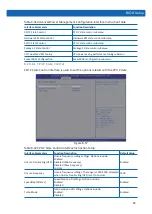
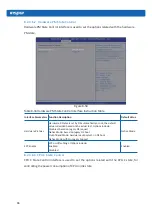
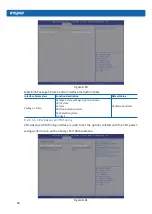
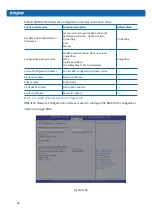
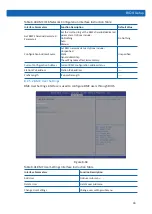
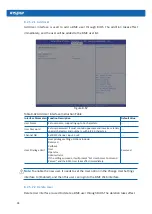
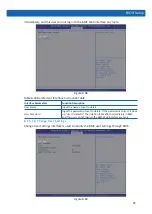
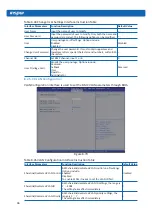
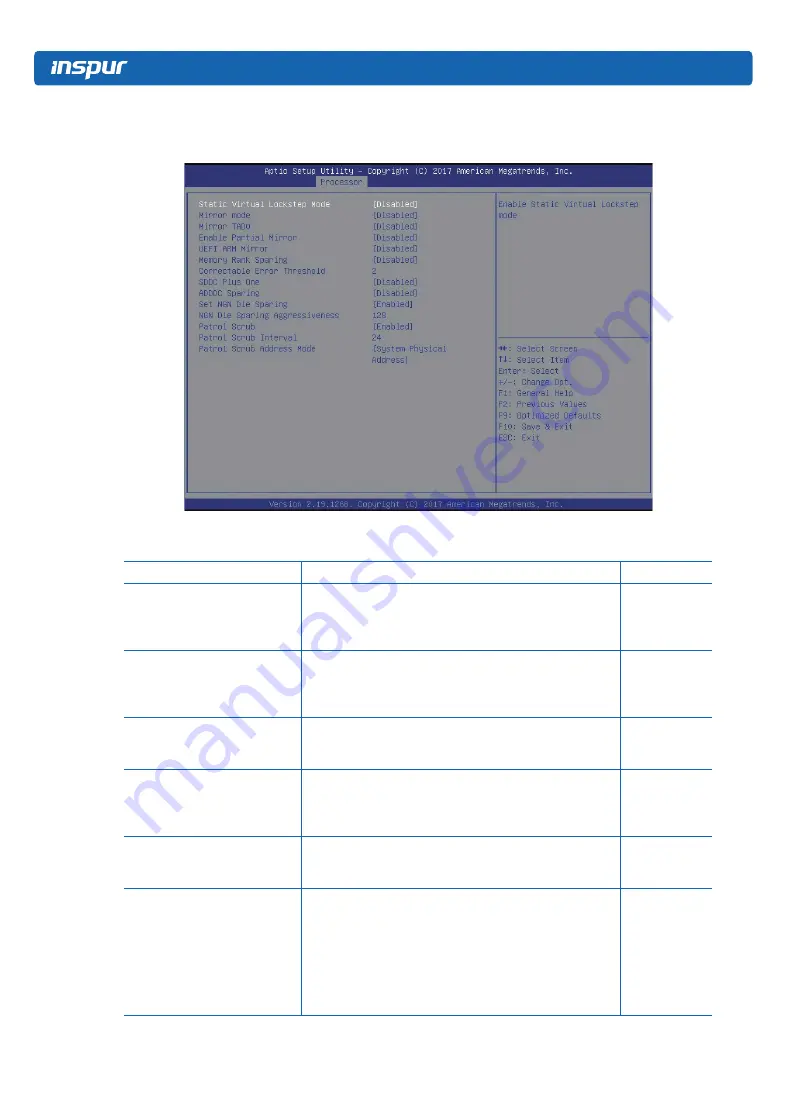
8.2.4.4.2 Memory RAS Configuration

Memory RAS Configuration interface is used to set the options related with the memory RAS feature.

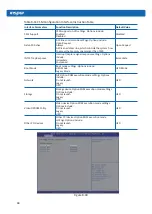
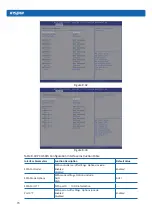
Figure 8-54

Table 8-29 Memory RAS Configuration Interface Instruction Table

Interface Parameters

Function Description

Default Value

Static Virtual Lockstep Mode

Static virtual lockstep mode on-off settings. Options 

include:

Enabled 

Disabled

Disabled

Mirror Mode

Mirror mode settings. Options include:

Disabled

Mirror Mode 1LM

Mirror Mode 2LM

Disabled

Mirror TAD0

Mirror TAD0 mode on-off settings. Options include:

Enabled

Disabled

Disabled

Enable Partial Mirror

Enable partial mirror mode. Options include:

Disabled

Partial Mirror mode 1LM

Partial Mirror mode 2LM

Disabled

UEFI ARM Mirror

UEFI ARM mirror mode on-off settings. Options include: 

Enabled 

Disabled 

Disabled

Memory Rank Sparing

Memory Rank sparing on-off settings. Options include:  

Enabled 

Disabled

When it is set to Enabled, users can select the memory 

sparing mode. It is a kind of memory channel sparing 

in Rank, the total memory capacity varies with sparing 

modes, and it supports at most half of the memory 

capacity to be used for sparing.

Disabled

Summary of Contents for NF5280M5

Page 1: ...Inspur Server User Manual NF5280M5 ...

Page 2: ...ritten consent of Inspur The information in this manual is subject to change without notice Inspur is the registered trademark of Inspur All the other trademarks or registered trademarks mentioned in this manual are the property of their respective holders Edition 1 13 May 2021 Edition Statement Add numbers and names for some figures and tables ...

Page 3: ...y If needed please contact Inspur for our support and guidance 2 Before disassembling the server s components please be sure to disconnect all the power cords connected to the server 3 BIOS and BMC setup is a significant factor in correctly configuring your server If there are no special requirements it is suggested to use the Default Values and not alter the parameter settings arbitrarily After t...

Page 4: ...he Server 18 4 3 Extend the Server from the Rack 18 4 4 Remove the Access Panel 19 4 5 Remove the Access Panel 19 4 6 Install the Access Panel 20 4 7 Remove the PCIE Riser Cage 20 4 8 Install the PCIE Riser Cage 21 4 9 Remove the Air Baffle 23 4 10 Remove the TPM 23 4 11 M 2 SSD Option 24 4 12 OCP PHY Card Option 25 5 Setup 26 5 1 Optimum Environment 26 5 2 Rack Warnings 28 5 3 Identifying the Con...

Page 5: ...BMC Settings 104 9 1 Introduction 104 9 2 Server System Overview 104 9 3 IPMI2 0 106 9 4 Management Web GUI 112 9 5 SNMP 115 9 6 Smash Lite CLI 116 9 7 System Information and State 119 9 8 Device State Monitor and Diagnostic 129 9 9 Logs 132 9 10 Event Alerting 135 9 11 Diagnostics 137 9 12 BMC Self Recovery 139 9 13 LED 140 9 14 BMC Network 140 9 15 Users 143 9 16 Protocols and Ports 150 9 17 Tim...

Page 6: ... Compliance Identification Numbers 186 12 2 Federal Communications Commission Notice 186 12 3 European Union Regulatory Notice 187 12 4 Disposal of Waste Equipment by Users in the European Union 187 12 5 Korean Notice 188 12 6 Chinese Notice 188 12 7 Battery Replacement Notice 188 12 8 Battery Caution 189 12 9 Restricted Access Area 190 13 Electrostatic Discharge 191 13 1 Preventing Electrostatic ...

Page 7: ...roperly grounded plugs Observe extension cable ratings Ensure that the total rating of all equipment plugged into the extension cable does not exceed 80 percent of the ratings limit for the extension cable 4 Please be sure to use the power supply components that come with the server such as power cable power socket if provided with the server etc For your safety please do not replace power cables ...

Page 8: ...into the rack Failure to install the corresponding stabilizers before installing equipment into the rack may cause the cabinet to tip over possibly resulting to severe injury After installing the equipment and other components into the rack only one component can be pulled out from the rack through its sliding part at one time Pulling out several components at the same time may cause the rack to t...

Page 9: ...fore removing the host cover and or touching the internal components please allow for the equipment to cool first To avoid damaging the motherboard please power off the system and wait for five seconds and then remove the components from the motherboard and or disconnect the peripheral device from the system Please remember that only service technicians trained by Inspur are authorized to remove t...

Page 10: ...ternal components 3 During the dismounting process avoid making large movement ranges to prevent damage to the components or scratching arms 4 Handle components and plug in cards with care Please do not touch the components or connection points on the plug in cards When handling the plug in cards or components firmly grab the edges of the plug in cards and components and or their metal fixed suppo...

Page 11: ...M DDR4 memories support RDIMM LRDIMM NVDIMM memories and support memory mirroring and sparing functions Support up to 24 2 5 SAS SATA SSD NVME or 12 3 5 SAS SATA drive in the front Support up to 10 2 5 SAS SATA SSD or 4 2 5 SAS SATA SSD 3 5 SAS SATA drive at the rear Support up to 4 internal SAS SATA HDDs Support Type A and Type C OCP cards Support 4 onboard OCU link ports directly connected with ...

Page 12: ... 2 2 5 25 Configuration i e Full Configuration Supports 25 2 5 SAS SATA SSD in the front as shown in the figure below 6 2 5 24 Configuration i e Full Configuration Supports 24 front 2 5 SAS SATA SSD NVME HDDs as shown in the figure below 3 5 12 Configuration i e Full Configuration Supports 12 front 3 5 2 5 SAS SATA SSD NVME HDDs as shown in the figure below Note The 3 5 HDD trays can hold 3 5 2 5 ...

Page 13: ...orts hot plug SAS SATA SSD NVME drive NIC NIC Controller The motherboard supports OCP PCIE cards Management Management Chip It integrates 1 independent 1000Mbps network interface special for IPMI remote management PCI Expansion Slot Onboard 2 PCI Express 3 0 24 slots 1 PCI Express 3 0 24 slot 16 lane used to support PCI E Riser card The Riser card supports horizontal inserted and full height cards...

Page 14: ...ghtincludes Host PackingBox Rails AccessoryBox Full configuration 24 2 5 drive bay with 24 drives installed Host weight 25 2kg Grossweight 35kg Grossweightincludes Host PackingBox Rails AccessoryBox Environmental Operating Temperature 10 35 Storage Transportation Temperature 40 60 Operating Humidity 20 80 relative humidity Storage Transportation Humidity 20 93 40 relative humidity 2 3 Compatible P...

Page 15: ...configuration h idle state power 105 8W 88 5W i list of all components for additional idle power allowances if any additional PSU HDDs or SSDs additional memory additional buffered DDR channels additional I O devices j maximum power expressed in Watts and rounded to the first decimal place 604 9W 186 6W k declared operating condition class as detailed in Table 6 A2 A2 l idle state power Watts at t...

Page 16: ...U 10W 10W HDD or SSD 5 0 W per HDD or SSD 10W 10W Additional memory 0 18 W per GB 137 52W 33 84W Additional buffered DDR channel 4 0 W per buffered DDR channel 16W 16W Additional I O devices 1 Gb s No Allowance 0 0 1 Gb s 2 0 W Active Port 1 Gb s and 10 Gb s 4 0 W Active Port 10 Gb s and 25Gb s 15 0 W Active Port 25 Gb s and 50Gb s 20 0 W Active Port 50 Gb s 26 0 W Active Port Total additional idl...

Page 17: ...ont Panel Components 2 5 24 Drive Bays Figure 3 1 Table 3 1 Item Description 1 Front control panel buttons and LEDs 2 Quick release lever 3 Drive bays 4 VGA port 5 USB3 0 port 6 USB2 0 LCD port 2 5 24 drive sequence diagram Figure 3 2 3 5 12 Drive Bays Figure 3 3 ...

Page 18: ...ion 1 Front control panel buttons and LEDs 2 Quick release lever 3 HDD bays 4 VGA port 5 USB3 0 port 6 USB2 0 LCD port 2 5 24 HDD sequence diagram 3 5 12 HDD Bays Figure 3 5 Table 3 3 Item Description 1 Front control panel buttons and LEDs 2 Quick release lever 3 Drive bays 4 VGA port 5 USB3 0 port 6 USB2 0 LCD port 2 5 25 drive sequence diagram 0 5 10 15 20 1 6 11 16 21 2 7 12 17 22 3 8 13 18 23 ...

Page 19: ... failure occurs Flashing red A warning occurs 4 Memory failure LED Off Normal Steady red A failure occurs Flashing red A warning occurs 5 Fan failure LED Off Normal Steady red Fail to read the speed Flashing red Speed reading is abnormal 6 Power failure LED Off Normal Steady red A power failure occurs Flashing red Power state is abnormal 7 System overheat LED Off Normal Steady red CPU Memory overh...

Page 20: ...iption Status Interpretation 1 Activity status LED Steady green Normal Flashing green Read and write activity 2 Fault alarm LED Steady red A failure occurs Steady blue Disk positioning Steady purple RAID rebuilding 3 2 Rear Panel Components Figure 3 9 ...

Page 21: ...or connecting the USB device 8 COM port For connecting the serial device 9 BMC_RST button For resetting BMC 10 UID RST button Short press to turn on off the UID LED long press to reset the server 11 OCP expansion card For installing the OCP card 12 RJ45 latch Assist in unplugging the network cable connected to the server 13 PSU0 For installing the PSU0 14 PSU1 For installing the PSU1 15 3 5 drive ...

Page 22: ...ard handles 2 5 CPU1 6 System fan connectors 4 7 Front HDD backplane power connectors 3 8 Front control panel connector 9 GPU power connectors 4 10 Rear HDD backplane power connectors 2 11 NVME connectors 4 12 PSU1 connector 13 PSU0 connector 14 PCIE2_CPU1 connector 15 M 2_CONN connector 12 17 GPU2 18 GPU1 19 GPU3 3 3 主板布局 ...

Page 23: ...Front control panel 34 USB3 0 ports 2 35 TPM connector Motherboard Jumper Introduction Table 3 7 See 3 3 Motherboard Components for the jumper position Item Description Function CLR_CMOS CMOS clear jumper Short circuit pin1 2 restore to normal status short circuit pin2 3 clear CMOS Note It is required to shut down the system as well as disconnect the power supply during CMOS clearing Hold for 5 se...

Page 24: ...and some internal circuitry remain active until AC power is removed IMPORTANT If installing a hot plug device it is not necessary to power down the server 1 Back up the server data 2 Shut down the operating system 3 Disconnect the power cords The system is now without power 4 3 Extend the Server from the Rack 1 Pull down the quick release levers on each side of the server 2 Extend the server from ...

Page 25: ... of personal injury be careful when sliding the server into the rack The sliding rails could pinch your fingers Figure 4 2 4 4 Remove the Front Baffle 1 Power down the server 2 Extend the server from the rack 3 Remove the front baffle Figure 4 3 4 5 Remove the Access Panel WARNING To reduce the risk of personal injury from hot surfaces allow the drives and the internal system components to cool be...

Page 26: ...the hood latch 4 Lift up on the hood latch handle and then remove the access panel Figure 4 4 4 6 Install the Access Panel 1 Place the access panel on top of the server with the hood latch open Allow the panel to extend past the rear of the server 2 Push down on the hood latch The access panel slides to a closed position 3 Use the screwdriver to tighten the security screw on the hood latch 4 7 Rem...

Page 27: ...l the PCIE Riser Cage 1 Power down the server 2 Extend the server from the rack 3 Remove the access panel 4 Install the PCIE riser cage 5 Install the access panel 6 Install the server into the rack 7 Power up the server Note The riser card types supported by the PCIE riser cage are shown as follows X8x2 riser card Figure 4 6 ...

Page 28: ...ot at the bottom is the X8 X1 slot which supports both X8 card and X8 X1 card Figure 4 7 X16 X8 riser card The slot at the bottom is the X8 X1 slot which supports both X8 card and X8 X1 card Figure 4 8 X16 riser card Figure 4 9 ...

Page 29: ...ports hot plug components minimize the amount of time the access panel is open 1 Power down the server 2 Extend or remove the server from the rack 3 Remove the access panel 4 Remove the air baffle Figure 4 10 4 10 Remove the TPM 1 Power down the server 2 Extend the server from the rack 3 Remove the access panel 4 Remove the air baffle 5 Remove the TPM Figure 4 11 ...

Page 30: ...onding node 5 Remove the screw that secures the M 2 riser card to the motherboard and remove the M 2 riser card vertically Figure 4 12 6 Remove the screw that secures the M 2 riser card to the bracket Figure 4 13 7 Open the fastener as shown below Pull out the M 2 SSD in the direction of the arrow and replace it with a new one ...

Page 31: ...2 OCP PHY Card Option 1 Power down the server 2 Extend the server from the rack 3 Remove the access panel 4 Remove the corresponding node 5 Remove the OCP PHY card vertically as shown below and replace it with a new one Figure 4 15 ...

Page 32: ...binet and the rear door must be adequately ventilated to allow the warm air to escape from the cabinet CAUTION To prevent improper cooling and damage to the equipment do not block the ventilation openings When vertical space in the rack is not filled by a server or rack component the gaps between the components cause changes in airflow through the rack and across the servers Cover all gaps with bl...

Page 33: ...equirements Installation of this equipment must comply with local and regional electrical regulations governing the installation of information technology equipment by licensed electricians This equipment is designed to operate in installations covered by NFPA 70 1999 Edition National Electric Code and NFPA 75 1992 code for Protection of Electronic Computer Data Processing Equipment For electrical...

Page 34: ...Standards Association CSA C22 1 and Canadian Electrical Code In all other countries you must install the equipment in accordance with any regional or national electrical wiring codes such as the International Electrotechnical Commission IEC Code 364 parts 1 through 7 Furthermore you must be sure that all power distribution devices used in the installation such as branch wiring and receptacles are ...

Page 35: ...oved on its casters Never stand in front of the rack when it is rolling down the ramp from the pallet Always handle the rack from both sides 5 3 Identifying the Contents of the Server Shipping Carton Unpack the server shipping carton and locate the materials and documentation necessary for installing the server All the rack mounting hardware necessary for installing the server into the rack is inc...

Page 36: ...onnect the power cord to the AC power source WARNING To reduce the risk of electric shock or damage to the equipment Do not disable the power cord grounding plug The grounding plug is an important safety feature Plug the power cord into a grounded earthed electrical outlet that is easily accessible at all times Unplug the power cord from the power supply to disconnect power to the equipment Do not...

Page 37: ...e operating system into a USB disk boot the server through the USB disk to install the OS This process may require you to obtain additional drivers from the Inspur website http www inspur com eportal ui pageId 2317460 ...

Page 38: ...essor Option The server supports single and dual processor operation CAUTION To avoid damage to the processor and system board only authorized personnel should attempt to replace or install the processor in this server To help avoid damage to the processor and system board do not install the processor without using the processor installation tool CAUTION Topreventpossibleservermalfunctionanddamage...

Page 39: ...tion marked by 1 with the Clip s triangle mark vertically align the mounting holes on the heatsink with those on the Clip and assemble the heatsink and Clip together Figure 6 2 Step 3 Install the assembled heatsink module onto the CPU socket and the position marked by 1 should be aligned with the triangle mark on the CPU socket Tighten the screws according to the sequence of 1 2 3 4 ...

Page 40: ...between CPU heatsink and CPU During fixing CPU heatsink it is required to fasten bolts according to the sequence accordingly 6 3 Memory Option IMPORTANT RDIMMs and LRDIMMs can not be mixed AEPs can be mixed with RDIMMs or LRDIMMs DIMM slot layout is as shown in the following figure Figure 6 4 ...

Page 41: ...ns Installation DIMM population guidelines Only DIMMs of the same type could be used in the same machine Detailed DIMM population and combination principles are as follows a One CPU DIMM population guidelines Figure 6 5 ...

Page 42: ...k tabs on both ends of the DIMM slot Step 2 Align the bottom key with the receptive point on the slot press both ends of the DIMM with your thumbs Insert the DIMM into the slot completely and the lock tabs will automatically secure the DIMM locking it into place Figure 6 7 ...

Page 43: ...pports hot plug components minimize the amount of time the access panel is open 1 Determine the status of the hard disk drive from the hot plug HDD LED 2 Back up all server data on the hard disk drive 3 Remove the hard disk drive Installing a hot plug HDD Step 1 Press the HDD panel button Figure 6 8 Step 2 The lever on HDD tray pops up automatically pull it outwards and remove the HDD tray Figure ...

Page 44: ...nt improper cooling and thermal damage do not operate the server unless all bays are populated with either a component or a blank 1 Access the product rear panel 2 Remove the power supply blank WARNING To reduce the risk of personal injury from hot surfaces allow the power supply or power supply blank to cool before touching it 3 Install the power supply into the power supply bay Figure 6 11 ...

Page 45: ...green 6 6 Expansion Board Option CAUTION To prevent damage to the server or expansion boards power down the server and remove all AC power cords before removing or installing the PCIE Riser cage CAUTION For proper cooling do not operate the server without the access panel baffles expansion slot covers or blanks installed If the server supports hot plug components minimize the amount of time the ac...

Page 46: ...ing do not operate the server without the access panel baffles expansion slot covers or blanks installed If the server supports hot plug components minimize the amount of time the access panel is open 1 Power down the server 2 Extend the server from the rack WARNING To reduce the risk of personal injury from hot surfaces allow the machine to cool before touching it ...

Page 47: ...41 Hardware Options Installation 3 Remove the access panel 4 Remove the air baffle vertically to replace it with a new one Figure 6 15 ...

Page 48: ...ing Cable routing blue between the backplane and SAS RAID card Cable routing red between the backplane and motherboard Figure 7 1 CAUTION Please route the cables according to the purchased machine configuration ...

Page 49: ...ettings users can try to recover it through the Clear CMOS operation 2 The factory default settings are the optimal settings It is advised not to alter the parameters before understanding their denotations 3 The common settings are introduced in detail in this chapter but less common ones are not 4 The BIOS content varies according to the particular configuration of the products hence the detailed...

Page 50: ...t configuration F9 Restore to the default configuration F10 Save and exit Enter Execute commands or select a submenu Note Options in grey are not available Options with symbol have a sub menu Figure 8 1 8 1 2 UEFI Legacy Mode Switch Login to the BIOS Setup interface select Advanced CSM Configuration Press Enter to set the Boot Mode UEFI Mode Legacy Mode Set the Option ROM execution mode of Network...

Page 51: ...es must be set to Legacy If the Boot Mode is set to UEFI Mode the Option ROM execution mode of Network must be set to UEFI and the Option ROM execution mode of Storage Video OPROM Policy and Other PCI devices is suggested to set to UEFI If there are special requirements it can be set to Legacy Figure 8 2 8 1 3 View System Information Login to the BIOS Setup interface and the Main menu displays the...

Page 52: ...ce select Processor Processor Configuration Processor Information and press Enter to display the CPU detailed information as shown in the following figure Figure 8 4 8 1 5 View Memory Information Login to the BIOS interface select Processor Memory Configuration Memory ...

Page 53: ...n the following figure Figure 8 5 8 1 6 View HDD Information and RAID Configuration 8 1 6 1 View HDD Information Login to the BIOS interface select Chipset PCH SATA Configuration PCH sSATA Configuration and press Enter to display the HDD information of the current onboard SATA ports or sSATA ports as shown in the following figures Figure 8 6 ...

Page 54: ...d the system reboots 2 When Boot Mode is set to UEFI mode in the BIOS Setup Advanced interface there will be the Intel R RSTe SATA Controller menu as shown in the following figure Figure 8 8 2 1 Press Enter the executable operation and the current HDD information will be displayed as shown in the following figure ...

Page 55: ...cording to actual requirements RAID0 This RAID volume is allowed to be made on 2 or above HDDs RAID1 This RAID volume is allowed to be made on 2 HDDs RAID10 This RAID volume is allowed to be made on 4 HDDs which is only available when HDD quantity is 4 or above RAID5 Parity This RAID volume is allowed to be made on 3 or above HDDs Select Disks Select HDDs to make RAID volume press Enter select X a...

Page 56: ...nd press Enter to cancel the deletion select No and press Enter Figure 8 11 Figure 8 12 Figure 8 13 3 When Boot Mode is set to Legacy a prompt Press CTRL I to enter Configuration Utility will appear on the screen during system booting Press Ctrl and I keys at the same time to enter SATA RAID configuration as shown in the following figure ...

Page 57: ...le Key Description Used to move cursor in different menus or to change values of menu options TAB To select the next menu option Enter To select a menu Esc To exit menu or return to previous menu from sub menu Table 8 4 Menu Instruction Table Create RAID Volume To create an RAID volume Delete RAID Volume To delete an existed RAID volume Reset Disks to Non RAID To reset HDDs in RAID volume and to r...

Page 58: ...AID0 This RAID volume is allowed to be made on 2 or above HDDs RAID1 This RAID volume is allowed to be made on 2 HDDs RAID10 This RAID volume is allowed to be made on 4 HDDs which is only available when HDD quantity is 4 or above RAID5 Parity This RAID volume is allowed to be made on 3 or above HDDs Select Disks Select HDDs to make RAID volume press Enter select X and then press Enter to return to...

Page 59: ...lease use the space key to select the HDD to reset according to the actual demand and then press Enter to reset the HDD The system will prompt Are you sure you want to reset RAID data on selected disks Y N again enter Y or N according to the prompt It is to be noted that all data on this disk will be lost after reset Meanwhile this disk will not belong to RAID volume any more Figure 8 18 3 5 Mask ...

Page 60: ...n in the following figure The system will prompt Are you sure you want to exit Y N enter Y to exit or enter N to cancel the exit operation Figure 8 20 8 1 7 BMC Network Parameters View and Settings 8 1 7 1 View BMC Network Parameters Login to the BIOS interface select Server Mgmt BMC Network Configuration BMC IPv4 Network Configuration BMC IPv6 Network Configuration Press Enter to view the current...

Page 61: ...re 8 21 Figure 8 22 8 1 7 2 BMC Network Settings Take BMC Sharelink port as an example to introduce the settings of BMC IPv4 network parameters as shown in the following table BMC Network Configuration Instruction Table ...

Page 62: ...nt Configuration Address Display the current BMC network parameters configuration Station IP address BMC station IP address Subnet mask Subnet mask Station MAC address BMC station MAC address Router IP address BMC router IP address 8 1 7 3 Set BMC Static Network Parameters Set the Configuration Address Source option to Static If the setting succeeds the system will prompt Set Static BMC IP Address...

Page 63: ...ress in BIOS Setup interface and does not notify BMC to change the IP settings The prompts of Subnet mask and Router IP address settings are similar to those of Station IP address setting there is no more detailed description here As shown in the following figure the BMC network parameters have taken effect you can login to BMC Web interface to operate Figure 8 26 8 1 7 4 Set BMC Dynamic Network P...

Page 64: ...t patiently Figure 8 28 After the dynamic network takes effect the system will prompt Get Dynamic BMC Dhcp Success and the interface will be shown as the following figure Figure 8 29 Note Please make sure that the BMC management port is connected to the network when you use the Manual setting options ...

Page 65: ...ameters to Do nothing or Manual then set to Auto the function will take effect The settings of BMC IPv6 network parameters are similar to this which will be omitted here 8 2 BIOS Parameter Description 8 2 1 Main Main interface displays the basic information of BIOS system including BIOS BMC ME version CPU type total memory capacity and system time Figure 8 30 Table 8 7 Main Interface Instruction T...

Page 66: ...ue decreases by 1 System Time hh mm ss Display and set system time Use Tab or Enter key to switch between system date and time directly input the value or use keys to change the value Press key the value increases by 1 and press key the value decreases by 1 8 2 2 Advanced Advanced interface includes the BIOS system parameters and related function settings such as ACPI serial port PCI subsystem CSM...

Page 67: ... 2 1 Trusted Computing Trusted Computing interface is used to enable or disable BIOS support for security device Figure 8 32 Table 8 9 Trusted Computing Interface Instruction Table Interface Parameters Function Description Default Value Security Device Support Security device support settings Options include Enabled Disabled BIOS supports TPM TCG version 1 2 2 0 BIOS supports TPM module through TP...
Page 68: ...cription Serial Port 0 Configuration Serial port 0 configuration the configuration interface provides this serial port s on off control and resource allocation control Users can manually adjust the IO PORT and IRQ number that COM PORT uses Serial Port 1 Configuration Serial port 1 configuration 8 2 2 2 1 Serial Port 0 Configuration Serial Port 0 Configuration interface is used to set the options r...

Page 69: ...tions include Enabled Disabled Enabled Change Settings Select the optimal setting according to the demand Options include Auto I0 3F8h IRQ 4 I0 3F8h IRQ 3 4 5 6 7 9 10 11 12 I0 3E8h IRQ 3 4 5 6 7 9 10 11 12 I0 2E8h IRQ 3 4 5 6 7 9 10 11 12 Auto 8 2 2 3 Serial Port Console Redirection Serial Port Console Redirection interface is used to set the options related with the serial port redirection ...

Page 70: ...ue Console Redirection Serial port console redirection on off settings Options include Enabled Disabled Disabled Console Redirection Settings Serial port console redirection parameter settings 8 2 2 4 Console Redirection Settings When the Console Redirection is set to Enabled the Console Redirection Settings menu will be opened Figure 8 36 ...

Page 71: ...w Control Flow control settings Options include None Hardware RTS CTS None VT UTF8 Combo Key Support VT UTF8 combination key support on off settings Options include Enabled Disabled Enabled Recorder Mode Recorder mode on off settings Options include Enabled Disabled Disabled Redirection 100 31 Expanded redirection resolution 100 31 on off settings Options include Enabled Disabled Disabled Legacy O...

Page 72: ...le Interface Parameters Function Description Default Value Above 4G Decoding Above 4G memory access control on off settings Options include Enabled Disabled Enabled SR IOV Support SR IOV support on off settings Options include Enabled Disabled Enabled 8 2 2 6 Network Stack Configuration Network Stack Configuration interface is used to set the options related with Network UEFI PXE Figure 8 38 ...

Page 73: ...bled Ipv4 HTTP Support Ipv4 HTTP support on off settings Options include Enabled Disabled Disabled Ipv6 PXE Support UEFI Ipv6 PXE support on off settings Options include Enabled Disabled Disabled Ipv6 HTTP Support Ipv6 HTTP support on off settings Options include Enabled Disabled Disabled PXE boot wait time Set the wait time to cancel PXE boot after pressing ESC key the setting range is 0 5 0 Medi...

Page 74: ... Interrupt Capture signal response settings Options include Immediate Postponed Immediate Boot Mode Boot mode settings Options include UEFI Mode Legacy Mode UEFI Mode Network NIC Option ROM execution mode settings Options include Do not launch Legacy UEFI UEFI Storage Storage device Option ROM execution mode settings Options include Do not launch Legacy UEFI UEFI Video OPROM Policy Video device Op...

Page 75: ... PCH sSATA Configuration PCH sSATA configuration USB Configuration USB configuration Miscellaneous Configuration Miscellaneous configuration Server ME Configuration Server ME configuration Runtime Error Logging Runtime error logging 8 2 3 1 PCH SATA Configuration PCH sSATA Configuration PCH sSATA Configuration and PCH SATA Configuration interfaces are used to set the options related with the onboa...

Page 76: ...Function Description Default Value SATA Controller SATA controller on off settings Options include Enabled Disabled Enabled SATA Mode Options SATA mode settings Options include AHCI RAID AHCI SATA Port 0 7 SATA port 0 7 HDD information Port 0 7 SATA port on off settings Options include Enabled Disabled Enabled ...

Page 77: ...d with the onboard USB ports Figure 8 44 Table 8 19 USB Configuration Interface Instruction Table Interface Parameters Function Description Default Value USB N Onboard USB port on off settings Options include Enabled Disabled Enabled 8 2 3 3 Miscellaneous Configuration Miscellaneous Configuration interface is used to set some other common options Figure 8 45 ...

Page 78: ...em 1GB VGA Priority Onboard Offboard VGA device priority settings Options include Onboard Device Offboard Device Offboard Device 8 2 3 4 Server ME Configuration Server ME Configuration interface is used to display and set the options related with server ME configuration Figure 8 46 Table 8 21 Server ME Configuration Interface Instruction Table Interface Parameters Function Description Default Valu...

Page 79: ... owner is located in PCIe 15 8 bus 7 3 device 2 0 function If set to 0 it means disabled 0 ME Firmware Features ME FW features 8 2 3 5 Runtime Error Logging Runtime Error Logging interface is used to set the runtime error logs Figure 8 47 Table 8 22 Runtime Error Logging Interface Instruction Table Interface Parameters Function Description Default Value System Errors System error log record settin...

Page 80: ...on Processor Configuration Processor configuration Common Configuration Common configuration UPI Configuration UPI configuration Memory Configuration Memory configuration IIO Configuration IIO configuration Advanced Power Management Configuration Advanced power management configuration 8 2 4 1 Processor Configuration Processor Configuration interface is used to set the options related with the pro...

Page 81: ...ent CPU usage The default value is 0 all cores enabled 0 Hyper Threading Technology Hyper threading technology on off settings Options include Enabled Disabled Enabled Max CPUID Value Limit The max CPUID value limit on off settings Enabled Disabled When the legacy OS boot does not support CPUID function please enable this option Disabled Execute Disable Bit Execute disable bit on off setting Optio...

Page 82: ...efetcher on off settings Options include Enabled Disabled This function can prefetch CPU data to shorten the data reading time Enabled DCU IP Prefectcher DCU IP prefectcher on off settings Options include Enabled Disabled This function can judge whether there is data to prefetch to shorten the data reading time Enabled LLC Prefetcher All threads LLC prefetcher on off settings Options include Enabl...

Page 83: ...High Base MMIO high base settings Options include 56T 40T 24T 16T 4T 1T 56T MMIO High Granularity Size MMIO high granularity size settings Options include 1G 4G 16G 64G 256G 1024G 256G Numa Numa on off settings Options include Enabled Disabled Enabled 8 2 4 3 UPI Configuration UPI Configuration interface is used to set the options related with UPI ...

Page 84: ...logy Topology Precedence Link Speed Mode Link speed mode settings Options include Fast Slow Fast Link Frequency Select Link frequency select settings Options include Auto 9 6 GT s 10 4GT s Use Per Link Setting Auto Link L0p Enable Link L0p on off settings Options include Enabled Disabled Link power saving mode setting which is set when the bandwidth is half of the peak bandwidth Enabled Link L1 En...

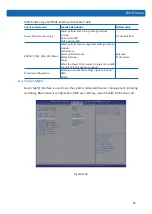
Page 85: ... VGA stack number settings the range of effective values is 0 6 0 8 2 4 4 Memory Configuration Memory Configuration interface is used to set the options related with the memory Figure 8 52 Table 8 27 Memory Configuration Interface Instruction Table Interface Parameters Function Description Default Value Enforce POR Enforce POR settings Options include POR Disabled POR Memory Frequency Memory frequ...

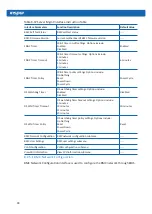
Page 86: ...ngs Options include Enabled Disabled Enabled ADR Data Save Mode ADR data save mode settings Options include Disabled Batterybacked DIMMs NVDIMMs NVDIM Erase Arm NVDIMMs Erase Arm NVDIMMs on off settings Options include Enabled Disabled Enabled Restore NVDIMMs Restore NVDIMMs on off settings Options include Enabled Disabled Enabled Interleave NVDIMMs Interleave NVDIMMs on off settings Options inclu...

Page 87: ...nel 64B Target 64B Channel Auto IMC Interleaving IMC interleaving settings Options include Auto 1 way Interleave 2 way Interleave Auto Channel Interleaving Channel interleaving settings Options include Auto 1 way Interleave 2 way Interleave 3 way Interleave Auto Rank Interleaving Rank interleaving settings Options include Auto 1 way Interleave 2 way Interleave 4 way Interleave 8 way Interleave Aut...

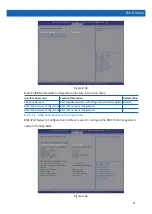
Page 88: ...Disabled Mirror TAD0 Mirror TAD0 mode on off settings Options include Enabled Disabled Disabled Enable Partial Mirror Enable partial mirror mode Options include Disabled Partial Mirror mode 1LM Partial Mirror mode 2LM Disabled UEFI ARM Mirror UEFI ARM mirror mode on off settings Options include Enabled Disabled Disabled Memory Rank Sparing Memory Rank sparing on off settings Options include Enable...

Page 89: ...g Aggressiveness NGN Die sparing aggressiveness settings the value range is 0 255 and 0 means no sparing Die 128 Patrol Scrub Patrol Scrub on off settings Options include Enabled Disabled Enabled Patrol Scrub Interval Patrol Scrub interval settings the unit is hour and the range is 0 24 24 Patrol Scrub Address Mode Patrol Scrub address mode settings Options include System Physical Address Reverse ...

Page 90: ...settings of each PStack of each CPU Intel AIC Rtimer AIC SSD Technology Non VMD Intel AIC Retimer AIC SSD settings submenu AIC Retimer AIC SSD on off settings of each PStack of each CPU PCIe Hot Plug PCIe hot plug on off settings Options include Enabled Disabled Enabled PCI E ASPM Support Global PCIE ASPM support on off settings Options include Disabled Per Port L1 Only Per Port PCIe Max Read Requ...

Page 91: ...8 2 4 6 1 CPU P State Control CPU P State Control interface is used to set the options related with the CPU P state Figure 8 57 Table 8 32 CPU P State Control Interface Instruction Table Interface Parameters Function Description Default Value Uncore Freq Scaling UFS Uncore frequency scaling settings Options include Enabled Disabled Min Frequency Disabled Max Frequency Custom Enabled Uncore Frequen...

Page 92: ...t by OS automatically or not the default value is decided based on the actual test Options include Disabled based on legacy OS request Native Mode based on legacy OS boot Out of Band Mode hardware auto select no OS boot Native Mode with No Legacy Support Native Mode EPP Enable EPP on off settings Options include Enabled Disabled Enabled 8 2 4 6 3 CPU C State Control CPU C State Control interface i...

Page 93: ...bled Enabled Autonomous Core C State Autonomous core C state on off settings Options include Enabled Disabled Disabled CPU C6 report On off settings of reporting C6 state to OS Options include Enabled Disabled Enabled Enhanced Halt State C1E C1E on off settings Options include Enabled Disabled Enabled 8 2 4 6 4 Package C State Control Package C State Control interface is used to set the options re...

Page 94: ...e Package C State Package C state settings Options include C0 C1 state C2 state C6 Non Retention state C6 Retention state No Limit C6 Retention state 8 2 4 6 5 CPU Advanced PM Tuning CPU Advanced PM Tuning interface is used to set the options related with the CPU power saving performance with an Energy Perf BIAS submenu Figure 8 61 ...

Page 95: ...rformance management settings Options include Performance Balanced Performance Balanced Power Power When the Power Performance Tuning is set to BIOS Controls EPB this option can be set Balanced Performance Workload Configuration Workload optimization settings Options include UMA NUMA 8 2 5 Sever Mgmt Server Mgmt interface is used to set the options related with server management including watchdog...

Page 96: ...eset Power Down Power Cycle Power Cycle OS Watchdog Timer OS watchdog timer settings Options include Enabled Disabled Disabled OS Wtd Timer Timeout OS watchdog timer timeout settings Options include 5 minutes 10 minutes 15 minutes 20 minutes 10 minutes OS Wtd Timer Policy OS watchdog timer policy settings Options include Do Nothing Reset Power Down Power Cycle Reset BMC Network Configuration BMC n...

Page 97: ...k Network BMCSharelinknetworkon offsettings takeeffectimmediately Enabled BMC IPv4 Network Configuration BMC IPv4 network configuration BMC IPv6 Network Configuration BMC IPv6 network configuration 8 2 5 1 1 BMC IPv4 Network Configuration BMC IPv4 Network Configuration interface is used to configure the BMC IPv4 management network through BIOS Figure 8 64 ...

Page 98: ...ss Source Set BMC network status Options include Unspecified Static DynamicBmcDhcp The setting takes effect immediately Unspecified Current Configuration Address Current BMC configuration address status Station IP address Station IP address Subnet mask Subnet mask Station MAC address Station MAC address Router IP address Router IP address 8 2 5 1 2 BMC IPv6 Network Configuration BMC IPv6 Network C...

Page 99: ...nclude Unspecified Static DynamicBmcDhcp The setting takes effect immediately Unspecified Current Configuration Address Current BMC configuration address status Station IPv6 address Station IPv6 address Prefix Length IPv6 prefix length 8 2 5 2 BMC User Settings BMC User Settings interface is used to configure BMC users through BIOS Figure 8 66 Table 8 41 BMC User Settings Interface Instruction Tab...

Page 100: ...se letters special characters and numbers within 8 20 characters Channel NO Set BMC channel input 1 or 8 User Privilege Limit User privilege settings Options include Reserved Callback User Operator Administrator If the setting succeeds it will prompt Set User Access Command Passed and the BMC User takes effect immediately Reserved Note To enable the new user it needs to set the User option in the ...

Page 101: ...ription User Name Input the name of user to delete User Password Input the password of user to delete If the password is correct it pops up User Deleted The deletion takes effect immediately in BMC and this user can not login to the BMC Web interface any more 8 2 5 2 3 Change User Settings Change User Settings interface is used to modify the BMC user settings through BIOS Figure 8 69 ...

Page 102: ... Limit Modify the user privilege Options include Reserved Callback User Operator Administrator Reserved 8 2 5 3 VLAN Configuration VLAN Configuration interface is used to set the BMC VLAN parameters through BIOS Figure 8 70 Table 8 45 VLAN Configuration Interface Instruction Table Interface Parameters Function Description Default Value Sharelink Dedicated VLAN Control BMC sharelink dedicated VLAN ...

Page 103: ...manufacturer System Product Name System product name System Product Part Number System product part number System Version System version System Serial Number System serial number Board Manufacturer Board manufacturer Board Product Name Board product name Board Serial Number Board serial number Board Part Number Board part number Chassis Manufacturer Chassis manufacturer Chassis Product Name Chassi...

Page 104: ...nd lowercase letters special characters and numbers within 8 20 characters User Password Create a user password It must contain uppercase and lowercase letters special characters and numbers within 8 20 characters Secure Boot Secure boot menu 8 2 7 Boot Menu Boot interface is used to set the options related with system boot including boot mode boot priority boot procedure etc Figure 8 73 ...

Page 105: ...nabled Disabled Enabled Quiet Boot Quite boot on off settings Options include Enabled Disabled If it is set to Enabled the boot logo displays as that set by manufacturer if set to Disabled the boot screen displays as the text mode POST interface Enabled New Boot Option Policy New UEFI boot option policy settings Options include Default Place First Place Last Place First Fixed Boot Order Priorities...

Page 106: ... defaults Boot Override To override the boot option you could select the boot device from the following options 8 3 Firmware Update For BIOS update you could select to update in UEFI Shell or OS 8 3 1 Update BIOS in UEFI Shell 1 When Inspur Logo appears on the screen during system booting there is a prompt Press DEL to SETUP or TAB to POST or F11 to Boot Menu or F12 to PXE Boot below Press F11 key...

Page 107: ...ommended to power cycle the system Figure 8 77 4 If there are any changes in ME part execute the command to update 32M ME BIOS AfuEfix64 efi BIOS bin b p n x k l me and the process is as shown in the following figure Parameter instructions B Program Boot Block P Program main bios image N Program NVRAM X Do not check ROM ID K Program all non critical blocks L Program all ROM Holes ME Program ME Ent...

Page 108: ...Update BIOS in Linux There are 32bit and 64bit Linux OS afulnx tools Taking Linux 64bit OS as an example use the afulnx_64 tool to enter the directory containing afulnx_64 tool Meanwhile put the corresponding BIOS bin file into this folder When there is no change in ME part execute the command to update BIOS afulnx_64 BIOS bin b p n x k l as shown in the following figure ...

Page 109: ...multaneously afulnx_64 BIOS bin b p n x k l me as shown in the following figure Figure 8 80 Notes 1 For Linux system it needs to run the afulnx_64 tool as root 2 After the update is complete please power off the machine and confirm that there is no residual electricity on the motherboard and then power it on ...

Page 110: ...or OS hang or went down 9 2 1 Main Features Support IPMI 2 0 IPMI interfaces include KCS Lan and IPMB Management Protocol IPMI2 0 HTTPS SNMP Smash CLI Web GUI Redfish Management Network Interface Dedicated NCSI Console Redirection KVM and Virtual Media Serial Over Lan SOL Diagnostic Logs System Event Log SEL Blackbox Log Audit Log Hardware watchdog timer if the BMC does not respond within four min...

Page 111: ...erface provides IPMI Compliant KCS and BT interfaces The PCI Express interface is mainly used for the graphics controller interface to communicate with the host The graphics controller is a VGA compliant controller with 2D hardware acceleration and full bus master support The graphics controller can support up to 1920x1200 32bpp 60Hz resolution at high refresh rates The PCI Express interface is al...

Page 112: ...terface BMC supports IPMI V2 0 compatible with V1 5 and supports receiving and sending IPMI messages based on RMCP or RMCP format BMC supports up to 2 LAN Interfaces Dedicated NIC and Shared NIC List of supported cipher suites in IPMI Table 2 Supported Cipher Suites in IPMI ID Authentication Algorithm Integrity Algorithm Confidentiality Algorithm 0 RAKP NONE NONE NONE 1 RAKP HMAC SHA1 NONE NONE 2 ...

Page 113: ...ort App 09h YES Get Command Support App 0Ah YES Get Command Sub function Support App 0Bh YES Get Configurable Commands App 0Ch YES Get Configurable Command Sub functions App 0Dh YES Set Command Enables App 60h YES Get Command Enables App 61h YES Set Command Sub function Enables App 62h YES Get Command Sub function Enables App 63h YES Get OEM NetFn IANA Support App 64h YES BMC Watchdog Timer Comman...

Page 114: ...ctivate Payload App 48h YES Deactivate Payload App 49h YES Get Payload Activation Status App 4Ah YES Get Payload Instance Info App 4Bh YES Set User Payload Access App 4Ch YES Get User Payload Access App 4Dh YES Get Channel Payload Support App 4Eh YES Get Channel Payload Version App 4Fh YES Get Channel OEM Payload Info App 50h YES Master Write Read App 52h YES Get Channel Cipher Suites App 54h YES ...

Page 115: ...D S E 15h YES Alert Immediate S E 16h YES PET Acknowledge S E 17h YES Sensor Device Commands Get Device SDR Info S E 20h YES Get Device SDR S E 21h YES Reserve Device SDR Repository S E 22h YES Get Sensor Reading Factors S E 23h YES Set Sensor Hysteresis S E 24h YES Get Sensor Hysteresis S E 25h YES Set Sensor Threshold S E 26h YES Get Sensor Threshold S E 27h YES Set Sensor Event Enable S E 28h Y...

Page 116: ...46h YES Clear SEL Storage 47h YES Get SEL Time Storage 48h YES Set SEL Time Storage 49h YES Get Auxiliary Log Status Storage 5Ah YES Set Auxiliary Log Status Storage 5Bh YES Get SEL Time UTC Offset Storage 5Ch YES Set SEL Time UTC Offset Storage 5Dh YES LAN Device Commands Set LAN Configuration Parameters Transport 01h YES Get LAN Configuration Parameters Transport 02h YES Suspend BMC ARPs Transpo...

Page 117: ...h NO Set Bridge Proxy Address Bridge 04h NO Get Bridge Statistics Bridge 05h NO Get ICMB Capabilities Bridge 06h NO Clear Bridge Statistics Bridge 08h NO Get Bridge Proxy Address Bridge 09h NO Get ICMB Connector Info Bridge 0Ah NO Get ICMB Connection ID Bridge 0Bh NO Send ICMB Connection ID Bridge 0Ch NO Discovery Commands ICMB Prepare For Discovery Bridge 10h NO Get Addresses Bridge 11h NO Set Di...

Page 118: ...x64 Windows 10 x64 Ubuntu 14 04 03 LTS x64 MAC OS X Fedora 23 x64 CentOS 7 x64 On Windows Clients Edge Firefox 43 Chrome 47 IE 11 On Linux Clients Firefox 43 Chrome 47 On MAC Client Safari Step 1 Enter https BMC_IP in browser address bar Port number is modifiable See the Services section and the http port number is 80 disabled by default https port number is 443 If you modify the port number you n...

Page 119: ...ble 6 Features Supported in Web GUI Menus Subdirectory Auto Refresh Support Main content Overview Information General Information YES System Running State BMC Information Quick Launch Tasks Active Session FW Version Information Recent System Event Log Information Information System Info YES Device asset info and health state include CPU Memory Device Inventory Network Hard Disk Power Supply Unit F...

Page 120: ... NO Power limit setting Fan Speed Control YES Display fan speed and state Switch to manually fan control BMC Settings BMC Network NO BMC Network Setting BMC DNS Setting Network Bonding Network Link Setting Services NO Supported service or protocol setting NTP NO BMC time setting SMTP NO SMTP setting for email alert Alerts NO SNMP Trap and email alert setting Threshold NO Threshold setting for sens...

Page 121: ...an Internet Standard protocol for collecting and organizing information about managed devices on IP networks and for modifying that information to change device behavior In the BMC the agent can obtain the server information such as network information user information temperature voltage fan speed and so on through the SNMP service At the same time we can configure parameters and manage the serve...

Page 122: ...P Schematic 9 6 Smash Lite CLI BMC supports Smash Lite CLI users can login to BMC via SSH and enter Smash Lite CLI And it supports ipconfig sensor fru chassis user mc fan psu id diagnose commands as the figure shows Smash Lite help Figure 9 5 Smash Help Ipconfig Figure 9 6 Ipconfig ...

Page 123: ...BMC Settings 117 sensor Figure 9 7 Sensor fru Figure 9 8 Fru chassis Figure 9 9 Chassis user Figure 9 10 User ...

Page 124: ...118 mc Figure 9 11 MC fan Figure 9 12 Fan psu Figure 9 13 Psu id Figure 9 14 Id ...

Page 125: ...age Information System Information this page displays information and health status of main components of platform including CPU Memory PCIE Device Network Hard Disk Backplane Power Supply Unit Fan Temperature and Voltage 9 7 1 CPU Go to table CPU in System Information page Figure 9 16 CPU Information ...

Page 126: ...sed Core Number y is All Core Number TDP Rated Power L1 Cache KB L1 Cache L2 Cache KB L2 Cache L3 Cache KB L3 Cache 9 7 2 Memory Go to table Memory in System Information page Figure 9 17 Memory Information Table 8 Memory Information Attribute Value No x x denotes the number of Memory Location CPUx_CHy_DIMMz x y z starting from 0 Present Present Absent or power is off Size GB Size of memory Type DD...

Page 127: ...ard slot number where device is located Slot on Riser Riser slot number where the device is located Connection Type Connection Type Present Present Absent or power is off Device Type Device Type Device ID Device ID Vender ID Vendor ID Rated Width Rated Width Rated Speed Rated Speed Current Width Current Width Current Speed Current Speed 9 7 4 Network Go to table Network in System Information page ...

Page 128: ...No x x denotes the device number Present Present Absent Location Location Port Number Port Number MAC Address MAC Address 9 7 5 Hard Disk Go to table Hard Disk in System Information page Figure 9 20 Hard Disk Information Table 12 Hard Disk Backplane Attribute Value No x x denotes the device number Present Present Absent Port Number Port Number Hard Disk Number Hard Disk Number ...

Page 129: ...d Disk Backplane Number Error Normal State Error State Absent Locate Locating Absent or Non Locate Rebuild Rebuilding Absent or Non Locate NVME YES or NO 9 7 6 Power Supply Unit Go to table Power Supply Unit in System Information page Figure 9 21 Power Supply Unit Information Table 14 Power Supply Summary Attribute Value Present Power W Total Power Rated Power W Rated Power ...

Page 130: ...d 97h MFR ID Manufacture ID MFR Model Manufacture Model Serial Number Serial Number Rated Power W Rated Power FW Version Firmware Version Temperature C Temperature PIN W Input Power POUT W Output Power VIN V Input Voltage VOUT V Output Voltage IIN A Input Current IOUT A Output Current 9 7 7 FAN Go to table FAN in System Information page Figure 9 22 Fan Information ...

Page 131: ...r 9 7 8 Temperature Go to table Temperature in System Information page Figure 9 23 Temperature Information Table 17 Temperature Information Attribute Value Sensor Sensor Name Status Normal State Warning State Critical State State unavailable or current power is off Reading C Temperature Reading Lower NRT C Lower Non Recoverable Threshold Lower CT C Lower Critical Threshold Lower NCT C Lower Non Cr...

Page 132: ...sor Name Status Normal State Warning State Critical State State unavailable or current power is off Reading V Temperature Reading Lower NRT V Lower Non Recoverable Threshold Lower CT V Lower Critical Threshold Lower NCT V Lower Non Critical Threshold Up NCT V Up Non Critical Threshold Up CT V Up Critical Threshold Up NRT V Up Non Recoverable Threshold Note Threshold value N A means not configured ...

Page 133: ...ate One or more CPUx_Status critical Power Off Memory Memory Healthy state Normal All Memories Normal Warning State One or more CPUx_CHy_DIMMz warning Critical State One or more CPUx_CHy_DIMMz critical Power Off Hard Disk Hard Disk Healthy state Normal All Disks Normal Warning State One or more DISKx_Status warning Critical State One or more DISKx_Status critical Power Off Fan Fan Healthy state No...

Page 134: ... One or more Temperature Sensors warning Critical State One or more Temperature Sensors critical Power Off ME ME state Normal State Warning State ME_FW_Status Sensor warning Critical State ME_FW_Status Sensor critical State unavailable or current power is off 9 7 11 Firmware Version Page Firmware Version Information displays version of firmware residing in the platform including BMC BIOS ME PSU PC...

Page 135: ...ion Language Manufacture Date Time weekday month day year Board Manufacturer Inspur Board Product Name Board Serial Number Board Part Number Board Extra Product Information Product Information Area Format Version Language Manufacture Name Inspur Product Name Product Part Number Product Version Product Serial Number Asset Tag 9 8 Device State Monitor and Diagnostic 9 8 1 Sensors 9 8 1 1 Physical Se...

Page 136: ...ant Watchdog Timer Event Log The Event Log sensor is used to indicate when the event log is cleared An assertion event is logged against this sensor when the SEL is cleared This discrete sensor also supports offsets that indicate when the SEL is full and almost full Clear CMOS If BIOS CMOS is cleared by BMC an assertion event will be logged System Restart When system is cold reset or hard reset an...

Page 137: ...red State Level Related Model Present Info SDR SEL Thermal Trip Critical SDR SEL Processor Hot Critical SDR SEL Catt Error Critical SDR SEL Error0 Warning Blackbox Error1 Warning Blackbox Error2 Critical Blackbox CPU VR Hot Critical Blackbox PCH Thermal Trip Critical Blackbox 9 8 3 Memory Table 23 Memory Health State Monitored State Level Related Model Mem Hot Critical Blackbox Mem VR Hot Critical...

Page 138: ...s and user can get the sensor event information by WEB or IPMI CMD Support up to 3639 items Support linear mode When SEL is full new log will be discarded Support cycle mode default mode When SEL is full oldest log will be discarded When SEL is almost full 75 then Almost full log will be recorded in SEL When SEL is full in linear mode Full log will be recorded in SEL When SEL is clear Clear log wi...

Page 139: ...rmation Sensor Name Sensor Name locate the device Sensor Type Sensor Type defined in IPMI2 0 Description Event details 9 9 2 Audit Log BMC provides ability to record BMC system audit log All Web setting operating actions will be recorded Web SSH login and logout will be recorded Audit log supported size is 50K if more than 50K log will be cleared Support exporting log by Web ...

Page 140: ...function used to record some details when event occurred Record each CPU s MSR CSR Registers used for fault diagnostic CPU Catterr Thermal Trip Error2 Uncorrectable ECC will trigger the record of CPU Registers Record event details for Non IPMI events used for diagnostic When more than 3M log will loop to store and the old log content will be deleted Support exporting log by WEB Figure 9 28 Blackbo...

Page 141: ...the trap receiver BMC supports SNMP v1 v2 v3 traps Default Trap v1 A Modular Information Block MIB file associated with the traps should be provided with the BMC firmware to help SNMP Trap receiver to translate the trap SNMP default port number is 162 users can set port in Chapter Service Only IPMI sensor based log supports SNMP Traps Step 1 Set SNMP Trap protocol including Trap version event seve...

Page 142: ...twork then set destination to a user configured email Figure 9 31 Alert Policy Configure 9 10 2 SMTP Email Alert SMTP Simple Mail Transport Protocol defined in RFC821 email alert is supported The email alert provides text information about the event Step 1 Configure SMTP settings Users should set SMTP server for used LAN channel if an event occurs Sender Email will send an email to destination ema...

Page 143: ... address IPv4 IPv6 FQDN port number log type enable status and send test information Report log supports security log operation log and system event log and it is configurable These logs carry host log Considering security Syslog report logs support TLS encryption and support bidirectional authentication based on imported certificate 9 11 Diagnostics Diagnostic tool provides the ability of check a...

Page 144: ... 80h BMC is able to trace post code via port 80h to figure out the cause of issue happened Figure 9 34 BIOS Post Code 9 11 2 Screen Capture BMC will record monitor screen after server power reset or power off BMC also supports BSOD Blue Screen of Death screen capturing server OS should be Windows 2012R2 and above Figure 9 35 Screen Capture ...

Page 145: ...r will be reset Cold reset BMC use WEB or ipmtool mc reset cold and BMC will be reset KVM reset user WEB and KVM server will be reset Figure 9 36 BMC Recovery 9 12 BMC Self Recovery BMC Self Recovery provides the ability of automatic repair operations as well if necessary 9 12 1 Hardware Watchdog Known fault scenarios Kernel panic System resources exhausted or error system can t create a new task ...

Page 146: ...SYS LED is OFF SYS LED Red ON The following CPU events occur 1 CPU IERR 2 CPU Thermal Trip 3 PCIE Error SYS LED Red BLINK The following warning about CPU appears Processor Automatically Throttled Power LED Yellow ON Power plugged in but not powered on Power LED Green ON 1 Power on 2 Power button is pressed BMC Heartbeat Green BLINK BMC status OK BMC Heartbeat Green ON OFF BMC error DIMM Error Red ...

Page 147: ... polling periodically Bonding function is disabled by default users can enable it in WEB GUI or IPMI CMD Only support Active backup bonding mode Default bonding on both NICs Dedicated and Shared NICs means network will be working on the NIC plugged with cable If both NICs plugged with cable before BMC bootup shared NIC will be primary network to be working If one NIC plugged with cable before BMC ...

Page 148: ...BMC to a set of Network Interface Controllers NICs in server computer systems for the purpose of enabling out of band remote manageability It mainly includes a management controller MC one or more support up to 4 NCSI electrical characteristics network controllers NC The network controller on the one hand connects the external network interface to the internal host interface and on the other hand ...

Page 149: ...ort link is disconnected Default NCSI mode is Manual Switch to port0 NCSI Failover setting as shown in figure BMC Shared NIC Switch NCSI Mode Select the supported NCSI mode The available modes are Auto Failover and Manual Switch BMC Shared NIC Select the port of shared NIC The available port is eth0 Channel Number Select the channel number of the selected NIC Channel 0 1 2 or 3 can be selected 9 1...

Page 150: ...istrator User Name Password can be changed 9 15 1 1 User Security Username User Name is a string of 1 to 16 alpha numeric characters including _ and It must start with an alphabetical character It is case sensitive Special characters comma period colon semicolon space slash backslash left bracket right bracket and so on are not allowed Password Authentication Password encryption scheme 64Bit Blowf...

Page 151: ...gest you enable this function for security Password Failed Locking is only supported in Web GUI Password History Record Password History Records The range is 0 5 Disabled by default If enabled you could not set password same to Password History Records last N passwords Password History Record is only supported in Web GUI 9 15 2 BMC System Root User System root user can be used to access BMC Diagno...

Page 152: ...odically 9 15 3 1 User Security SNMPV3 supports user authentication supported authentication algorithm is SHA and MD5 SNMPV3 supports user privacy supported privacy algorithm is DES and AES 9 15 4 Uboot Password You can access BMC Uboot by BMC Diagnose Serial Cable For security you cannot access Uboot by default Password is not set by default If you want to access Uboot you must set a password the...

Page 153: ... 5 2 User Privilege for Management Web GUI Only IPMI WEB SSH Unified User supports Web GUI Table 32 User Privilege for Management Web GUI Menu Subdirectory N U O A Information System Information NA RO RO RW History Record NA RO RO RW Remote Control Console Redirection NA NA NA RW Locate Server NA NA NA RW Remote Session NA RO RO RW Virtual Media NA RO RO RW Mouse Mode NA RO RO RW Power and Fan Pow...

Page 154: ... Firmware Update NA NA NA RW BIOS FW Update NA NA NA RW CPLD Update NA NA NA RW PSOC Update NA NA NA RW Restore Factory Defaults NA NA NA RW Note N No Access Privilege level U User Privilege level O Operator Privilege level A Administrator Privilege level RW Support Read and Write operation RO Support Read operation only For Operator and User privilege if with RO attribute the settings are visible...

Page 155: ... NO YES YES YES set NO NO NO YES fan get NO YES YES YES set NO NO NO YES psu get NO YES YES YES set NO NO NO YES password get NO NO NO NO sol get NO NO NO YES id set NO YES YES YES register get NO NO NO YES set NO NO NO YES diagnose get NO NO NO YES diaglog get NO NO NO NO Note N No Access Privilege level of Unified User U User Privilege level of Unified User O Operator Privilege level of Unified ...

Page 156: ...curity Port Default Port Timeout s Max Session TCP UDP RMCP IPMI Enable 623 N A N A 1800 20 TCP UDP HTTP HTTPS Web GUI Enable 80 Http 443 Https 443 Https 1800 20 TCP KVM Console Redirection Enable 7578 7582 7578 1800 4 TCP cd media Virtual Media Enable 5120 5124 5120 N A 4 TCP fd media Virtual Media Enable 5122 5126 5122 N A 4 TCP hd media Virtual Media Enable 5123 5127 5123 N A 4 TCP Ssh ssh Enab...

Page 157: ...y interface such as WEB UI users are able to get current system date and time information or configure date and time or synchronize date and time through NTP Table 36 Time and NTP Mode State UTC Timezone NTP Server1 NTP server2 NTP Server3 Manual Disable N A N A N A N A NTP Enable GMT 0 pool ntp org time nist gov time nist gov Time Synchronization BMC will synchronize time with ME after BMC runnin...

Page 158: ...T code redirection to certain BMC GPIO group NMI to PCH Non Maskable Interrupt The highest priority interrupt in the system after SMI This interrupt has traditionally been used to notify the operating system fatal system hardware error conditions such as parity errors and unrecoverable bus errors It is also used as a Diagnostic Interrupt for generating diagnostic traces and core dumps from the ope...

Page 159: ...Setup Options Figure 9 42 BIOS Setup Options 9 18 2 BIOS Boot Options BMC supports BIOS startup options including timeliness and startup options BMC must restart within 60 seconds otherwise the BIOS startup option action will be invalid Timeliness Selectable timeliness is only used for the next boot or applies to all boot Startup options No override Force PXE Force boot from default Hard drive For...

Page 160: ...Broadcom 12 ALL Supported 3008 IT SAS Broadcom 12 14 00 02 00 Not Supported 3008 IR SAS Broadcom 12 14 00 02 00 Not Supported 3008 iMR RAID Broadcom 12 ALL Supported 9305 16i SAS Broadcom 12 Not supported 9361 16i RAID Broadcom 12 Supported 2208 8i RAID Broadcom 6 X Not Supported 9364 8i RAID Broadcom 12 ALL Supported 8060 RAID Microsemi 12 33083 and above Not Supported 9300 8e SAS Broadcom 12 Not...

Page 161: ...ed Schematic that BMC accesses RAID SAS controller storelib RAID Monitor I2C Driver BMC Firmware RAID Controller Internet HDDs Figure 9 44 Schematic that BMC Access RAID SAS Controller Table 38 Storage Management Information Device Monitored Information RAID controller Product Name Serial Number Vendor ID SubVendor ID Device ID SubDevice ID Host Interface Firmware Version WebBIOS Version BIOS Vers...

Page 162: ...truction Rate S M A R T Polling Cache Flush Interval s Spinup Drive Count Spinup Delay Controller BIOS Shield State Supported Maintain PD Fail History Battery Warning Hard disk Device ID Enclosure ID Firmware State Media Type Vendor ID Product Revision Level Max Speed Gbps Temperature Cel Raw Size GB Media Error Count User Data Block Size B Certified Disabled for Removal FW Download Allowed Securi...

Page 163: ...n The managed server can be located by means of UID LED Users can control UID LED by BMC IPMI CMD and UID Button separately UID can be turned on off by UID Button even BMC crashed The Remote Control Locate Server page shows the status of UID Turn on UID Specify the light time period and click Turn On Led button to turn on UID for specified time Turn off UID Click Turn Off Led button to turn off UI...

Page 164: ...annot normally output power server will work normally powered by other power supply 9 21 2 PSU Active Standby In the case of meeting the normal work BMC provides a way to manually set the power supply to standby to improve power conversion efficiency PSU defaults to Activate Activate mode and if it need switch to Active Standby mode as the power supply is critical the work need to do under the gui...

Page 165: ...supply rated power reaches the upper limit Figure 9 47 PSU Active Standby 9 21 3 Power Peak Power peak is used to prevent many servers from being started at the same time when first time A C power is restored which would cause heavy power loading Power peak can be enabled or disabled Disabled by default When it is enabled users can configure the maximum random time BMC will power on server with a ...

Page 166: ... 9 49 Power Limits 9 21 5 Power Consumption Statistics and History Record BMC provides curve based inlet temperature and power monitoring statistics Administrators can gain insight into the actual use of electricity and cooling resources through energy monitoring devices Users can optimize the server s energy savings based on historical data Go to page Power Management Power statistics and this pa...

Page 167: ...ally Fan Control in Web GUI if enabled users can select one of four fan speeds predefined for each fan module These predefined fan speeds are Low Medium High and Full Click Power and Fan Fan Speed Control to go to the configuration page Select Manually Fan Control and click the fan speed you want In the Duty Ratio filed users can see the duty ratio of the fan module In this page users can know the...

Page 168: ...e to update firmware This is a sideband mode it supports Firmware Integrity Checking and preserving configuration It is a suggested update mode SOCflash tool update SOCflash tool is used in DOS Windows Linux OS SOCflash will directly erase and overwrite flash with new image without Firmware Integrity Checking All configuration will be erased This is an inband mode users should accept user permissi...

Page 169: ...rade process is a crucial operation Make sure that the chances of a power or connectivity loss are minimal when performing this operation Once you enter into Update Mode and choose to cancel the firmware flash operation BMC must be reset This means that you must close the Internet browser and log back onto the BMC before you can perform any other types of operations It defaults to boot the higher ...

Page 170: ...button to upload file BMC will enter flash mode IPMI service will stop and then BMC will verify image Verify Size should be 32M Verify image integrity it will make sure this is BMC image If the verification fails BMC will stop flash and restart Figure 9 4 BMC Update Step 2 ...

Page 171: ...u want to enable SOCflash you should enable High performance Bus AHB bridges please contact our support staff to get the method We strongly don t suggest customer to use SOCflash tool for security To update BMC in Windows Linux DOS enter DOS or Linux shell or Windows cmd line execute the following CMDs socflash if Imagefile will update the Image1 socflash if Imagefile offset 0x2000000 will update ...

Page 172: ... be preserved by default Click Enter Firmware Update Mode button to enter update mode Figure 9 56 BIOS Update Step 1 Step 2 Select image file and click Upload button to upload file ME will enter recovery mode and then BMC will verify the image Verify Size should be 32M Verify image integrity it will make sure this is BIOS image If the verification fails BMC will stop flash and change ME to normal ...

Page 173: ... will be restored after clicking Restore Factory Defaults or upgrading BMC Table 39 Restore Factory Defaults Items Preserved configuration Note SEL SEL Log IPMI IPMI including PEF data SOL data IPMI user information SMTP DCMI data etc PEF PEF Select IPMI option when this configuration is included SOL SOL Select IPMI option when this configuration is included SMTP SMTP Select IPMI option when this ...

Page 174: ...mote network client Users connect to the BMC on the local PC open the serial port redirection function with the standard IPMI command sol activate view the system serial output and enter the system serial port COM0 and COM1 both support SOL COM0 port has connector on the motherboard The COM1 port is dedicated for SOL function SOL is enabled on COM0 some projects on COM1 by default users should con...

Page 175: ... The logs BIOS or OS sends to the serial port will be recorded to the BMC s DDR and keep up to 2M bytes of system serial logs When more than 2M log will loop to store and the old log content will be deleted When the system crashes or restarts system serial log can be exported and fault information can be used for fault diagnosis 9 26 Console Redirection KVM Remote KVM redirects the host system s c...

Page 176: ...RGB ARM LAN BMC USB Keyboard Mouse Video Keyboard Mouse Video Figure 9 62 KVM Schematic 9 26 1 HTML5 KVM BMC supports HTML5 KVM supported on Chrome 58 and above IE 11 and above Not depend on JAVA NET Go to Remote Control Console Redirection in WEB GUI click Launch KVM HTML5 Viewer to launch HTML5 KVM Figure 9 63 Console Redirection Figure 9 64 KVM Screen ...

Page 177: ...emote Control Console Redirection in WEB GUI click Launch KVM Java Viewer to launch Java KVM Figure 9 65 Java KVM 9 26 3 KVM Reconnect Support reconnection after network disconnection the retry count is 3 by default and the retry time interval is 10s Users could change reconnect setting in page Remote Control Configure Remote Session Retry count ranges from 1 to 6 time interval ranges from 5 to 30...

Page 178: ...RHEL 5 4 Relative Relative Relative Relative RHEL 5 6 Relative Relative Relative Relative RHEL 6 0 Absolute Absolute Absolute Absolute RHEL 6 4 Absolute Absolute Absolute Absolute RHEL 7 0 Absolute Absolute Absolute Absolute Fedora10 Relative Relative Relative Relative Fedora11 Absolute Absolute Absolute Absolute Fedora12 Absolute Absolute Absolute Absolute Fedora14 Absolute Absolute Absolute Abso...

Page 179: ...te OpenSuse 12 1 Relative Relative Relative Relative Windows 2008 Absolute Absolute Absolute Absolute Windows server 2012 Absolute Absolute Absolute Absolute 9 27 Virtual Media The media redirection will allow users to take various media devices and images that presented on the client side Local Media Support or remote Remote Media Support and attach them as virtual USB on the server side in which...

Page 180: ...k uncheck the Enable check box Note You can also select all the media types simultaneously Server Address for CD DVD Images Displays the address of the server where the remote media images are stored Path in server Displays the Source path to the remote media images Share Type for CD DVD Displays the Share Type of the remote media server either NFS or CIFS Domain Name Username and Password If shar...

Page 181: ...rough the HTTP client The following is the use of curl in Linux to send the request to access redfish The usual request operation is GET PUT POST PATCH DELETE and so on The sending and receiving data are all in json format The username and password below must be BMC users with administrator privileges 9 28 1 GET The client gets the data of the specified URL via HTTP GET The basic format is as foll...

Page 182: ...ions 1 X DELETE Note https BMC_IP 8080 redfish v1 SessionService Sessions 1 is the deleted address 9 28 4 Steps 1 Get the resources provided by Redfish Redfish s root directory visit does not require authorization Get the accessible resource URL through visiting the Redfish root directory Request curl k u username password https BMC_IP 8080 redfish v1 Response Redfish Copyright Copyright 2014 2016...

Page 183: ...he Chassis category redfish v1 Chassis Request curl k u username password https BMC_IP 8080 redfish v1 Chassis Response Redfish Copyright Copyright 2014 2016 Distributed Management Task Force Inc DMTF For the full DMTF copyright policy see http www dmtf org about policies copyright odata context redfish v1 metadata ChassisCollection ChassisCollection odata id redfish v1 Chassis odata type ChassisC...

Page 184: ...hermal odata id redfish v1 Chassis 1 Thermal Power odata id redfish v1 Chassis 1 Power Links ComputerSystems odata id redfish v1 Systems 5280 ManagedBy odata id redfish v1 Managers BMC ManagersInChassis odata id redfish v1 Managers BMC odata context redfish v1 metadata Chassis Chassis odata id redfish v1 Chassis 1 Redfish Copyright Copyright 2014 2016 Distributed Management Task Force Inc DMTF For...

Page 185: ...spection Code Description 0x55 SFT_CODE_OK 0x56 SFT_CODE_NOT_IMPLEMENTED 0x57 SFT_CODE_DEV_CORRUPTED 0x58 SFT_CODE_FATAL_ERROR 0xff SFT_CODE_RESERVED 0x80 SEL_ERROR 0x40 SDR_ERROR 0x20 FRU_ERROR 0x10 IPMB_ERROR 0x08 SDRR_EMPTY 0x04 INTERNAL_USE 0x02 FW_BOOTBLOCK 0x01 FW_CORRUPTED ...

Page 186: ...If there is a machine and a power module of the same type you could change the power module to test whether there is a power module fault d If the instructions above do not resolve the problem please contact Inspur customer service 2 No display after power on Description After pressing the power button the power LED on server s front control panel is on the chassis fans rotate normally but there s...

Page 187: ...ld not resolve the problem please contact Inspur customer service 4 Power module LED is off or red Description The server is under normal operation but a certain power module LED is off or red Suggestions a Firstly check whether all power cables are normal and plug in the power cables again b If the fault still exists insert the power module again c If shutdown is allowed you could exchange the tw...

Page 188: ...emperature of server room if it is excessively high open the air conditioner to cool the room c If the server room s temperature is normal check whether the front panel or chassis interior is jammed with dust or the air inlet is blocked It needs to improve the server room s environment to avoid server over temperature running because of too much dust d Check whether the server runs under high load...

Page 189: ...the operating system on server supports USB devices b Make sure the system has been installed with correct USB device driver c Power off the server and then power on again to test d Check whether the USB device is normal when connected to other hosts e If the USB device is normal when connected to other hosts the server may be abnormal please contact Inspur customer service f If the USB device tur...

Page 190: ...ntified completely the operating system may have limits to the memory capacity e g Windows server 2008 x86 supports 4G memory at most b If the memory is not identified completely in BIOS Setup confirm that the corresponding slots have been installed with memories of correct type c If above operations could not resolve the problem please contact Inspur customer service 3 Abnormal network Descriptio...

Page 191: ...battery Do not expose the battery to temperatures higher than 60 C 140 F Do not disassemble crush puncture short external contacts or dispose of in fire or water Replace only with the spare designated for this product To remove the component 1 Power down the server 2 Extend the server from the rack 3 Remove the access panel 4 Remove the full length expansion board retainer if any full length expan...

Page 192: ...l devices into two classes A and B depending upon their intended installation Class A devices are those that may reasonably be expected to be installed in a business or commercial environment Class B devices are those that may reasonably be expected to be installed in a residential environment for example personal computers The FCC requires devices in both classes to bear a label indicating the in...

Page 193: ...ily and available in English only within the product documentation The compliance is indicated by one of the following conformity markings placed on the product Please refer to the regulatory label provided on the product 12 4 Disposal of Waste Equipment by Users in the European Union This symbol on the product or on its packaging indicates that this product must not be disposed of with other hous...

Page 194: ...12 7 Battery Replacement Notice CAUTION Risk of explosion if battery is replaced by an incorrect type Dispose of used batteries according to the instruct ions ATTENTION Risque d explosion si la batterie est remplacée par un type incorrect Mettre au rebus les batteries usagées selon les instructions ...

Page 195: ...ks of fire explosion or leakage of flammable liquid or gas Replace battery with an incorrect type Dispose of a battery into fire or a hot oven or mechanically crushing or cutting of a battery Dispose the used battery according to your local regulations or the battery manufacturer s instructions 12 8 2 Avertis sement de l utilisation de la batterie Lorsque utiliser la batterie évitez Températures e...

Page 196: ... placed inside any part of the body seek immediate medical attention 12 8 4 Avertissements de sécurité personnelle Risque de brûlure chimique Ce produit contient une batterie de cellules N ingérer pas la batterie Si la batterie de cellule est avalée elle peut causer de graves brûlures internes en seulement 2 heures et peut entraîner la mort Gardez les batteries nouvelles ou utilisées à l écart des...

Page 197: ...tatic sensitive component or assembly 13 2 Grounding Methods to Prevent Electrostatic Discharge Several methods are used for grounding Use one or more of the following methods when handling or installing electrostatic sensitive parts Use a wrist strap connected by a ground cord to a grounded workstation or computer chassis Wrist straps are flexible straps with a minimum of 1 megohm 10 percent resi...

Page 198: ...ices 3 years 14 1 2 Warranty Service Terms Conditions i Remote Services Inspur provides 24x7 remote service through Hotline E mail and Website Through Hotline and E mail Services Inspur engineer helps customers determine the cause of the malfunction and provide solution Website service provides a number of resources to help customers resolve problems and learn about our products such as product ma...

Page 199: ...ranty Service Terms Conditions do not apply to consumable parts as well as any products the serial number of which falls off is damaged or obscure for the following reasons Accident misuse abuse defiling improper maintenance or calibration or other external causes Operating beyond the parameters as stipulated in the user documentation Use of the software interface parts or supplies not provided by...

Page 200: ... Mobula MobulaBP Skybolt Tatsu WD drive neodymium content reference range Table 15 2 Product Series Name Neodymium Content Range 5g 5g 25g 25g Rainier Libra He10 Leo A Vela A Vela AX Vela AP Hs14 Leo B Toshiba drive neodymium content reference range Table 15 3 Product Series Name Neodymium Content Range 5g 5g 25g 25g AL14SE Lite AL15SE AL14SX MG04 Tomcat R SAS MG04 Tomcat R SATA MG04 Tomcat SATA M...

Reviews: