USER MANUAL
– EN
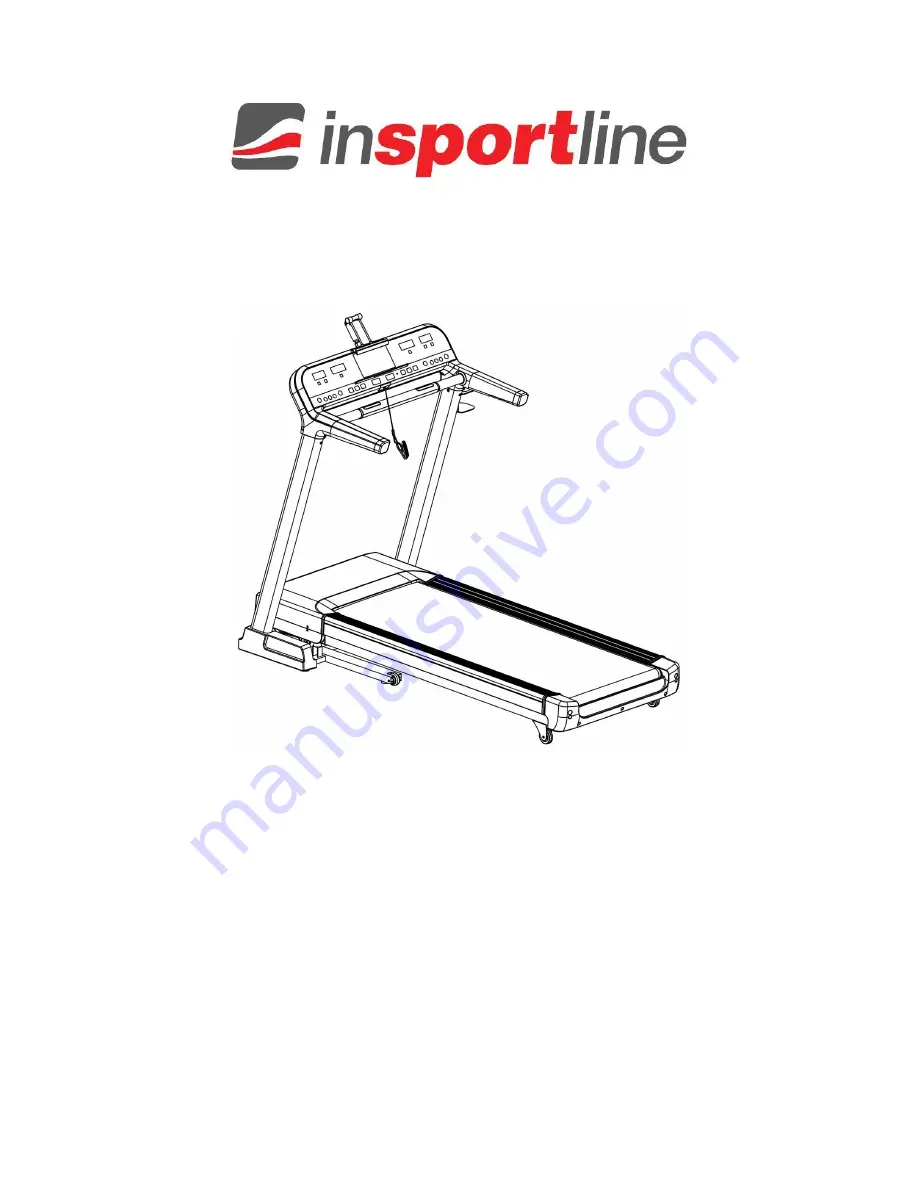
IN 16529 Treadmill inSPORTline inCondi T70i II
Page 1: ...USER MANUAL EN IN 16529 Treadmill inSPORTline inCondi T70i II ...
Page 2: ...EPS 9 TRANSPORT TIPS 9 OPERATION INTRODUCTION 10 HOMEPAGE INTRODUCTION 11 ICON DESCRIPTION 12 FUNCTION DESCRIPTION 13 SIMPLE MALFUNCTION AND SOLUTION SHOWN IN TFT SCREEN 30 STRETCHING TIPS 31 MAINTENANCE 32 EXPLODED DRAWING 34 PARTS LIST 36 TERMS AND CONDITIONS OF WARRANTY WARRANTY CLAIMS 39 ...
Page 3: ...e and according to this manual Be sure that the voltage of the electric supply is correct and same as indicated on the power cable Inform all possible users about safety and possible risks Two adult people are required to remove it from the package and to assemble it Unplug it from the wall socket or from the power source before assembly Put in on a solid flat and clean surface Use a protective co...
Page 4: ... or mental capability or for people with lack of experiences Such people should be under adult supervision all the exercising time Never let children play with this device It is not a toy This machine should be properly earthed to avoid an electric shock Weight limit 125 kg Category HC according to EN957 norm suitable for home using WARNING The heart rate frequency monitoring may not be completely...
Page 5: ...9 mm 1 WARNING Don t switch on before finishing the assembly ASSEMBLY STEPS STEP 1 Open the package and put the mainframe A on the floor WARNING Don t open the packing belt P before setting up the treadmill STEP 2 First lift columns A06 and A07 Fix column A06 to the main frame A with bolt E13 and lock washer E32 using 5 Allen wrench B09 Fix the column A07 to the mainframe according to the steps ab...
Page 6: ... STEP 4 Screw the iPad holder C into the monitor B with solid wrench B15 WARNING First screw the shaft B12 of the iPad holder into the monitor B by hand and then fasten the stop nut B13 using solid wrench B15 The iPad holder is an optional part You will not assemble it if you don t find it in the package STEP 5 Fix the left and right foam handlebar C05 C06 to the monitor B with bolt E22 and big wa...
Page 7: ...ucture of the left and right bottom cover is a buckle design Please make sure all the buckles are securely fastened STEP 7 Fix the bottle holder B01 to the right column A07 using bolt E22 with cross solid wrench B08 STEP 8 Cut off the P belt Insert the safety key D07 into the monitor B ...
Page 8: ... STEP 9 Take apart the bolt M8 15 E13 in the bottom side of the steel cable E using 5 Allen wrench B09 STEP 10 Take apart the bolt M8 15 E13 in the top side of the steel cable E using 5 Allen wrench B09 Then take away the steel cable from the bottom frame NOTICE The steel cable will ensure your safety during assembly You can keep it for future using ...
Page 9: ...port place F with hand kick the place E of air pressure bar then the base frame will fall automatically TRANSPORT TIPS To tilt it start by placing one hand at position F to support the top end of the treadmill Next place one foot at position D to hold the bottom end of the treadmill steady With your foot at D slowly tilt the top of the treadmill downward and towards the ground Once the main frame ...
Page 10: ...et inclination it shows current inclination in range 0 15 If there is not any operation it enters calorie window after 30 seconds 2 Time window displays running time 3 Distance window displays running distance 4 Speed Pulse window it shows usually your current speed in range 0 8 20 0 km h If you hold the pulse sensor for several seconds it shows your current pulse in range 50 200 bpm These data ar...
Page 11: ...by mode 13 MP3 interface You can connect external MP3 and mobile phone with a MP3 wire to play music 14 Press it to go to the previous music or video 15 Press it to go to the next music or video 16 Press this button to go back to home page 17 Speed button each press decreases the speed by 0 1 km h Press it over 0 5 second and the speed decreases continually 18 Speed 6 8 10 Shortcut key for differe...
Page 12: ...how QR code Scan to download FitShow APP with your mobile phone It is an optional function according to the request Local Media Programs Pace System manage Volume button click to adjust the volume while playing music or video Home button click to go back to the home page Time current time displaying Start button click to start running and you can drag the icon to set its position Internet Real vie...
Page 13: ...ideo format of MP3 APE MP4 MOV It is better to play music with bright rhythm during music Music with fast or changeful rhythm will disrupt your running pace It is dangerous to watch video while running because of mind distraction a Click local media icon to enter local media page as below Click on music icon to show the page as below ...
Page 14: ...d the file size The white words stand for the rest of the music and the size of the file PLAY Play in order PAUSE Random play PREV Single cycle NEXT Progress bar b Click on to enter video page as below Slide up and down and click to play the video that you want ICON DESCRIPTION PREV Toggle between full screen and windowed by single tap of the playing video NEXT PLAY ...
Page 15: ... file Progress bar 2 Internet Internet is available after connecting to WIFI Support to display music and video format of MP3 APE MP4 MOV It is dangerous to search the internet while running because of mental distraction Click on the internet icon to check the available APP ...
Page 16: ...e page as shown below There are three countdown modes and five pre set programs available Click to choose the icon that you need by sliding around on the screen with your finger Adjust the value by clicking on the buttons and ICON DESCRIPTION 3 countdown modes 5 pre set programs Time countdown Body sculpting Distance countdown Fat burning Calories countdown Mountain ...
Page 17: ...wn mode for reference Click on the countdown mode and the page as below will show During the process of time countdown click anywhere of the screen to enter incline and speed adjustment page as below Press Incline and Speed button to adjust the speed and incline ...
Page 18: ...y running distance Display consumed calories Display running speed b Pre set programs take program Road for reference Click on the ROAD icon and adjust the target time and press START button to exercise The speed will change according to each stage You can change the speed and incline by pressing SPEED and INCLINE key during each stage Also you can adjust the speed and incline by touching the scre...
Page 19: ...running time to the target setting time Speed and incline column diagram horizontal display segments Each pre set program is divided into 16 sections Ordinate displays running speed and incline of each section Light green stands for speed Dark green stands for incline ...
Page 20: ... Heart rate control program it is an optional function It is only available if the treadmill comes with heart rate reviver and a chest belt Click on the heart rate control program icon to enter the setting page as above Click on the START icon after setting the age target heart rate and max adjust speed The program starts with a warm stage which lasts 1 minute with incline 0 and lowest speed You c...
Page 21: ...l Choose a suitable pace program according to your physical condition Run in the centre of the running belt Click on the PACE icon to enter the page as below There are six available paces Slide around with your finger to choose the pace that you need and you can adjust target running time per 1 km by buttons and ...
Page 22: ...ce Click on the marathon pace icon and the page as below will appear ICON DESCRIPTION Annular map display the percentage of current running distance to the target distance Circular diagram Purple target pace Yellow current pace Blue average pace The screen will pop up a running data automatically when you stop running ...
Page 23: ...rve a water intake and don t run for more than 60 minutes continually Click on the REAL VIEW SPORT icon There are three real view for selection canyon grassland seaside Click on the grassland icon and the page will show as below The bottom of the page will show exercise data Use this icon to display or to hide the data ...
Page 24: ...he system keeps it automatically Connect to WIFI before running The data will upload to the service management centre You can check your ranking among all users Data only for ranking Your personal data will be kept in privacy Click on the USER icon to set your personal data The page will show as below ...
Page 25: ... and password 2 Click on register to fill in your account number name and password Press done after finishing 3 Accomplish by clicking on the register user 4 If you already got an account just click on the guest on the left top and choose the Login Then insert your account number and password to log in ...
Page 26: ...rds Distance accumulated running distance Time accumulated running time Calories accumulated consumed calories Click on the red column to check the history records Click on the blue column to check daily records Click on the HISTORY RECORDS icon to check your history records ...
Page 27: ...System manage Don t download too much APP to avoid system breakdown Uninstalling the pre set APP is prohibited Please remove the APP data and cache regularly Click on the SYSTEM MANAGE icon to go to the setting page Click on BRIGHT ADJUST icon to adjust the brightness ...
Page 28: ...28 Click on WIFI icon to search and connect to WIFI Click on CLEAN CACHE ICON and the page as below will appear Tick the box on the right and then click on the clean cache The cache will be wiped ...
Page 29: ...29 Click on the TREADMILL MANAGE icon to check the total distance that the treadmill has to go and how many KM are to next lubrication ...
Page 30: ...30 SIMPLE MALFUNCTION AND SOLUTION SHOWN IN TFT SCREEN ...
Page 31: ...or 30 seconds and usually repeat for about 2 or 3 times Don t stretch too much to avoid hurts If you feel some pain stop exercising immediately Don t bounce Stretching should be gradual and relaxed Don t hold your breath during stretching Stretch after exercising to prevent muscles tightening up Stretch at least three times a week to maintain your flexibility Thigh stretching Stand on your right l...
Page 32: ...r about 10 seconds MAINTENANCE WARNING Before cleaning this machine make sure the power has been switched off Cleaning Wipe away the dust on the belt running board and side footboard as excess dust may increase the friction of the belt and cause machine breakage It is recommended to clean the machine once a month LUBRICATION Lubrication needed per 300 km The machine will give a sound alarm and dis...
Page 33: ...pping Adjust bolts according to the diagram below When adjusting the two sides make sure each adjustment is the same on either side of the machine We recommend adjusting by half a turn until the running belt does not slip or deviate Don t tight it too much WARNING To prolong product lifespan we suggest switch off the treadmill for about 10 minutes after 2 hours of exercising Too loose or too tight...
Page 34: ...34 EXPLODED DRAWING ...
Page 35: ...35 ...
Page 36: ...ransport wheel 4 B08 Cross solid wrench 1 B09 Inner hex wrench 1 B10 Handle pulse sheet 4 B11 Safety key seat 1 B12 iPad shaft 1 B13 Stop nut 1 B14 iPad connect pole 2 B15 Solid wrench 1 C01 Monitor top cover 1 C02 Monitor bottom cover 1 C03 Monitor left bottom cover 1 C04 Monitor right bottom cover 1 C05 Left foam handlebar 1 C06 Right foam handlebar 1 C07 iPad rotation component 1 C08 iPad holde...
Page 37: ...29 Flat foot pad 6 C30 Transportation wheel 2 C31 Adjustable wheel 2 C32 Plastic washer 4 C33 O ring 2 C34 Acrylic panel 1 C35 Cushion 2 C36 Left anterior side rail cap 1 C37 Right anterior side rail cap 1 C38 End cap 2 C39 EVA pad 1 D01 Monitor 1 D02 Lower control board 1 D03 Upper wire of the monitor 1 D04 Lower wire of the monitor 1 D05 Handel pulse upper wire 1 D06 Lower wire of the handle pul...
Page 38: ...E05 Bolt M10 45 1 E06 Bolt M10 30 4 E07 Bolt M8 80 2 E08 Bolt M8 70 2 E09 Bolt M8 40 2 E10 Bolt M8 40 2 E11 Bolt M8 30 1 E12 Bolt M8 20 4 E13 Bolt M8 15 12 E14 Bolt M8 40 1 E15 Bolt M8 35 1 E16 Bolt M6 55 3 E17 Bolt M6 40 4 E18 Bolt M6 25 4 E19 Bolt M6 20 1 E20 Screw ST4 2 15 4 E21 Bolt M5 16 6 E22 Bolt M5 12 8 E23 Bolt M5 8 13 E24 Screw ST2 9 8 2 E25 Screw ST4 2 30 4 E26 Screw ST4 2 12 25 E27 Scr...
Page 39: ...eral Conditions of Warranty and Definition of Terms All Warranty Conditions stated hereunder determine Warranty Coverage and Warranty Claim Procedure Conditions of Warranty and Warranty Claims are governed by Act No 40 1964 Coll Civil Code Act No 513 1991 Coll Commercial Code and Act No 634 1992 Coll Consumer Protection Act as amended also in cases that are not specified by these Warranty rules Th...
Page 40: ...Seller immediately after taking the responsibility for the Goods and its damages i e immediately after its delivery The Buyer must check the Goods so that he discovers all the defects that can be discovered by such check When making a Warranty Claim the Buyer is obliged on request of the Seller to prove the purchase and validity of the claim by the Invoice or Bill of Delivery that includes the pro...
Page 41: ...a 3 Czech Republic Headquarters Delnicka 957 749 01 Vitkov Czech Republic Warranty Service Centre Cermenska 486 749 01 Vitkov Czech Republic CRN 26847264 VAT ID CZ26847264 Phone 420 556 300 970 E mail eshop insportline cz reklamace insportline cz servis insportline cz Web www insportline cz SK INSPORTLINE s r o Headquarters Warranty Service centre Elektricna 6471 911 01 Trencin Slovakia CRN 363117...