1
USER MANUAL – EN
IN 10893 Exercise Bike inSPORTline inCondi UB30m
Page 1: ...1 USER MANUAL EN IN 10893 Exercise Bike inSPORTline inCondi UB30m...
Page 2: ...S SAFETY FUNCTION 3 TOOL KIT 4 EXPLODED VIEW 5 PARTS LIST 6 ASSEMBLY 7 RESISTNCE ADJUSTMENT 14 CONSOLE INSTRUCTIONS 15 iBIKING INSTRUCTIONS 17 FAT BURNING 22 TERMS AND CONDITIONS OF WARRANTY WARRANTY...
Page 3: ...ximum positions to which they can be adjusted tightened to 12 This exerciser is designed for adults Please ensure that children use the exerciser only under the supervision of an adult 13 Ensure that...
Page 4: ...These are all the accessories you will need to complete the assembly of your product The following accessories are loosely assembled to the frame or master component and will need to be removed prior...
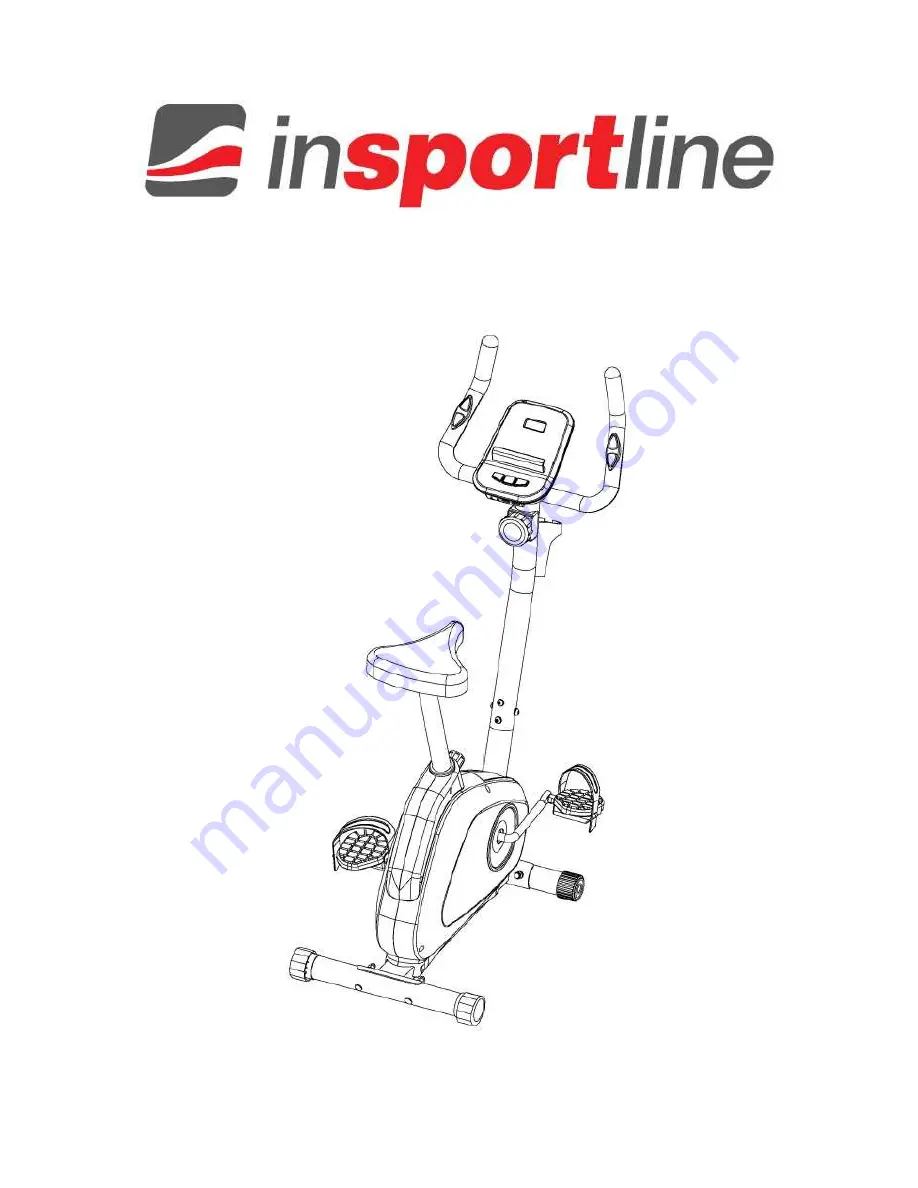
Page 5: ...5 EXPLODED VIEW...
Page 6: ...x 25 mm Allen Bolt 2 14 Pulse Sensor Wire 2 15 Tension Controller 1 16 Saddle 1 17 Saddle Stem Insert 1 18 Saddle Adjustment Knob 1 19 Transportation Wheel 2 20 Hex End Cap 2 21 Pedal Right Left 1 22...
Page 7: ...efully unpack each component checking against the parts list that you have all the necessary parts to complete the assembly of your product PLEASE NOTE that some of the parts may be pre fitted to majo...
Page 8: ...be tightened securely otherwise damage may occur to the Crank Fit the Pedal Straps Marked L and R ensuring a snug but not tight fit with your normal footwear Note One Pedal is supplied with a RIGHT HA...
Page 9: ...ove the 3 x M8 Nylon Locknuts 36 and 3 x M8 Flat Washers 43 from the underside of the Saddle 16 Attach the Saddle 16 to the Saddle Stem 4 then loosely refit the 3 x M8 Flat Washers 43 and 3 x M8 Nylon...
Page 10: ...of the pedaling action and secure in place with the Saddle Adjustment Knob 18 Align the Saddle and tighten the 3 x M8 Nylon Locknuts 36 securely Unlock the Saddle Adjustment Knob 18 and change the sa...
Page 11: ...close the open section of the metal bracket slightly with a pair of pliers as this will help to retain the cables d Connect the lower part of the Upper Link Wire 33 to the Lower Sensor Wire 34 ensuri...
Page 12: ...12 STEP 6 Fit the Handlebar 1 onto the Handlebar Upright 2 with 2 x M8 x 25mm Allen Bolts 13 2 x M8 Curved Washers 41 2 x M8 Spring Washers 42...
Page 13: ...13 STEP 7 Attach the Console 10 to the Handlebar Upright 2 using 2 x M5 x 10mm Screws 30 Connect the Upper Link Wire 33 and Pulse Sensor Wire 14 into the back of Console 10...
Page 14: ...OCKWISE as required When you have finished your routine turn the Tension Controller Knob 15 fully COUNTER CLOCKWISE again to ensure that the Tension Controller Cable is not under tension when your Mag...
Page 15: ...peed TIME TMR W O setting the target value time will count up With setting the target value time will count down from your target time to 0 and as 0 is achieved time alarm W O any signal been transmit...
Page 16: ...hold the button to increase the value faster TMR setting range 0 00 99 00 Each increment is 1 00 CAL setting range 0 9990 Each increment is 10 DST setting range 0 0 999 0 Each increment is 1 0 KM MODE...
Page 17: ...l the battery and try again 5 Battery Spec 1 5V UM 3 or AA 4PCS iBIKING INSTRUCTIONS To operate iBiking first you need to connect your 3c device and computer through 3 5mm cable Then download iBiking...
Page 18: ...ing are 1 training 2 gym center 3 setting 4 information TRAINING The main function of training are 1 target 2 quick start 3 heart rate 1 You can setting 3 traget values which are 1 time 2 distance 3 c...
Page 19: ...Facebook Twitter Weibo 3 You can setting 2 values 1 heart rate 2 time Main layout 1 x to clear 2 Done to confirm As over the target heart rate value there would be a warning GYM CENTER Combine with g...
Page 20: ...orites Main layout Choose vision mode Shows elevation and length of the route shows the exercise information time distance calories speed rpm heart rate 3 MapMyFitness Combine with map my fitness Step...
Page 21: ...21 Step 3 Press MapMyFitness Step 4 Use the route database from MapMyFitness SETTING Log in by user s Google Facebook account or create a new account INFORMATION All the workout histories show up...
Page 22: ...charge in order to reduce the interference of the transmission 6 Do not put the Tunelinc audio cable connector in humid environment 7 Due to operate iBiking APP needs to increase the volume therefore...
Page 23: ...ing about training is to start it Wishing you lots of fun and success with your exerciser TERMS AND CONDITIONS OF WARRANTY WARRANTY CLAIMS General Conditions of Warranty and Definition of Terms All Wa...
Page 24: ...ods and its damages i e immediately after its delivery The Buyer must check the Goods so that he discovers all the defects that can be discovered by such check When making a Warranty Claim the Buyer i...
Page 25: ...kov Czech Republic Warranty Service Centre Cermenska 486 749 01 Vitkov Czech Republic CRN 26847264 VAT ID CZ26847264 Phone 420 556 300 970 E mail eshop insportline cz reklamace insportline cz servis i...