


3
2
Instruction | Fiber7-X, Fiber7-X2 | MikroTik
08 | 2021 | Nr. 01
Installations Instruction
MikroTik CCR2004-1G-12S +2XS
1
Connecting the components
1. Use the provided fibre patch cable to connect the router to the OTO socket.
2. Connect the router to the power supply.
3. Connect your computer to the router using an Ethernet cable.
2
Download script file
Download the following file:
https://www.init7.net/de/support/routerinfos/mikrotik-ccr2004_fiber7-x2_
multicast-2-1.auto.rsc
(You will need it in step 6).
3
Assigning a static IP address
Vergeben Sie Ihrem Computer eine statische IP-Adresse. Zum Beispiel
192.168.88.2 (nicht 192.168.88.1, die gehört dem Router).
Operating system: Linux
1. Open «Settings».
2. Click on «Network».
3. Select the detected interface (either PCI Ethernet or USB Ethernet).
4. Select «IPv4» and the method «Manual».
5. Address: 192.168.88.2
Netmask:
255.255.255.
Operating system: Windows
1. Click on the Windows symbol. Select «Settings»
-> «Network and Internet».
2. Click on the Ethernet network you are connected to.
3. Under «IP assignment», select «Edit».
4. Under «Edit IP settings», select «Manual».
5. IP address: 192.168.88.2
Subnet prefix length: 255.255.255.0
EN
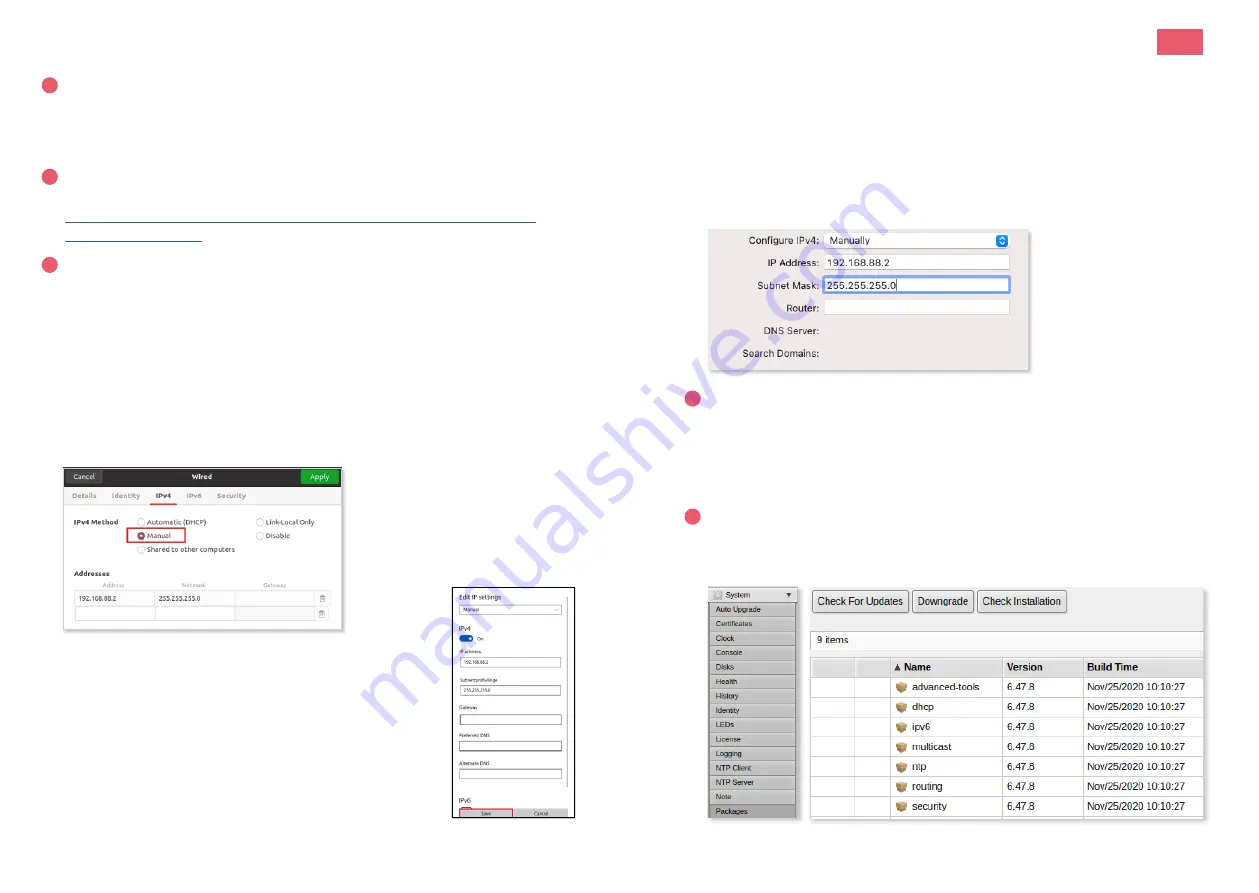
Operating system: MacOs
1. Click on the Apple icon in the upper left corner. Click on
«System Preferences» and select «Network».
2. Select the network connection «Ethernet».
3. Select «Manually» under «Configure IPv4».
4. IP Address: 192.168.88.2
Subnet Mask: 255.255.255.0
4
Connecting the router
Connect your computer to the Mgmt port of the router (RJ45 connector,
labelled «Mgmt port»). Open a web browser and enter 192.168.88.1 in the
address bar. Log in to the router and select «WebFig». (Note: No login data is
required for the initial connection.)
5
Set up IPv6 (If you do not need IPv6, go to step 6.)
Select the item «Packages» in the left menu bar and click on the package ipv6.
Check the «Enabled» box and click «Enable».


