51
50
4-2. Wi-Fi setting utility instruction
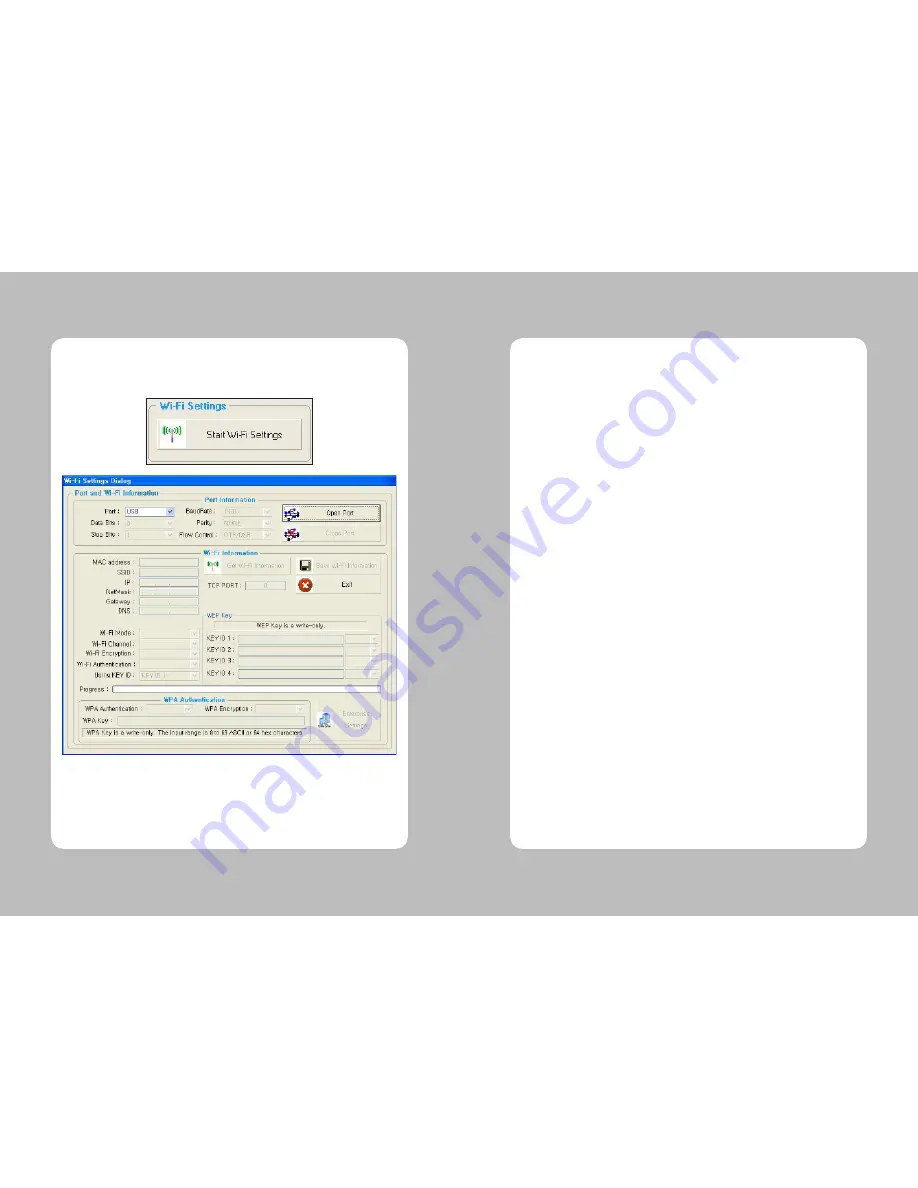
Execute a utility program, press the ‘Start Wi-Fi Settings’ button as shown the image below.
4-2-1. Port and Wi-Fi Information Tab
4-2-2. Wi-Fi Information Tab
4-2-3. WPA Authentication Tab
Users can connect from PC to printer via serial port (COM1 – COM9) or USB port. If the users
use serial port, check the Baud Rate both Printer and PC first.
After setting, prepare a connection between printer and PC to press the “Open Port” button.
The Wi-Fi information which stored in the printer will show when use press the ‘Get Wi-Fi
Information’ button.
Users can change the Wi-Fi setting value in this menu.
To store the Wi-Fi setting, press the ‘Save Wi-Fi Information’ button. After that, press the
‘Close Port’ button to disconnect between PC and printer.
User can change the network setting like SSID, IP, Net Mask, Gateway, DNS for suitable
network environment. Also, users can change the settings value below.
• Wi-Fi Mode (Ad-Hoc or Infrastructure)
• Wi-Fi Channel
• Wi-Fi Encryption mode
• Wi-Fi Authentication mode
• Using KEY ID
IN the Wi-Fi module, two WPA authentication (WPA PSK(TKIP) or WPA2 PSK(AES)) and three
Enterprise authentication (WPA-Enterprise / WPA2-Enterprise / 802.1x (PEAP, TLS, TTLS,
LEAP, FAST)) is supported in this module. To change an enterprise authentication, press the
“Enterprise Settings” button right below on the menu.
Users can change those authentication ways on this menu.


