


Instruction manual
www.imv-imaging.com | 31
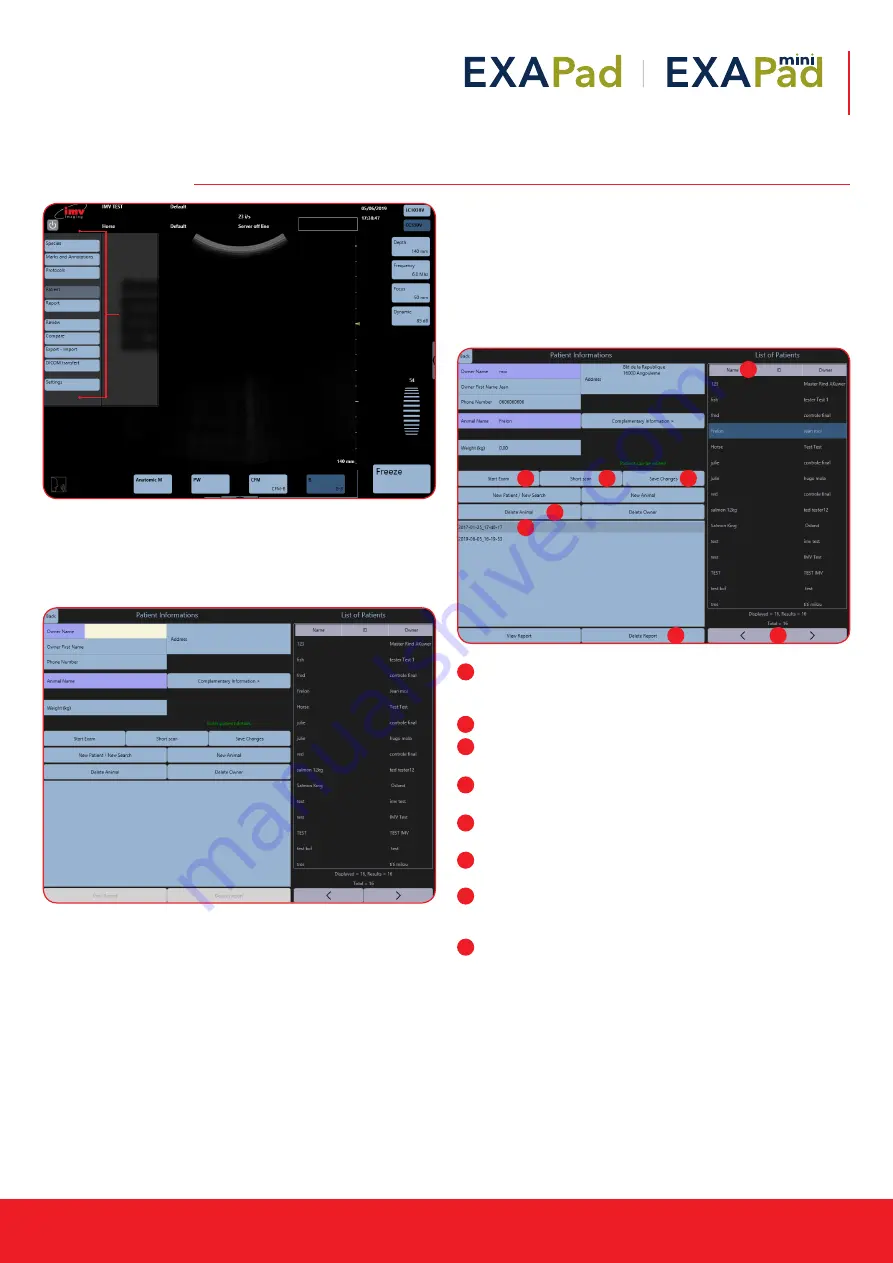
The Patient menu is made of three parts:
•
Patient data base
•
Patient file
•
Keyboard
13.1 Create a new owner & animal
To create a new owner, click on the button “Owner Name”
Fill in the accessible fields. The fields “Owner Name” and “Animal
Name” are necessary to be filled in.
The format of the birthdate can be modified in the Setting menu, in
the sub-menu System
When the patient fields have been filled in, the button “Short Scan”
enables to start an examination without a report.
In order to make an examination with a related report, press “Start
Exam”.
13.2 Create a new animal
For the current owner, to create a new animal, click the button
“New Animal”. Fill in the fields and click “save changes”.
13.3 Search an animal
Searching for a patient in the database can be done manually by
scrolling down the patient list using the arrows or by using a filter.
The patients are listed alphabetically by their surnames.
Arrows: Search for patients using following filters; Name,
Surname, Date of Birth. The arrows allow you to skip between
search pages
Name: Select Patient
Short Scan: Once patient is selected, Short Scan for quick
examination without report
Start Exam: Once patient is selected, Start Exam Start with
report
Save Changes: Modify patient information and confirm by
saving changes
Delete Animal: Once patient is selected, press to delete its
history and confirm
Report: Once patient is selected, select report and then
view report to review all reports with clips, images and
measurements.
Delete Report: Once patient and report are selected, remove
by pressing Delete Report and confirm
13. Patient file
Access to the
general Setting
menu by tapping
from the left-hand
side of the screen
1
2
3
4
5
6
7
1
2
3
4
5
6
7
8
8


