This restoring process will only overwrite the
storage spaces in the speaker system that were
occupied at the time when the presets were
saved onto the computer.
6.5.7
Restoring factory presets
To save only the factory-defined presets on the
first five storage spaces of the speaker system:
1) Call up the menu item “Hardware
Load Fac-
tory Presets”. A dialog window appears.
2) In the dialog window, open the folder “fac-
tory”, located in the installation folder of the
program.
3) Select the appropriate file, depending on the
model of the speaker system in question
(MegaDSPxx.factory), and then confirm your
selection.
Example: For the speaker system MEGA-DSP08,
the files “MegaDSP08.factory” has to be selected.
CAUTION: At the worst, the selection of a
wrong file may damage the speaker system
during operation.
4) While the presets are being saved, a window
is shown indicating the saving progress.
Upon completion (message “Done”), click the
button [Close] to close the window.
6.6 Additional settings
6.6.1
Changing the name
The speaker systems may be named differently
for easier identification. To change the name of
a speaker system:
1) In the main window (
MAIN), in the field
beneath UNIT CONNECTION, overwrite the
current name with the new name, and then
press the Enter key.
The maximum length of the name is 16
characters, and the name may not include
(language-specific) special characters. Oth-
erwise, an error message will be displayed.
2) The name is transferred to the speaker sys-
tem and is shown on the display of the
speaker system. In addition, the name is
updated in the list of speaker systems (figs. 2,
3).
6.6.2
Changing the password
To change the password for the speaker system:
1) Call up the menu item “Hardware
Configure
Change Password”.
2) In the window displayed, enter the current
password in the field “Enter Old Password:”
(the pre-defined password is “monacor”).
3) In the window displayed, enter the new pass-
word in the field “Enter New Password:”.
4) In the window displayed, re-enter the pass-
word in the field “Confirm New Password:”.
Important: Make sure to remember the new
password! If the password gets lost, it will not
be possible to access the settings of the
speaker system via the computer. The setting
options available at the speaker system
depend on the current access right settings
(
chapter 6.6.6).
The new password is saved in the speaker sys-
tem.
6.6.3
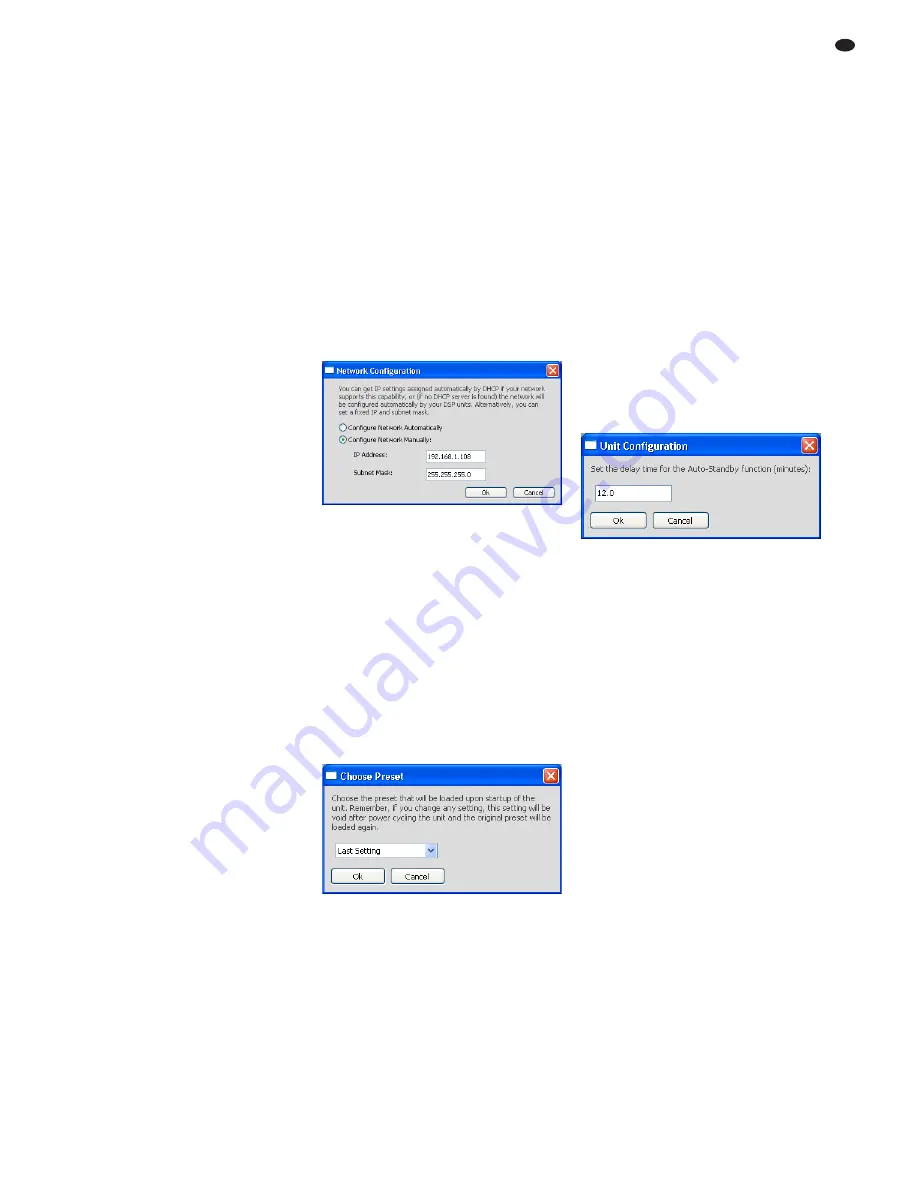
Changing network settings
To change the network settings of the speaker
system:
1) Call up the menu item “Hardware
Configure
Network Settings” The dialog window “Net-
work Configuration” (fig. 7) appears.
2) In the dialog window, select the option “Con-
figure Network Automatically” if the speaker
system is to obtain its network settings from
the DHCP server automatically or (provided
that no DHCP server exists) if the speaker
system is to configure the other network
members. (To be configured by the speaker
system, the other members must be defined
to automatically obtain the IP address).
3) If a specific IP address is to be used, select
the option “Configure Network Manually”.
Enter the IP address in the field “IP-
Address:”, and the subnet mask of the net-
work to be used in the field “Subnet Mask:”.
4) Click [OK] to confirm, or click [Cancel] to keep
the original settings.
6.6.4
Defining preset for switch-on
To define the settings to be used when the
speaker system is switched on:
1) Call up the menu item “Hardware
Configure
Power On Preset”. The dialog window
“Choose Preset” (fig. 8) appears.
2) From the list field of the dialog window, select
the preset to be used automatically when the
speaker system is switched on.
If the speaker system is not to use a pre-
set but the settings that were valid when it
was switched off, select the option “Last Set-
ting”.
3) Click [OK] to confirm, or click [Cancel] to keep
the original settings.
6.6.5
Standby mode
If the input of the speaker system does not
receive any signal for a specific period of time,
the speaker system will automatically change to
the standby mode: the display (4) will become
dark, and the LED on the front panel of the
speaker system will change from blue to red. To
define this period of time:
1) Call up the menu item “Hardware
Configure
Standby Delay”. The dialog window “Unit
Configuration” (fig. 9) appears.
2) In the dialog window, enter the period of time
(in minutes) after which the speaker system
is to change automatically to the standby
mode (max. 30 minutes).
With the value 0, the speaker system will
never change to the standby mode.
3) Click [OK] to confirm, or click [Cancel] to keep
the original settings.
The standby mode can also be manually set by
means of the menu item “Hardware
Go to
Standby”.
The speaker system will exit the standby mode
when an input signal with a sufficient level is
present at the input, the button MENU (2) or ESC
(3) is pressed, or the menu item “Hardware
Exit
Standby” is called up in a configuration window.
6.6.6
Options for a locked speaker system
When a speaker system is switched on or when
the network connection is interrupted during
operation, the speaker system is “locked”, pro-
viding only a limited range of operating options.
To define the operating options available for a
locked speaker system:
1) Call up the menu item “Hardware
Configure
Locked Rights”. The dialog window “Access
Rights” (fig. 10) appears.
2) Select (check mark) the options that are to be
available for a locked speaker system:
Access Input Channel:
Accessing input configuration
Load Presets:
Loading presets
Save Presets:
Saving presets
Change Unit Name:
Changing the unit name
Change Unit Configuration:
Changing general settings (network, standby
mode, preset at switch-on)
⑨
Standby delay
⑧
Preset at switch-on
⑦
Network settings
19
GB
Summary of Contents for MEGA-DSP 08
Page 11: ...11 ...


