background image

Connection to the web interface/Ethernet connection

6

Connection to the web interface

/Ethernet connection

6

NOTE

The configuration process must be made in local mode, although later you will be 
able to access the unit from any PC in the LAN.

3) 

Launch the web browser and enter the MAC 201 unit's IP address:


F

INITIAL IP ADDRESS: 192.168.1.6

NOTE

This initial IP address may be modified by the user.

NOTE

The unit also has the IP address 10.254.254.254 assigned by default. 
This IP address may not be modified by the user.

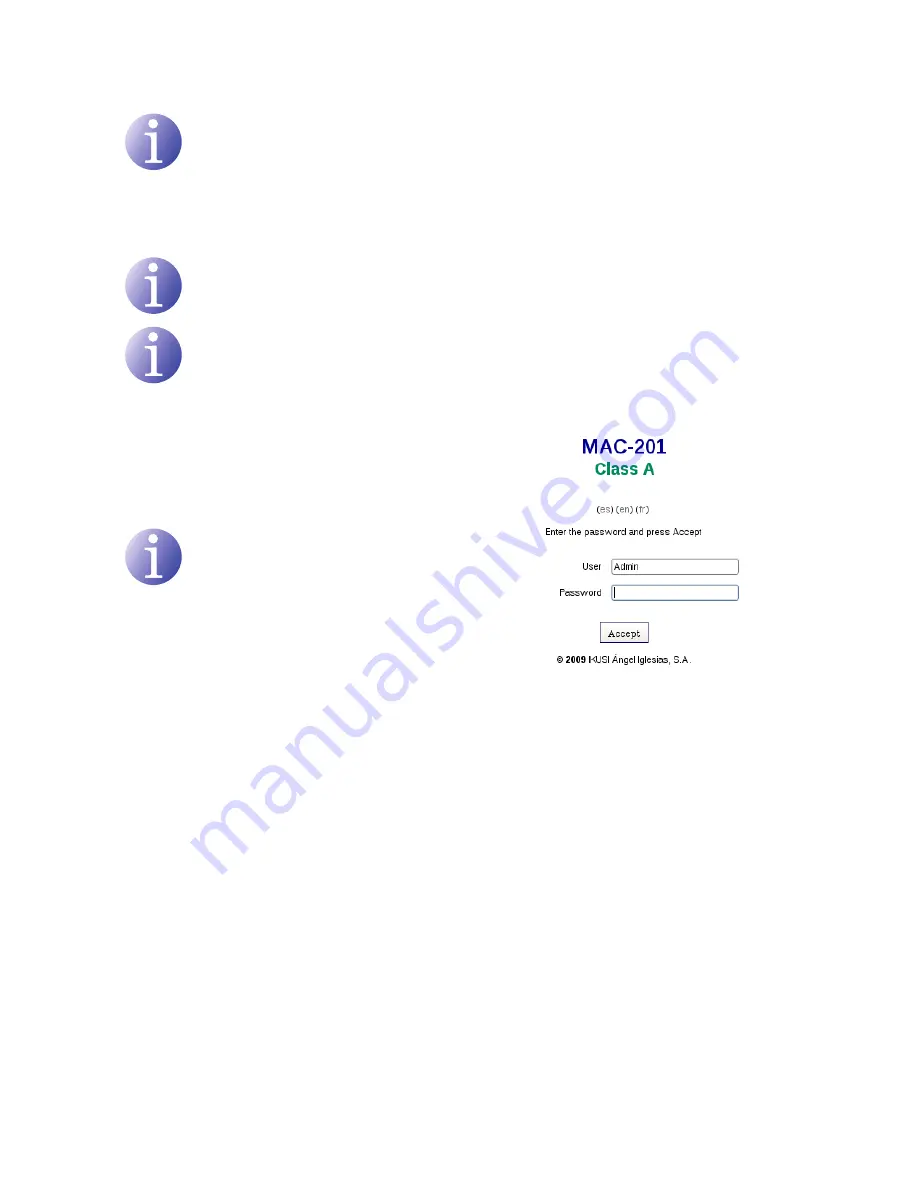
4) 

Click on 

ENTER

 to access the welcome 

screen.

5) 

Enter the user name 

Admin

 and the password 

“admin”.

NOTE

The unit with which you have connected 
the PC disconnects automatically after 15 
minutes without interaction.

Summary of Contents for AV-COFDM

Page 1: ...MAC AV COFDM standalone modulator User manual for web interface 201 REF 4449 ...

Page 2: ......

Page 3: ...l configuration 7 Main menu 8 Identification 8 System time 9 Network 9 Password 10 LCD Joystick 10 Restart 10 Firmware 11 Save restore configuration 12 Signal settings 12 Inputs 13 Service Management 14 Advanced Service Management 15 Output 17 Status information 17 Status information 19 Reports 19 General 19 Logs Contents ...

Page 4: ...e and instal lation of the MAC 201 unit the corresponding user manual must be read Product Description The MAC 201 unit is a standalone modulator of analogue TV input signals to COFDM digital TV output signal The analogue TV input is composed of video and stereo audio The COFDM digital TV output is tuned with an RF carrier that can be configured in VHF or UHF bands Suitable for individual resident...

Page 5: ... CAT 5E crossover cable 1 Access the TCP IP PROPERTIES of the PC and configure the following parameters F F IP ADDRESS OF THE PC 192 168 1 1 F F SUBNET MASK 255 255 255 0 2 Connect the PC to the LAN port RJ 45 of the MAC 201 unit position 1 in the follow ing diagram KEY 1 Ethernet connector LAN port RJ 45 2 Link LED 3 Activity LED NOTE The Ethernet connector of the MAC 201 position 1 in the above ...

Page 6: ...r and enter the MAC 201 unit s IP address F F INITIAL IP ADDRESS 192 168 1 6 NOTE This initial IP address may be modified by the user NOTE The unit also has the IP address 10 254 254 254 assigned by default This IP address may not be modified by the user 4 Click on ENTER to access the welcome screen 5 Enter the user name Admin and the password admin NOTE The unit with which you have connected the ...

Page 7: ...more submenus position 9 in the above diagram Each submenu will consist of one or more configuration tabs position 1 in the above diagram J J To obtain information about the web interface click on the option ABOUT position 4 in the above diagram The window on the right ap pears with the corresponding information J J To change the interface language click on the option corresponding to your languag...

Page 8: ... the installer or operator J J LOCATION name of the site where the unit is installed for example a postal address J J CONTACT contact details of the installer or operator for example a telephone num ber J J INSTALLATION DATE date of installation and start up of the unit 3 Once finished configuring the data you can save it by clicking on SAVE in the lower part of the screen System time 1 Select the...

Page 9: ...r you to configure the following fields NOTE If the administrator of the local area network assigns static IP network addresses never activate this option Only activate this option if there is a local area network switching unit capable of assigning dynamic IP addresses by DHCP protocol J J IP ADDRESS enter a static IP address within the valid range for the local area network to which the unit is ...

Page 10: ...h a code J J BLOCKING CODE Enter the code that unblocks the unit through the LCD display and using the control button Restart 1 Select the GENERAL menu and then the CONFIGURATION submenu 2 Select the RESTART tab The RESTART configuration tab enables you to restart the MAC 201 unit J J RESTART to restart the unit click on the RE START button on the screen 3 After restarting the unit the welcome scr...

Page 11: ... the configuration data established in the unit and accessible through the menus submenus and tabs of the web interface can be stored in a backup file Likewise all the unit configuration data can be restored using an existing backup file 2 Select SAVE CONFIGURATION and click on the START button to save the backup file A window will appear in which you can select the location and the name of the ba...

Page 12: ...values from 1 to 255 You can enter a value or increase or decrease unit by unit with the but tons on the right of the value field J J SATURATION 1 255 configures the saturation of the image within the range of values from 1 to 255 You can enter a value or increase or decrease unit by unit with the buttons on the right of the value field J J INPUT ATTENUATION DB 0 40 configures the audio attenuatio...

Page 13: ... to each input and save the SID values F F SID modifies the SID value NOTE The SID value is important to detect channels on some receivers All SID values must be different for the group of services processed by one or more units contributing towards a common RF output F F SERVICES displays the name of each service F F TYPE modifies the type of service F F PIDS click on the icon to view the PID for...

Page 14: ...allows you to assign a value to the identi fication of the transport current or TS NOTE For a header configuration with 2 or more units the TSID value must be different for each unit J J ONID allows you to assign a value to the origi nal network identifier J J PROVIDER allows you to specify the name of the service provider J J NIT MODE allows you to select the NIT mode F F OFF NIT is not inserted ...

Page 15: ...of both sets of information If the TSIDs coincide they are replaced by those of the unit Output 1 Select the SETTINGS menu and then the OUT PUT submenu The RF OUTPUT tab displays the configuration parameters of the output signal radio frequency and lets you modify it for flexible setting in the output of the unit J J PARAMETERS F F FREQUENCY displays the output frequen cy of the current radio freq...

Page 16: ...per left part of the screen to view the advanced parameters of the output signal of the unit J J ADVANCED PARAMETERS F F I Q FORMAT configures the format of the I and Q digital signals that will be modulated F F OFDM WINDOW allows you to activate and configure the OFDM window using a sliding bar and an OFF button F F CELL ID configures the cell identification value using a sliding bar or inserting...

Page 17: ...e output F F MINIMUM NULL displays the minimum percentage of binary data in the output without information F F ACTUAL NULL displays the current percentage of binary data in the output without information F F MAXIMUM NULL displays the maximum percentage of binary data in the output without information J J GENERAL F F HARDWARE ALARM informs whether any hardware alarms have been triggered F F TEMPERA...

Page 18: ...s J J GENERAL temperature of the unit J J INPUT alarms and status of the inputs J J TS PROCESSING transport processing J J OUTPUTS output status The detailed general status report can be exported to a text file To save this text file click on the SAVE TO FILE button in the lower part of the screen A window will appear in which you can select the loca tion and the name of the file generated ...

Page 19: ...INPUT INPUT 1 J J SETTINGS AV INPUT INPUT 2 J J SETTINGS SERVICE MANAGEMENT SERVICE 1 J J SETTINGS SERVICE MANAGEMENT SERVICE 2 J J SETTINGS SERVICE MANAGEMENT ADVANCED MANAGEMENT Logs 1 Select the REPORTS menu and then the SYS TEM LOGS submenu The system log reports the events in the unit since the last restart The inputs shown in this report can be filtered de pending on the level and process J ...

Page 20: ...To apply the filter click on the APPLY FILTERS button The unit log shows the current date and time in the format HH MM DD MM YYYY Each entry in the report consists of the following fields J J DATE month and day of the report entry J J TIME entry time of the report in the format HH MM SS J J LOG LEVEL report entry category ERROR or INFO J J PROCESS identification of the process that generated the r...

Page 21: ......

Page 22: ......

Page 23: ......

Page 24: ...Ángel Iglesias S A Paseo Miramón 170 20009 San Sebastián Spain Tel 34 943 44 88 00 Fax 34 943 44 88 20 ikusi ikusi com www ikusi com ...

Reviews: