12
INITIAL SETUP
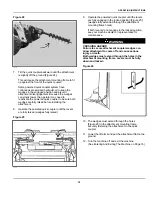
Installing The Auger On The Loader
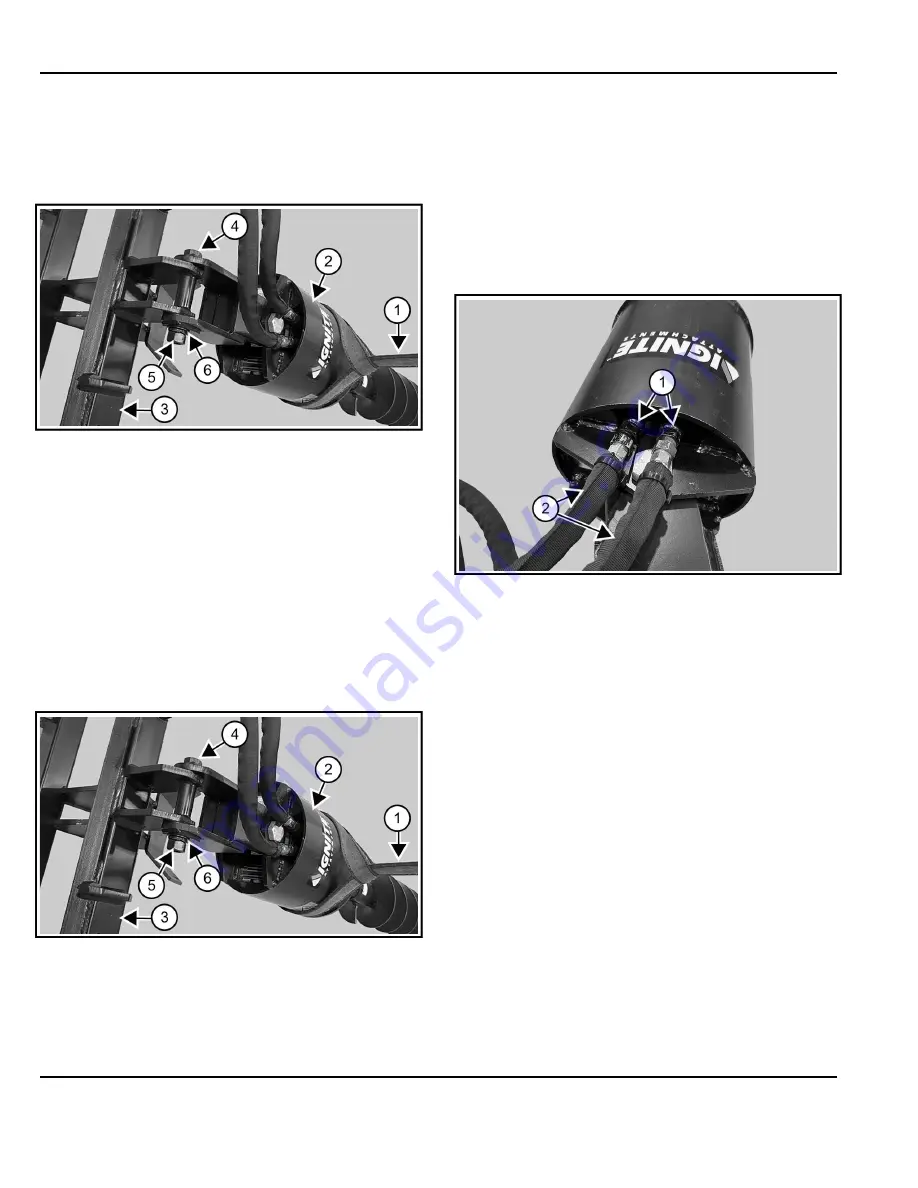
Attachment Mounting Frame
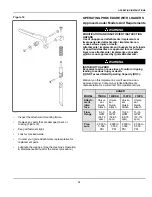
Figure 5
C221404c
1.
Install a lifting device (Item 1) around the auger drive
(Item 2) [Figure 5].
2.
Align the loader attachment mounting frame (Item 3)
with the auger (Item 2) [Figure 5].
3.
Install the bolt (Item 4) and lock washer (Item 6)
[Figure 5].
4.
Install the nut (Item 5) [Figure 5] and tighten.
(See Torque Specification For Bolts on Page 40)
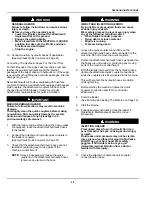
Removing The Auger From The Loader
Attachment Mounting Frame
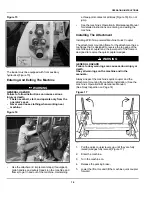
Figure 6
C221404c
1.
Install a lifting device (Item 1) [Figure 6] around the
auger drive (Item 2) and raise the auger and
mounting frame (Item 3) slightly.
2.
Remove the nut (Item 5) [Figure 6].
3.
Remove the bolt (Item 4) and lock washer (Item 6)
[Figure 6].
4.
Remove the loader attachment mounting frame (Item
3) [Figure 6].
5.
Lower the auger drive (Item 2) [Figure 6] fully.
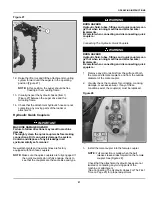
Installing The Hydraulic Hoses On The
Auger
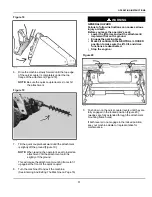
Figure 7
C221601b
1.
Install the hydraulic hoses (Item 2) [Figure 7] onto
the hydraulic fittings (Item 1) on the auger drive and
tighten.
(See Hydraulic Connection Specifications on Page
42)
Installing The Auger Bit
NOTE:
The auger bit installation is shown with the auger
drive connected to the machine.
Summary of Contents for Auger 75 DDH
Page 2: ......
Page 12: ...10 Figure 4 C221899a SAFETY AND TRAINING RESOURCES ...
Page 29: ......
Page 52: ...50 troubleshooting 29 W warranty 48 welding safety 7 ALPHABETICAL INDEX ...
Page 53: ......


