background image

FlammEx CO Alarm (carbon monoxide)

Please read carefully and retain!

In buying this item you have opted for a high-quality FlammEx product. Please read these 

user instructions carefully to ensure the device is used correctly. Keep them in a safe place 

for future reference. Use this product only as intended (as set out in the user instructions). 

Any changes or modifications to the product or painting it will result in loss of warranty. 

Correct working order is not guaranteed in this case.

1. What you need to know about carbon monoxide (CO)

Carbon monoxide (CO) is an insidious poison. It is a gas that has no colour, smell or taste. CO 

gas is formed from the incomplete combustion of materials containing carbon, namely when 

there is insufficient oxygen for such materials to burn properly. This danger can arise with 

central-heating boilers, open fireplaces and car exhausts. The poison accumulates in the 

blood and obstructs the passage of oxygen, which can lead to death from suffocation.  

Even small concentrations of CO gas can cause brain or organ damage in unborn babies 

without the mother being affected.

Symptoms of carbon monoxide poisoning include:
Mild indications


Stronger indications


Extreme indications

•  Slight headache 

•  Severe headache 

•  Unconsciousness

•  Nausea/vomiting 

•  Drowsiness 

•  Cramps

•  Tiredness 

•  Confusion 

•  Irregular heartbeat


•  High pulse 

•  Death

2. Important information

The installation should only be carried out by a competent person. CO alarms are 

not a substitute for smoke, fire or other alarms. This alarm is only intended for use in 

private residential properties. It is not suitable for commercial or industrial applications, 

nor for use on boats or ships, whether leisure or working craft. The following materials 

may have a lasting adverse effect on the device’s correct operation. 

Therefore, always keep the device away from:

• Ammonia gas/ammonia solutions   • Paint brush cleaners   • Paint thinners   • Cellulose thinners

It cannot offer people requiring special medical treatment complete security, and cannot 

prevent the chronic effects of carbon monoxide on the human body (see also EN 50292:2001, 

Annex A). It is not a replacement for the correct installation, use and maintenance of fuel-

burning systems including associated ventilation and gas flue systems.

The FlammEx CO alarm must be replaced after approx. 5 years. Closely follow the instructions 

provided in this user guide when installing your FlammEx CO alarm.

Note that there are other dangers where this alarm’s ability to detect carbon monoxide will not 

help you, e. g. in the event of gas leaks, fire or explosions. For such dangers we recommend 

our FlammEx gas, smoke and heat alarms. You can find more information about these on our 

website.

3. What to do when the alarm sounds

 1. Head immediately for fresh air. Go outside or to an opened door or window.

 2. Call the fire brigade.

 3. Do not re-enter the affected area/do not move away from the opened window

   or  door.


4. Wait for the fire brigade to arrive.


5. Thoroughly ventilate every room.


6. When danger no longer exists, the FlammEx CO alarm will reset itself


  automatically and return to its normal working mode.

4. Installation and first use

Recommended installation for optimum safety:

Install a CO alarm in every bedroom and in all rooms with gas heating, stoves/ovens or

open fireplaces, plus in the hallways on every floor and in any basement garage.

Recommended installation for basic protection:

Install a CO alarm in hallways and in rooms with gas heating, stoves/ovens and/or open

fireplaces.

Mounting location

Fit the alarm near to the source of danger (e. g. gas boiler) at a height of at least 1.5 m  

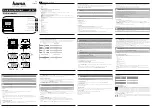
(picture 2)

.

Installation and first use:

1. Take off the mounting plate by holding the alarm firm and turning the plate anti-clockwise.

2. Once you have worked out the correct place to mount the alarm 

(pictures 1 - 4)

, fix the   

  mounting plate horizontally to the wall using the wall plugs and screws provided 

(picture 5)

.

3. Open the battery compartment by pressing the release 

(picture 5a)

 while at the same time  

  sliding the compartment cover downwards 

(picture 5b)

. Insert the 3 batteries 

the right way  

 round


(picture 6)

 and make sure that the red pins are in contact with each battery. 

  The alarm confirms that the batteries are in place with a short beep and all 3 LEDs 


(picture 5c)

 light up briefly. After a few seconds the yellow Fault LED will light up 

  continuously.

4. Place the alarm on the mounting plate to complete the activation process. If this does not  

  happen, after a delay of 5 – 6 minutes the alarm will start to beep every 60 seconds 


(see 5. Table of functions

). Turn the alarm clockwise until it clicks into place. The yellow

   Fault LED will go out and the beeping will stop

5. Close the battery compartment by replacing the cover and sliding it upwards until it 

  clicks in.

6. Test the alarm straightaway by pressing the 

Test/Mute button


(see 6. Maintenance/

  Testing the alarm, and picture 5b)

.

5. How the alarm functions

The alarm is equipped with a battery monitoring system. Low batteries are indicated by the 

alarm starting to beep and the yellow 

Fault LED (picture 5c)

 flashing around every  


6

7

D

GB

F

NL

I

S

 RUS

PL

SK

CZ

H

Summary of Contents for 003929

Page 1: ...IEH GmbH An der Strusbek 40 22926 Ahrensburg Germany Internet www flammex de E Mail info flammex de MA00118500 09 2012 UW 003929 ...

Page 2: ...1 2 3 4 c a b 1 2 5 6 7 ...

Page 3: ...fbetriebener Geräte einschließlich zugehöriger Lüftungs und Abgassysteme Der FlammEx CO Melder muss nach ca 5 Jahren ausgetauscht werden Befolgen Sie bei der Installation Ihres FlammEx CO Melders genau die Instruktionen dieser Anleitung Beachten Sie dass es noch andere Gefahren gibt bei denen Ihnen die CO Detektion dieses Melders nicht hilft so z B Gaslecks Feuer oder Explosionen Wir empfehlen hie...

Page 4: ...uch zurückzugeben Dies ist unentgeltlich bei der Verkaufsstelle oder bei einer Sammelstelle in der Nähe möglich 2 Legen Sie die 3 neuen Batterien polrichtig Bild 6 ein und drücken dabei die roten Stifte mit der jeweiligen Batterie herunter Der Melder quittiert mit einem kurzen Piepton 3 Schließen Sie das Batteriefach indem Sie den Deckel aufsetzen und nach oben schieben bis er einrastet 4 Prüfen S...

Page 5: ... this alarm s ability to detect carbon monoxide will not help you e g in the event of gas leaks fire or explosions For such dangers we recommend our FlammEx gas smoke and heat alarms You can find more information about these on our website 3 What to do when the alarm sounds 1 Head immediately for fresh air Go outside or to an opened door or window 2 Call the fire brigade 3 Do not re enter the affe...

Page 6: ... 60 secs off off flashes every battery low see 6 Maintenance 60 secs beeps every 60 secs off off constantly lit alarm is not locked into mounting plate beeps every 2 secs flashes every 2 s flashes every 2 s flashes every 2 s test function beeps every 60 secs off off flashes 3 x device faulty replace every 60 s immediately beeps every 60 secs flashes every 60 s flashes off muted intermittent alarm ...

Page 7: ...Pour le montage de votre détecteur de CO FlammEx veuillez suivre rigoureusement les instructions de cette notice N oubliez pas que ce détecteur de monoxyde de carbone ne vous protège pas de tous les dangers Il ne détecte par exemple ni les fuites de gaz ni les risques d incendie ou d explosion En revanche FlammEx propose des détecteurs de gaz de fumée et de chaleur Pour plus d informations visitez...

Page 8: ...ment À ce stade le détecteur dispose encore de 7 jours d autonomie mais les piles doivent être changées au plus vite Lorsque l alarme retentit vous pouvez l interrompre en appuyant brièvement sur le bouton Test Mute fig 5b Tableau de fonctionnement Son LED verte Power LED rouge Alarm LED jaune Fault Interprétation aucun clignote 1 x 60 s env éteinte éteinte Fonctionnement OK 1 bip 60 s env éteinte...

Page 9: ...n Volg bij het installeren van uw FlammEx CO melder de instructies in deze gebruiksaanwijzing nauwkeurig op Vergeet niet dat er nog andere gevaren bestaan waarbij de CO detectie van deze melder u niet kan helpen bijvoorbeeld gaslekken brand of explosies Hiervoor raden wij u onze FlammEx gas rook en warmtemelders aan Meer informatie vindt u op het internet 3 Hoe reageren bij alarm 1 Begeef u onmidd...

Page 10: ...de volgende 1 5 V alkalinebatterijen formaat AA Mignon Duracell MN 1500 Energizer E91 Nieuwe batterijen gaan onder normale omstandigheden ongeveer 1 jaar mee afhankelijk van het aantal tests Door de melder langere tijd aan hoge of lage temperaturen of hoge luchtvochtigheid bloot te stellen wordt de levensduur van de batterij verkort Functietest Controleer wekelijks of de melder goed werkt door de ...

Page 11: ...Durante l installazione del rilevatore di CO FlammEx attenersi scrupolosamente alle istruzioni del presente manuale Tenere presente che esistono altri pericoli contro i quali tale rilevatore di CO non è efficace ad esempio fughe di gas incendi o esplosioni In relazione a tali eventualità si consiglia l acquisto di rilevatori di gas fumo e calore FlammEx Ulteriori informazioni sono disponibili su I...

Page 12: ... test funzionamento Consigliamo di usare le seguenti batterie alcaline da 1 5 V AA Mignon Duracell MN 1500 Energizer E91 In condizioni normali le batterie nuove hanno una durata di ca 1 anno in base al numero di test eseguiti Se il rivelatore resta esposto per un periodo prolungato a temperature alte o bas se o a umidità estrema la durata delle batterie si riduce Test di funzionamento Verificare i...

Page 13: ... detektering inte hjälper mot t ex gasläckor bränder eller explosioner För sådana situationer rekommenderar vi vår FlammEx gasvarnare liksom våra FlammEx rök och värmedetektorer Mer information hittar du på Internet 3 Lakttag följande vid larm 1 Gå genast ut i friska luften utomhus eller till ett öppet fönster eller en öppen dörr 2 Larma brandkåren 3 Gå inte åter in i det berörda utrymmet respekti...

Page 14: ... hög luftfuktighet under längre tid blir batteriernas livslängd kortare Funktionstest Kontrollera funktionsdugligheten en gång i veckan genom att snabbt trycka på knappen Test Mute bild 5b Varnaren piper ljudligt minst två gånger och de tre LED lamporna bild 5c tänds samtidigt för en kort stund Därefter återgår varnaren till normal drift Rengöring av varnaren Löst damm inne i varnaren kan sugas bo...

Page 15: ... соответствующих систем вентиляции и отведения выхлопных газов Сигнализатор FlammEx СО необходимо заменять приблизительно через 5 лет эксплуатации При монтаже сигнализатора FlammEx СО в точности соблюдайте указания настоящей инструкции Обратите внимание что существуют угрозы при которых обнаружение окиси углерода этим сигнальным прибором не поможет например в случае утечки газа пожара или взрыва Д...

Page 16: ...нормальном режиме работают примерно год в зависимости от числа тестов Если детектор долгое время работает в условиях высоких или низких температур либо высокой влажности это сокращает время работы батарейки Проверка работоспособности Проверяйте правильность работы 1 раз в неделю для этого нажмите кнопку Тест Выключение звука рис 5b Детектор по крайней мере дважды издаст короткий звуковой сигнал и ...

Page 17: ...ując czujkę CO FlammEx należy postępować ściśle według wskazówek zawartych w niniejszej instrukcji Należy pamiętać że istnieją jeszcze inne zagrożenia przy których samo wykrycie czadu przez czujkę nic nie daje np ulatnianie się gazu pożar czy wybuch Z tego powodu zalecamy stosowanie czujek FlammEx do wykrywania gazu dymu i ciepła Więcej informacji można znaleźć w Internecie 3 Postępowanie w razie ...

Page 18: ...aleca się stosowanie następujących baterii alkalicznych 1 5 V typu AA Mignon Duracell MN 1500 Energizer E91 Nowe baterie w normalnych warunkach starczają na ok 1 rok w zależności od ilości wykonywanych prób Jeśli czujka jest narażona przez dłuższy czas na działanie wysokich lub niskich temperatur albo wysokiej wilgotności powietrza żywotność baterii ulega skróceniu Test funkcjonowania Prawidłowe d...

Page 19: ...výfukových plynov Senzor FlammEx CO sa musí po cca 5 rokoch vymeniť Pri inštalácii vášho senzora FlammEx CO sledujte presne inštrukcie tohto návodu Berte do úvahy že existujú aj iné nebezpečenstvá pri ktorých vám nepomôže detekcia CO tohto senzora ako napr úniky plynu požiar alebo výbuchy Odporúčame vám na tento účel náš plynový požiarny a tepelný hlásič FlammEx Viac informácií získate na internet...

Page 20: ...ti AA Mignon Duracell MN 1500 Energizer E91 Nové batérie vydržia za normálnych okolností cca 1 rok v závislosti od počtu testov Ak je hlásič dlhší čas vystavený vysokým alebo nízkym teplotám alebo vysokej vlhkosti vzduchu životnosť batérií sa skráti Funkčný test Riadnu funkciu kontrolujte 1 x za týždeň tak že krátko stlačíte tlačidlo Test Mute obrázok 5b Hlásič zapípa minimálne 2 x hlasno a 3 LED ...

Page 21: ...oupě Při instalaci Vašeho hlásiče CO FlammEx přesně dbejte instrukcí tohoto návodu Uvědomte si že existují ještě i další nebezpečí při kterých detekce CO tohoto hlásiče nepomáhá např při unikání plynu požáru nebo výbuchu Pro tyto případy doporučujeme naše plynové kouřové a teplotní hlásiče FlammEx Více informací naleznete na internetu 3 Chování v případě poplachu 1 Okamžitě jděte na čerstvý vzduch...

Page 22: ...st funkčnosti Doporučujeme následující 1 5 V alkalické baterie velikosti AA Mignon Duracell MN 1500 Energizer E91 Nové baterie vydrží za normálních okolností cca 1 rok v závislosti na počtu testů Je li hlásič delší dobu vystaven vysokým nebo nízkým teplotám nebo vysoké vzdušné vlhkosti doba životnosti baterií se zkracuje Test funkčnosti Správnou funkci kontrolujte 1x týdně krátkým stisknutím tlačí...

Page 23: ...mmEx CO jelző felszerelése során pontosan kövesse az útmutató utasításait Ne feledje hogy a CO jelző készülék számtalan veszélyhelyzetben nem nyújt segítséget ilyen lehet pl a gázszivárgás tűz vagy robbanás Erre a célra a FlammEx gáz füst és hőjelző alkalmazását javasoljuk További információkat az interneten találhat 3 Tennivaló a CO jelző riasztásakor 1 Menjen azonnal friss levegőre illetve a sza...

Page 24: ...ceruza alkálielemeket ajánljuk Duracell MN 1500 Energizer E91 Az új elemek élettartama normál körülmények között kb 1 év a tesztelések számától függően Ha a jelzőt hosszabb ideig alacsony hőmérsékletnek vagy magas légnedvességnek teszi ki akkor az elemek élettartama rövidül Működéspróba Hetente egyszer ellenőrizze a megfelelő működést a Test Mute gomb 5b ábra rövid lenyomásával A jelző ekkor legal...

Reviews: