Supplied By www.heating spares.co Tel. 0161 620 6677
British Gas RD1
-
Installation & Servicing
21
INSTALLATION
30 WATER CONNECTIONS
1.
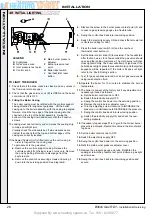
Remove the plastic plugs from the flow and
return pipes.
2.
Make all water connections and check for
water soundness.
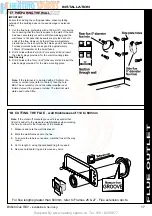
29 GAS CONNECTION
Refer to 'Gas Supply ', page 7.
Refer to Frame 2 for gas inlet service dimensions.
A
minimum
pressure of 20 mbar MUST be available at the boiler
inlet with the boiler operating. The main gas cock is on the left
hand side of the gas control valve, as shown. To facilitate
connection the gas cock may be removed from the gas control
valve.
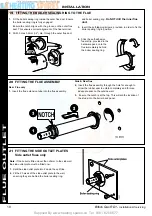
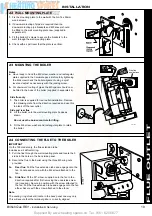
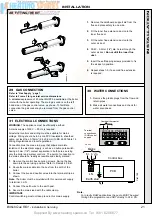
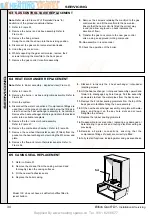
28 FITTING THE KIT
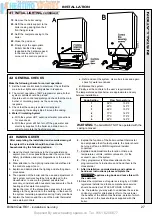
1.
Remove the cardboard support aid from the
flue and place safely to one side.
2.
Fit the inner flue extension duct onto the
inner flue duct.
3.
Fit the outer flue extension duct onto the
outer air duct.
4.
Drill 3 - 3.2mm (
1/8
") dia. holes through the
outer air duct.
Do not drill the inner flue
duct.
5.
Insert the self tapping screws provided to fix
the air duct in position.
6.
Repeat steps 1-5 if a second flue extension
is required.
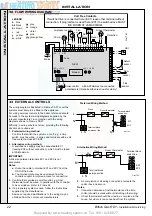
31 ELECTRICAL CONNECTIONS
WARNING.
The appliance must be efficiently earthed.
A mains supply of 230 V ~ 50 Hz is required.
All external controls and wiring must be suitable for mains
voltage. Wiring should be in 3-core PVC insulated & sheathed
cable, not less than 0.75mm
2
(24 x 0.2mm) to BS. 6500 Table 16
Wiring Regulations and local regulations.
Connection must be made in a way that allows complete
isolation of the electrical supply - such as a double pole switch,
having a 3mm (1/8") contact separation in both poles, serving
only the boiler and system controls. The point of connection to
the mains should be readily accessible and clearly marked.
Note.
For gravity DHW applications the pump MUST be wired
through the programmer and NOT directly to PL & PN.
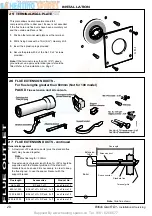
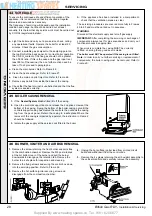
1.
Remove the control box securing screws. Swing the box
down into the servicing position. Refer to Frames 40 & 41.
2.
Route the mains cable into the box from the LHS of the
boiler.
3.
Connect the live and neutral wires into the terminal strip as
shown.
Note.
The boiler must be provided with this permanent supply
to terminal L & N.
4.
Connect the earth wire to the earth post.
5.
Secure the mains lead with the cable clamp.
IMPORTANT.
Control switching must not take place in this mains supply.
Terminal
connection on
(RHS) control
support
Cla 1789
OH1 OH2 PL PN EC1 EC2
Overheat thermostat
L N
Mains
br b y/g
Control box
PCB
Earth stud
Cla1790
INST
ALLA
TION


