Alarko HARMONY - D, Installation And Servicing Instructions
Introducing the Alarko HARMONY - D! Enhance your experience with our innovative product that guarantees comfort and efficiency. Don't worry about installation and servicing, simply visit manualshive.com to download the user manual for free. Follow our step-by-step instructions and make the most out of your purchase!
Share
Download


Reviews:
No comments
Related manuals for HARMONY - D

6-40R
Brand: Garland Pages: 28

R1K 25 RAIN
Brand: Radiant Pages: 60

Greenstar Danesmoor Utility Regular ErP+ 12/18
Brand: Worcester Pages: 16

ERA 31 S PK
Brand: LAMBORGHINI CALOR Pages: 68

HARSCO MACH C2000H
Brand: Patterson-Kelley Pages: 130
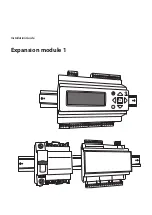
Expansion module 1
Brand: Thermia Pages: 28

1.5
Brand: Crestron Pages: 60

Lochinvar 3.5
Brand: Crest Audio Pages: 24

0T4D1AWA
Brand: Ferroli Pages: 61

FEB24ED3*
Brand: Morco Pages: 20

NHB-150
Brand: Navien Pages: 24

COMBY 4000
Brand: STI Pages: 10

EC Plus 120
Brand: Potterton Pages: 52

Kingfisher Mf
Brand: Potterton Pages: 40

Mexico Super FF4100
Brand: Ideal Boilers Pages: 44

HDCS 10/15
Brand: Flexiheat Pages: 26

24
Brand: Baxi Potterton Pages: 12

HF SERIES
Brand: Burnham Pages: 28


