ID Lock 202 Multi
Installation manual
11
2022-11-30
Page 1: ...INSTALLATION FILM INSTALLATION MANUAL INSTALLATION MANUAL...
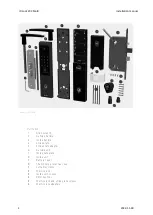
Page 2: ...side handle 3 Inside handle 4 Strike plate 5 Strike plate adapter 6 Outside unit 7 Inside backplate 8 Inside unit 9 Battery cover 10 Thumb turn protective cover 11 Cuttable screws 12 Mortise lock 13 I...
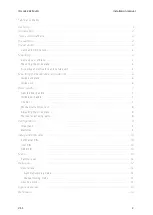
Page 3: ...ting the backplate and inside unit 6 Inside backplate 6 Inside unit 6 Door handle 7 Outside door handle 7 Inside door handle 7 Control 7 Mechanical function test 8 Adjusting the strike plate 8 Mortise...
Page 4: ...ual customizations of the door ID Lock cannot be held liable to replace any items other than the product regardless of direct or indirect cause At least one RFID key fob must be programmed and kept in...
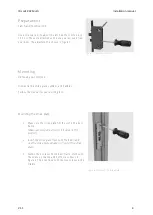
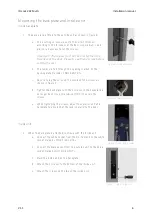
Page 5: ...handles Follow the manual for your existing lock Mounting the strike plate 1 Make sure the strike plate fits the slot in the door frame Make necessary adjustments if it does not fit properly 2 Insert...
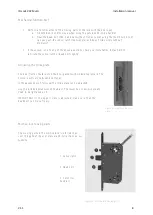
Page 6: ...he mortise lock is fastened with an even force until the back plate is parallel or flush with the door leaf Important The distance between the front of the mortise lock and the door leaf should be bet...
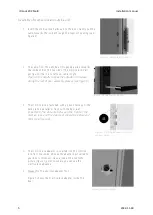
Page 7: ...e screws as shown in figure 9 d Tighten the backplate with the 4 screws so the backplate is no longer bent Use a screwdriver PH2 to secure the screws e While tightening the screws adjust the exterior...
Page 8: ...gh the mortise lock and the inside unit Inside door handle Your inside door handle can now be attached This has an included set screw This is tightened with the Allen wrench in the package Control Ver...
Page 9: ...the sensor latch or dead bolt slightly Adjusting the strike plate The door frame should rest on the door gasket with moderate pressure The pressure will vary between door types If the gasket doesn t...
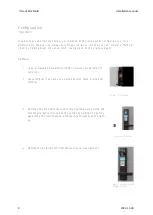
Page 10: ...page Batteries 1 Use 4 or 8 alkaline AA batteries LR06 Only use new batteries of same type 2 Leave the door in an open and unlocked position when inserting the batteries 3 Remove one of the batteries...
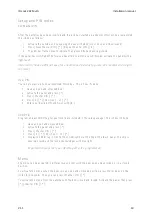
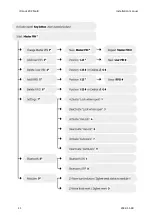
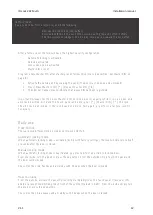
Page 11: ...d door 2 Activate the panel and press 3 Press Master PIN 4 Press 3 Position 1 25 5 Enter your desired PIN and finish with Add RFID Program at least 1 RFID tag for your lock 3 are included in the sales...
Page 12: ...ID Lock 202 Multi Installation manual 11 2022 11 30...
Page 13: ...Lock 202 Multi Automatic locking mode When automatic locking mode is activated as it is with factory settings the lock will simply lock itself 3 seconds after the door is closed Manual locking mode Wh...
Page 14: ...een mortise lock and door frame 5 Figure 7 Mortise adapter 5 Figure 8 Inside backplate 6 Figure 9 Cable positioning 6 Figure 10 Connecting cables 6 Figure 11 Attach inside unit 6 Figure 12 Attach outs...
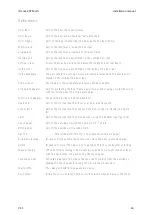
Page 15: ...ver the strike plate edge Mortise lock adapter Connects the inside unit to the dead bolt Dead bolt Part of the mortise lock that locks your door see figure 16 Sensor latch Part of the mortise lock tha...
Page 16: ...ID Lock 202 Multi Installation manual 15 2022 11 30...