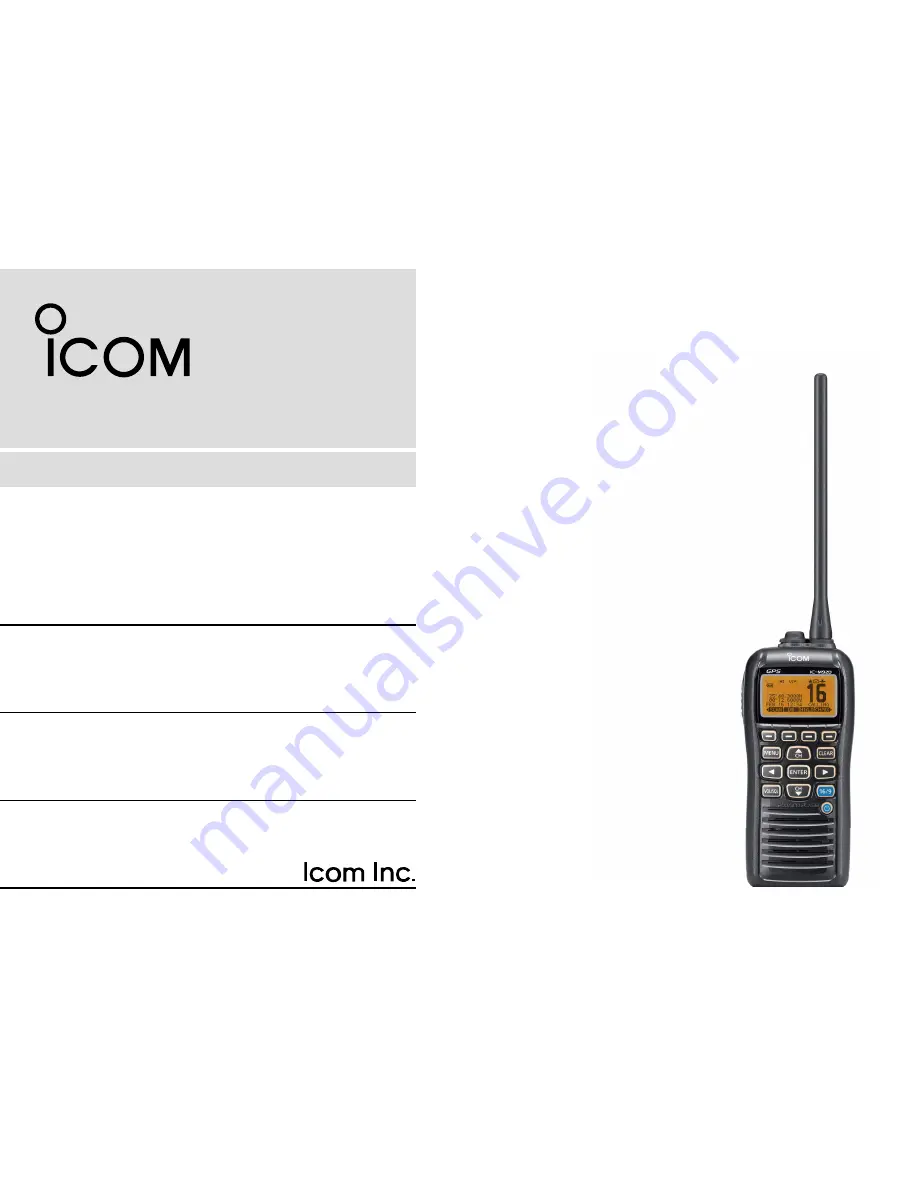
INSTRUCTION MANUAL
iM92D
VHF MARINE TRANSCEIVER
This device complies with Part 15 of the FCC
Rules. Operation is subject to the condition that
this device does not cause harmful interference.
Page 1: ...INSTRUCTION MANUAL iM92D VHF MARINE TRANSCEIVER This device complies with Part 15 of the FCC Rules Operation is subject to the condition that this device does not cause harmful interference ...
Page 2: ... DSC ID if you have one 4 LOCATED AT your position 5 State the nature of the distress and assistance re quired 6 Give any other information which might facilitate the rescue USING DIGITAL SELECTIVE CALLING Ch 70 DISTRESS CALL PROCEDURE 1 While lifting up the key cover push and hold DISTRESS for 3 seconds until you hear 3 short beeps change to one long beep 2 Wait for an acknowledgment on Channel 7...
Page 3: ... become inoper able due to salt crystallization NOTE DO NOT wash the transceiver in water if there is any reason to suspect the waterproofing may not be effective For example in cases where the battery pack rubber seal is dam aged the transceiver battery pack is cracked or broken or has been dropped or when the battery pack is detached from the transceiver ...
Page 4: ...THIS INSTRUCTION MANUAL This instruction manual contains important operating instructions for the IC M92D This instruction manual includes some functions which are usable only when they are pre programmed by your dealer Ask your dealer for details EXPLICIT DEFINITIONS WORD DEFINITION RDANGER Personal death serious injury or an ex plosion may occur RWARNING Personal injury fire hazard or electric s...
Page 5: ... as benzine or alcohol when cleaning as they will damage the transceiver surfaces R WARNING NEVER connect the transceiver to an AC outlet This may pose a fire hazard or result in an electric shock R WARNING NEVER hold the transceiver so that the antenna is very close to or touching exposed parts of the body especially the face or eyes while transmitting The transceiver will perform best if the mic...
Page 6: ...ce Spain Russia and or other countries CAUTION Changes or modifications to this device not expressly approved by Icom Inc could void your authority to operate this device under FCC regulations FOR CLASS B UNINTENTIONAL RADIATORS This equipment has been tested and found to comply with the limits for a Class B digital device pursuant to part 15 of the FCC Rules These limits are designed to provide r...
Page 7: ... ACCESSORIES AND ATTACHMENTS 6 13 3 PANEL DESCRIPTION 14 19 4 PREPARATION 20 26 5 BASIC OPERATION 27 6 SCAN OPERATION 28 32 7 DUAL WATCH TRI WATCH 33 34 8 DSC OPERATION 35 39 9 OTHER FUNCTION 35 39 10BATTEY CHARGING 35 39 11OPTIONAL SPEAKER MICROPHONE 35 39 12MAINTENANCE 35 39 13TROUBLE SHOOTING 35 39 14SPECIFICATIONS AND OPTIONS 35 39 15VHF MARINE CHANNELLIST 35 39 16SAFETY TRAINING INFORMATION 3...
Page 8: ...cation for radio purposes 2 OPERATOR S LICENSE A Restricted Radiotelephone Operator Permit is the license most often held by small vessel radio operators when a radio is not required for safety purposes The Restricted Radiotelephone Operator Permit must be posted or kept with the operator Only a licensed radio opera tor may operate a transceiver However non licensed individuals may talk over a tra...
Page 9: ...nna Connect the supplied flexible antenna to the antenna connector CAUTION NEVER carry the transceiver by hold ing the antenna Transmitting without an antenna may damage the transceiver D Handstrap Pass the handstrap through the loop on the back side of the transceiver as illustrated at right This facilitates carry ing D Belt clip Attach detach the belt clip to the transceiver as illustrated below...
Page 10: ...ewdriver to loosen or tighten the bot tom screw CAUTION When attaching or removing a battery pack make sure the rubber seal is set in the groove of the battery pack correctly If the seal is not correctly in the groove it may be damaged when attaching the battery pack If the seal is damaged waterproof protection is not guaranteed Make sure the rubber seal is properly seated in the groove and dust o...
Page 11: ...C p 25 Connects the optional external speaker microphone NOTE Attach the SP MIC cap when the optional speaker microphone is not used Otherwise water will get into the transceiver e PTT SWITCH PTT Push and hold to transmit release to receive p 10 r MENU KEY Push to enter the Menu mode to select from the following menus Adjustment Mode Inspection Mode DSC Calls DSC Settings Radio Settings Configurat...
Page 12: ...GHT Ω KEYS Push Y Z to select an operating channel p While in the set mode selects the setting or value of an item i CLEAR LOCK KEY Push to clear the selected page and return to the previ ous screen Hold down for 1 second to turn the key lock function ON or OFF p 13 o ENTER KEY Push to select a function enter the input channel com ment select an item etc 0 CHANNEL 16 KEY 16 C Push to select Channe...
Page 13: ...s while the weather alert function is acti vated blinks when the alert tone is received t CALL CHANNEL ICON p Appears when call channel is selected y DUPLEX ICON p 2 Appears when a duplex channel is selected u TAG CHANNEL ICON p The icon appears while a TAG favorite channel is se lected i MAIL ICON p The icon appears when a message is received o GPS ICON p Stays ON when the GPS receiver is activat...
Page 14: ...2 Shows the current position data when a GPS receiv er is connected or the position data is manually pro grammed When the GPS position data is invalid may blink every 2 seconds instead of position data The last position data is held for only 23 5 hours and after that No Position will appear may blink every 2 seconds instead of position data af ter 4 hours have passed from the time when the positio...
Page 15: ...pears and warning alarm sounds for 2 seconds Push w w ENT to Register Your MMSI appears Do not push CLEAR while this screen is displayed Push e e Y Z Ω to select and input with ENTER r Select FINISH and push ENTER to register t When MMSI CONFIRMATION screen appears input the previously registered 9 digited code to confirm the regis tration Then push ENTER to register Automatically enters the funct...
Page 16: ...6 CALLING appears Select w w CH WX to return to the selected channel before Channel 16 or push Y Z to select an operating chan nel Push 16 C key Call channel D D Each regular channel group has separate leisure use call channels The call channel is monitored during Tri watch The call channels can be programmed p 11 and are used to store your most often used channel in each channel group for quick r...
Page 17: ...er channels D D The IC M92D has 10 pre programmed weather channels These are used for monitoring broadcasts from NOAA Na tional Oceanographic and Atmospheric Administration The transceiver can automatically detect a weather alert tone on the selected weather channel while receiving on another channel during standby on a regular channel or while scan ning p 44 To Select a Weather channel Select CH ...
Page 18: ...elected Choose low power for short range communications choose high power for longer distance communications Some channels are for low power only t Hold down PTT to transmit then speak into the micro phone Channel 70 cannot be used for transmission t Release PTT to receive IMPORTANT To maximize the readability of your trans mitted signal pause a few seconds after pushing PTT hold the microphone 5 ...
Page 19: ...usting the volume level The volume level can be adjusted with VOL SQL and Y Z keys Push q q VOL SQL once to enter the volume adjustment mode then adjust the volume level with Y Z The transceiver has 20 volume levels and OFF With no key operation is performed for 5 seconds it returns to the main menu Push w w VOL SQL twice to exit the volume adjustment mode Adjusting the squelch level The squelch l...
Page 20: ...the maximum level level 20 The volume icon appears Push w w ENTER to turn the volume function OFF Volume mute function The volume mute function can be activated temporarily by pushing VOL SQL and Z The function does not work when the volume level is al ready OFF Hold down q q VOL SQL first and then while holding it down push Z to activate the volume loud function The volume level is set to the min...
Page 21: ...h any key except for PTT to turn the backlight ON The backlight is automatically turned OFF after 5 seconds of inactivity AquaQuake water draining function The AquaQuake water draining function clears water away from the speaker grill Without this function water may muffle the sound coming from the speaker The transceiver emits a vibrating beep when this function is activated Select AQUA and hold ...
Page 22: ...nds This clears all tags or tag all channels Channel names Each channel can be labeled with alphanumeric names of up to 10 characters for easy channel recognition The programmed names will be indicated at the chan nel name indicator of the function display Capital letters numbers 26 types of symbols and space can be used Select the desired channel q q Cancel dualwatch Tri watch or Scan in advance ...
Page 23: ...keys and it is convenient for night time operation Select q q BKLT to enter the backlight adjusting mode Push w w Y or Z to adjust the brightness level between 1 minimum to 7 maximum or OFF The default setting is 3 The display returns automatically to the main manu after 5 sec onds without no key operation is been performed ...
Page 24: ...itoring Channel 16 When a signal is detected on Channel 16 scan pauses until the signal disappears when a signal is detected on a channel other than Channel 16 scan becomes Dualwatch until the signal disappears Set the TAG channels scanned channels before scanning Clear the TAG for unwanted channels which inconveniently stop scanning such as those for digital communications p 15 Choose the desired...
Page 25: ...riority Scan and push ENTER to program t Select BACK to return to the previous page or simply select EXIT to return to the main menu screen SCAN appears if Normal Scan is selected and SCAN 16 apppears if Priority Scan is selected as show below To scan Select SCAN and push on the soft key to start or stop scan ning Pushing PTT also stops the scan When a signal is received scan pauses until the sign...
Page 26: ...ignal disappears If a signal is received on the call channel during Tri watch Tri watch becomes Dualwatch until the signal disap pears To transmit on the selected channel during Dualwatch Tri watch hold down PTT Operation Push q q MENU Push w w Y or Z to select Radio Settings then push EN TER Select e e Dual Tri Watch then push ENTER r Select Dualwatch or Tri watch and push ENTER to program t Sele...
Page 27: ...igit is specified as 0 for a Group ID The first two digits are 0 for any Coast station ID Repeat step r r e to enter all 9 digits After entering the 9 digit code push ENT to set it t t ID name programming screen is displayed Enter a desired 10 digit ID name in the following instruction y y Select a desired character using Y Z Ω Push ENT to set it To move the cursor select either arrow or then push...
Page 28: ...e first two digits are 0 for any Coast station ID Repeat step r r e to input the specific 9 digits group code After entering the 9 digit code push ENT to set it t t Group ID name programming screen is displayed Enter a desired 10 digit ID name in the following instruction y y Select a desired character using Y Z Ω Push ENT to set it To move the cursor select either arrow or then push ENT Push 123 ...
Page 29: ...D is displayed In this case push MENU to exit the MENU screen Select a desired ID name or ID if no name is programmed w w with Dial or Y Z to be deleted then push DEL Push OK to delete the ID and return to the INDIVIDUAL e e ID or GROUP ID list screen Push CANCEL to cancel it Push MENU to exit the MENU screen r r MENU DSC Settings Individual ID Group ID Push MENU Rotate Dial then push ENT ...
Page 30: ... or w w Y Z Ω Select a desired number using Dial or Y Z Ω Push ENT or Dial to set it To move the cursor select either arrow or then push ENT Select N North latitude or S South latitude when the cursor is on the N or S position Select W West longitude or E East longitude when the cursor is on the W or E position After entering the position data push ENT to program it e e The UTC time programming sc...
Page 31: ... DSC channel Channel 70 is automatically selected and the Distress call is transmitted After transmitting the call the transceiver waits for an ac e e knowledgment call The Distress call is automatically transmitted every 3 5 to 4 5 minutes until an acknowledgement is received Call repeat mode or DSC Cancel call is made p 26 Push RESEND to manually transmit the Distress repeat call Push Ω then pus...
Page 32: ...h BACK to return to waiting for an acknowledgement call Push FINISH e e Push EXIT to return to waiting for an acknowledgement call The Distress cancel call is transmitted r r Channel 16 is automatically selected t t Report your situation using the microphone After the report push EXIT to return to the normal operating mode ...
Page 33: ...g Sinking Adrift Abandoning ship Piracy or Man Overboard is selectable The nature of the distress is stored for 10 minutes after a selec tion is made The Distress call confirmation screen is displayed e e Rotate Dial or push Y Z to see the hidden lines Hold down DISTRESS for 3 seconds to transmit the Dis r r tress call While holding down DISTRESS count down beeps sound and both the key and display...
Page 34: ...ted set a desired 9 digit MMSI ID code for the individual you wish to call About Manual Inputting Enter a desired individual ID in the following way Select a desired number using Y Z Ω Push ENT to set it To move the cursor select either arrow or then push ENT The first digit is specified as 0 for a Group ID The first two digits are 0 for any coast station ID Select Routine Safety or Urgency as the...
Page 35: ...ntents Push CALL to transmit the Individual call y y If Channel 70 is busy the transceiver stands by until the chan nel becomes clear Standby on Channel 70 until an acknowledgement is re u u ceived When the acknowledgement Able to comply is received i i beeps sound and the screen below is displayed Or when the acknowledgement Unable to comply is re ceived beeps sound and the screen below is displa...
Page 36: ...eceived beeps sound and the screen as shown below is displayed Push ALARM OFF to stop the beeps Push ACK w w Select one of three options then push ENT e e Able to Comply Make an acknowledgment call without any changes Unable to Comply You cannot make an acknowledge ment call The Acknowledgement call Unable to Comply can be automatically transmitted if set See page 61 for de tails Propose New Chann...
Page 37: ...yed t t Comply to the call using the microphone y y Push EXIT to return to the normal operating mode u u Manual ACK Enter INDIVIDUAL ACK in the DSC CALLS menu q q When no Individual call has been received Individual ACK item will not be displayed Select a desired individual address or ID code to reply to w w using Dial or Y Z then push ENT Perform steps e e e to u as described in Quick ACK to the ...
Page 38: ...or the group you wish to call Select a desired intership channel using e e Y CH Z CH then push ENT Intership channels are already preset into the transceiver in the recommended order About Manual Inputting Enter a desired group ID in the following way Select a desired number using Y Z Ω Push ENT to set it To move the cursor select either arrow or then push ENT The first digit is specified as 0 for...
Page 39: ...ll t t If Channel 70 is busy the transceiver stands by until the chan nel becomes clear After the Group call has been transmitted the following y y screen is displayed Announce the information using the microphone u u After the announcement push EXIT to return to the nor i i mal operating mode ...
Page 40: ...ing Ask your dealer for the selectable catego ries Select a desired traffic channel using e e Y Z then push ENT The selected channel is displayed A confirmation screen appears r r Confirm the call contents Push CALL to transmit the All Ships call t t If Channel 70 is busy the transceiver stands by until the chan nel becomes clear After the All Ships call has been transmitted the following y y scre...
Page 41: ...osition request call can be set first p 20 When Manual Input is selected set the 8 digit ID code for the group you wish to call About Manual Inputting Enter a desired address ID in the following way Select the desired number usuing Y Z Ω Push ENT to set it To move the cursor select either arrow or then push ENT The first digit is specified as 0 for a Group ID The first two digits are 0 for any Coa...
Page 42: ...36 1 DSC OPERATION 1 2 3 4 5 6 7 8 9 10 11 12 13 14 15 16 Transmitting a Position report call D D ...
Page 43: ...ick Reply When q q a Position Request call is received beeps sound and the screen as shown below is displayed Push ALARM OFF to stop the beeps Push ACK w w Push INFO to display the Position Request call information Push BACK to return to the previous screen or push ACK The Position Reply confirmation screen is displayed e e Push CALL to transmit the reply call While transmitting the reply call the...
Page 44: ...played and then returns to the normal operating mode When no GPS receiver is connected and both position and time have been manually programmed the screen as shown below appears Edit your latitude and longitude posi tion and UTC time data as follows Push CHG then edit your latitude and longitude position and UTC time data Select a desired number using Y Z Ω Push ENT to set it To move the cursor se...
Page 45: ... the screen as shown below is displayed Push ALARM OFF to stop the beeps Push ACK w w Push INFO to display the Position Report Request call infor mation Push BACK to return to the previous screen or push ACK The Position Report Reply confirmation screen is dis e e played Push CALL to transmit the reply call While transmitting the reply call the screen as shown be r r low is displayed and then retu...
Page 46: ... not be displayed Select a desired Position Report Request call to be re w w plied using Y Z then push ENT The Position Report Reply call confirmation screen is dis e e played Push CALL to transmit the acknowledgement call While transmitting the reply call the screen as shown be r r low is displayed and then returns to the normal operating mode MENU DSC Calls Position Report Reply Push MENU Push Y...
Page 47: ...ick Reply When q q a Polling Request call is received beeps sound and the screen as shown below is displayed Push ALARM OFF to stop the beeps Push ACK w w Push INFO to display the Polling Request call information Push BACK to return to the previous screen or push ACK The e e Polling Reply confirmation screen is displayed Push CALL to transmit the reply call While transmitting the reply call the sc...
Page 48: ...be displayed Select a desired Polling Request call to be replied using w w Y Z then push ENT The Position Polling Reply call confirmation screen is dis e e played Push CALL to transmit the acknowledgement call While transmitting the reply call the screen as shown be r r low is displayed and then returns to the normal operating mode MENU DSC Calls Polling Reply Push MENU Push Y Z then push ENT ...
Page 49: ...d preprogrammed individual address or w w Manual Input then push ENT The ID code for the Individual call can be set first p 19 When Manual Input is selected set the 9 digit MMSI ID code for the individual you wish to call About Manual Inputting Enter a desired address ID in the following way Select a desired number using Y Z Ω Push ENT to set it To move the cursor select either arrow or then push ...
Page 50: ... until the chan nel becomes clear After the Test call has been transmitted the following t t screen is displayed When the acknowledgement call is received beeps sound y y and the following screen is displayed Push ALARM OFF to stop the beeps and then the screen u u as shown below is displayed Push EXIT to return to the normal operating mode i i ...
Page 51: ...eived beeps sound and the screen as shown below is displayed Push ALARM OFF to stop the beeps Push ACK w w Push INFO to display the Test call information Push BACK to return to the previous screen or push ACK The Test ACK confirmation screen is displayed e e Push CALL to transmit the acknowledgement call While transmitting the acknowledgement call the screen r r as shown below is displayed and the...
Page 52: ...ot be displayed Select a desired Test call to reply to using w w Y Z then push ENT The Test ACK confirmation screen is displayed e e Push CALL to transmit the acknowledgement call While transmitting the acknowledgement call the screen r r as shown below is displayed and then returns to the nor mal operating mode MENU DSC Calls Test ACK Push MENU Push Y Z then push ENT ...
Page 53: ... ALARM OFF to stop the alarm and the backlight q q blinking Push either softkey to select a desired action w w EXIT Push to return to the normal operating mode The transceiver exits the DSC mode By pushing PTT the transceiver also exits the DSC mode continues to blink and the Call is stored in the Re ceived Call Log INFO Push to display the Received call information p 58 CH 16 Push to switch the o...
Page 54: ... See page 62 for more details Push ALARM OFF to stop the alarm and the backlight q q blinking Push either softkey to select a desired action w w EXIT Push to return to the normal operating mode The transceiver exits the DSC mode By pushing PTT the transceiver also exits the DSC mode continues to blink and the Call is stored in the Re ceived Call Log INFO Push to display the Received call informati...
Page 55: ...Push ALARM OFF to stop the alarm and the backlight q q blinking Push either softkey to select a desired action w w EXIT Push to return to the normal operating mode The transceiver exits the DSC mode By pushing PTT the transceiver also exits the DSC mode continues to blink and the Call is stored in the Re ceived Call Log INFO Push to display the Received call information p 58 CH 16 Push to switch t...
Page 56: ...light q q blinking Push either softkey to select a desired action w w EXIT Push to return to the normal operating mode The transceiver exits the DSC mode By pushing PTT the transceiver also exits the DSC mode continues to blink and the Call is stored in the Re ceived Call Log INFO Push to display the Received call information p 58 CH 16 Push to switch the operating channel to Channel 16 and monito...
Page 57: ...w EXIT Push to ignore the Call and return to the normal operating mode The transceiver exits the DSC mode The Call is stored in the Received Call Log continues to blink and the Call is stored in the Re ceived Call Log INFO Push to display the Received call information p 59 ACK Push to display the INDIVIDUAL ACK screen to re ply to the Call and select the channel specified by the calling station fo...
Page 58: ...nking If you haven t pushed ALARM OFF within 2 minutes the next screen automatically appears depending on the received Cat egory Push either softkey to select a desired action w w EXIT Push to ignore the Call and return to the normal operat ing mode The transceiver exits the DSC mode continues to blink and the Call is stored in the Re ceived Call Log INFO Push to display the Received call informat...
Page 59: ... haven t pushed ALARM OFF within 2 minutes the next screen automatically appears depending on the received Cat egory Push either softkey to select a desired action w w EXIT Push to ignore the Call and return to the normal operat ing mode The transceiver exits the DSC mode continues to blink and the Call is stored in the Re ceived Call Log INFO Push to display the Received call information p 59 CH ...
Page 60: ... 2 minutes the next screen automatically appears depending on the received Cat egory Push either softkey to select a desired action w w EXIT Push to ignore the Call and return to the normal operat ing mode The transceiver exits the DSC mode continues to blink and the Call is stored in the Re ceived Call Log INFO Push to display the Received call information p 59 CH xx xx is specified by the callin...
Page 61: ... appears Push either softkey to select a desired action w w EXIT Push to ignore the Call and return to the normal operat ing mode The transceiver exits the DSC mode continues to blink and the Call is stored in the Re ceived Call Log INFO Push to display the Received call information p 59 ACK Push to display the POSITION REPLY screen and send a reply to the Call p 39 When POSITION ACK is set to Aut...
Page 62: ...minutes Push ALARM OFF to stop the alarm and the backlight q q blinking If you haven t pushed ALARM OFF within 2 minutes the next screen automatically appears Push either softkey to select a desired action w w EXIT Push to ignore the Call and return to the normal operat ing mode The transceiver exits the DSC mode continues to blink and the Call is stored in the Re ceived Call Log INFO Push to disp...
Page 63: ...cally appears Push either softkey to select a desired action w w EXIT Push to ignore the Call and return to the normal operat ing mode The transceiver exits the DSC mode continues to blink and the Call is stored in the Re ceived Call Log INFO Push to display the Received call information p 58 ACK Push to display the POLLING REPLY screen to reply to the Call p 43 When POSITION ACK is set to Auto TX...
Page 64: ...n automatically appears Push either softkey to select a desired action w w EXIT Push to ignore the Call and return to the normal operat ing mode The transceiver exits the DSC mode continues to blink and the Call is stored in the Re ceived Call Log INFO Push to display the Received call information p 58 ACK Push to display the TEST ACK screen to reply to the Call p 37 When TEST ACK is set to Auto T...
Page 65: ...rn to the normal operat ing mode The transceiver exits the DSC mode continues to blink and the Call is stored in the Re ceived Call Log Transmitted Call log The transceiver automatically stores up to 50 transmitted calls and the logs can be used as a supplement to your log book Enter TX CALL LOG in the DSC CALLS menu q q MENU DSC Calls Transmitted Call Log Push MENU Push p q then push ENT Push w w...
Page 66: ... DSC CALLS menu q q MENU DSC Calls Received Call Log Push MENU Push p q then push ENT Push w w p or q to select Distress then push ENT The messages are stored in Distress if its format specifier is Distress Push e e p or q to select the desired item then push ENT The message in the unopened file has not been read Push r r p q to scroll the message contents To delete the displayed message push DEL ...
Page 67: ...C Calls Received Call Log Push MENU Push p q then push ENT Push w w p or q to select Other then push ENT The messages are stored in Other if its format specifier is oth er than Distress Push e e p or q to select the desired item then push ENT The message in the unopened file has not been read ...
Page 68: ...y Polling Reply or Test Acknowl edgement Call respectively Only when the received Position Report call requires a reply When INDIVIDUAL ACK is set to Auto TX the trans ceiver automatically transmits the Acknowledgment call including Unable to Comply No Reason Given after re ceivng the Individual call q q Enter either INDIVIDUAL ACK POSITION ACK TEST ACK in the DSC Settings menu MENU DSC Settings I...
Page 69: ...NGER NEVER solder the battery terminals or NEVER modify the battery pack This may cause heat generation and the battery may rupture emit smoke or catch fire R DANGER Use the battery only with the transceiver for which it is specified Never use a battery with any other equipment or for any purpose that is not described in this instruction manual R DANGER If fluid from inside the battery gets in you...
Page 70: ... as it is properly handled However when the shape of the battery pack is so changed that the battery pack or battery cover can not be correctly attached to the transceiver it is time to replace it with a new one Otherwise the transceiver can be damaged due to the loss of air tightness R DANGER NEVER charge the battery pack in areas with ex tremely high temperatures such as near fires or stoves ins...
Page 71: ...ll ruin the battery charger White line Black line Optional battery chargers Rapid charging with the BC 205 BC 145S D D The optional BC 205 provides rapid charging of the Li ion battery pack An AC adapter may be supplied with BC 205 depending on ver sion or the DC power cable OPC 515L CP 23L is additionally required BC 145S AC adapter CP 25 or optional OPC 515L for 13 8 V power source or CP 23L for...
Page 72: ...al AC adapter or the DC power cable OPC 656 Battery pack AD 157S charger adapters are installed in each slot AC adapter Purchased separately Transceiver DC power cable OPC 656 Connect with the DC power supply 13 8 V at least 7 A Abou the OPC 656 Red line Black line Turn power OFF IMPORTANT Battery charging caution Ensure the guide tabs on the battery pack are correctly aligned with the guide rails...
Page 73: ...5 156 125 160 725 62 62A 156 125 156 125 156 175 160 775 63 63A 156 175 156 175 64 156 225 160 825 64 64A 64A 156 225 156 225 156 275 160 875 65 65A 65A 156 275 156 275 65A 156 325 160 925 66 66A 66A 156 325 156 325 66A 67 67 156 375 156 375 67 21A 21A 157 050 157 050 USA 21 157 050 161 650 21 CAN Transmit Receive INT Channel number Frequency MHz 71 71 156 575 156 575 71 72 72 156 625 156 625 72 7...
Page 74: ...inch Projections not included Weight approximately 295 g 10 4 oz with BP 275 Transmitter D D Output power 5 W 1 W Modulation system Variable reactance frequency modulation Max frequency deviation 5 0 kHz Adjacent channel power 70 dB Spurious emissions 68 dBc typical Receiver D D Sensitivity 12 dB SINAD 0 25 µV typical Squelch sensitivity 0 35 µV typical at threshold Intermodulation rejection ratio...
Page 75: ...attery pack HM 167 speaker microphone Full sized waterproof speaker microphone including alliga tor type clip to attach to your shirt or collar etc FA SC59V antenna CP 25 cigarette lighter cable For charging the battery pack through a 12 V cigarette light er socket For BC 204 MB 109 belt clip MB 96F leather belt hanger Approved Icom optional equipment is designed for optimal perfor mance when used...
Page 76: ...nes DO NOT operate the radio without a proper antenna attached as this may damaged the radio and may also cause you to exceed FCC RF ex posure limits A proper antenna is the antenna supplied with this radio by the manufacturer or antenna specifically authorized by the manufacturer for use with this radio DO NOT transmit for more than 50 of total radio use time 50 duty cycle Transmitting more than ...
Page 77: ...ne antenne appropriée y soit fixée car ceci risque d endommager la radio et causer une exposition supérieure aux limites établies par la FCC L antenne appropriée est celle qui est fournie avec cette radio par le fabricant ou une antenne spécialement autorisée par le fabricant pour être utilisée avec cette radio NE PAS émettre pendant plus de 50 du temps total d utilisation de l appareil 50 du fact...
Page 78: ...MEMO ...
Page 79: ...MEMO ...
Page 80: ...1 1 32 Kamiminami Hirano ku Osaka 547 0003 Japan A 7005D 1EX Printed in Japan 2012 Icom Inc Printed on recycled paper with soy ink ...