background image


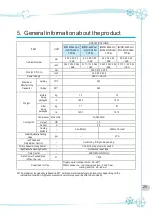
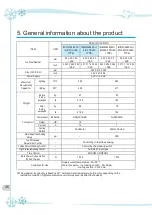
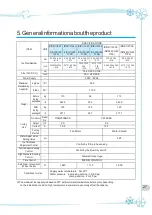
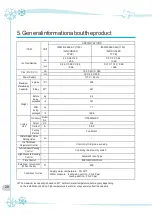
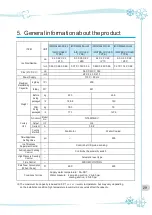
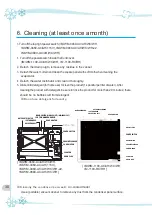
5.  General information about the product


ITEM


UNIT


IM/WM-0460-AC-22


(AIR-COOLED 

TYPE)


IM/WM-0460-AH-22


(AIR-COOLED 

TYPE)


IM/WM-0460-WC-22


(WATER-COOLED 

TYPE)


IM/WM-0460-WH-22


(WATER-COOLED 

TYPE)


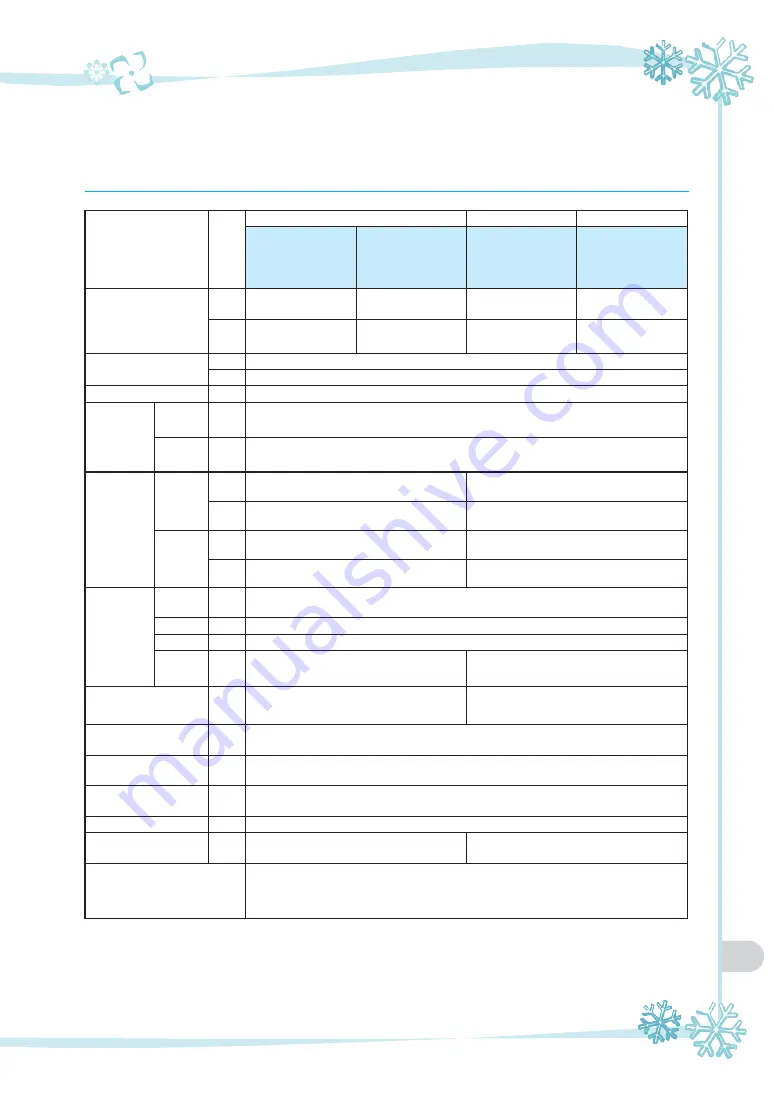
Ice Size/Number


mm


22 X 22 X 22


/ 210


9.5 X 29 X 22


/ 280


22 X 22 X 22


/ 210


9.5 X 29 X 22


/ 280


inch


0.86 X 0.86 X 0.86


0.37 X 1.14 X 0.86


0.86 X 0.86 X 0.86


0.37 X 1.14 X 0.86


Size (W X D X H)


mm


560 X 619 X 553


inch


22 X 24.3 X 21.7


Power Supply


-


115 V / 60 Hz


Maximum 

Manufacturing 

Capacitor


kg/day


10


200


lb/day


50


441


Weight


Before 

being 

packaged


kg


67.5


63.5


lb


148.8


140


After 

being 

packaged


kg


78.5


76


lb


173


167.6


Cooling 

Unit


Compressor


Model


No.


NT6220GKV


Output


HP


3/4


Current


A


5.92


Cooling 

Method


-


Fan Motor


Water Cooled


Water Adjust Valve 

Setting Value


psi


-


265


Ice Thickness


Adjustment Control


-


Control by ICE probe sensing


Full Ice Amount Sensing


Control


-


Control by the proximity switch


High Pressure Sensing


Control


-


Automatic reset type


Time Control


-


MICOM CONTROL


Rate Power Consumption


(When the ice)


W


690


600


Conditions for Use


Supply water temperature : 50~90


Water pressure : ice making section : 20~80 psi,


cooling section : 20~80 psi


The maximum ice capacity is based on 50

 am bient 

/ water temperature, but may vary depending


on the installation condition; high temperature in summer may severely affect the capacity. 

29


Summary of Contents for IM/WM-0460-AC

Page 1: ...1100 RC RH Thismachinecannotbeusedinanyothercountrywheretheelectricvoltage for its power supply is not available This product is designed for indoor installation Please be sure to install it indoors T...

Page 2: ...ns for connecting water supply Suitable installation condition and place After installation About grounding 3 What to check before using the product Howtouse DRAINSWITCH 4 Names of main parts 5 Genera...

Page 3: ...rvice repair expense SHOULDBEDONE PROHIBITION Warning DO NOT DISASSEMBLE DO NOT TOUCH DISCONNECT POWER PLUG GROUNDED Use a single receptacle for the ice machine Anelectricalfiremaybecausedbyareceptacl...

Page 4: ...Stop the operation When the smell of something burning or smoke is emitted from the machine or if the product malfunctions immediately unplug the product and stop operation Operating the product under...

Page 5: ...urrent leak electric shock and or fire Besuretocontactthecustomerservicecenterifthepowercord or plug gets peeled Prohibition Do not let children hang on the door of the icemaker Injury to the child or...

Page 6: ...le holding the plug body Pullingthepowercordorusingascrewdrivertounplugmaycause fire or electric sparks Grounded The Ice Machine must be connected to a grounded power source An ungrounded circuit may...

Page 7: ...manualforthesafestusage by users who are not familiar with the product Do not slide the hand or foot in under the icemaker The bottom of this product has diverse parts including metal sheet which may...

Page 8: ...be inserted deeper than 4 Installing the product and container for the IM WM 0460 AC AH WC WH IM WM 0460 AC AH 115V IM WM 0460 AC AH WC WH 22 IM WM 0680 AC AH WC WH 1 Usetheliftingdevicetoputtheprodu...

Page 9: ...idesmatch 5 Detach both side panels by loosening the bolts Bolt 6 Assemble the container and product with the included bolts excluded IM WM 0460 AC AH WC WH 22 7 Reassemblethesidepanelstocomplete inst...

Page 10: ...productontheloadingpartasthefirststep The loading part should be higher than 50 inches Product body Theright side of the product has thecompressor and weighs more so moreforcehas to beapplied by at le...

Page 11: ...front cover loosen the bolts from the protection cover on the upper right part 3 Fixtheincluded sidebracketsasinthe figure Makesurethescrewsatthefrontare slightly tightened 4 Insert the bracket downw...

Page 12: ...hatmoisture from thecontainerof theice makerabove willnot be accumulatedinthe control box both in the upper and lower parts as in the figure 8 Refertothefigureontheright which showsthe completedinstal...

Page 13: ...the amount of ice produced too lowpressurewillpreventicefrombeingmadeatall Installanauxiliary pressure pump in this case IM WM 0460 AC AH WC AH IM WM 0460 AC AH 115V IM WM 0680 AC AH Water Cooled only...

Page 14: ...inlet 3 8 FPT Leftover water outlet from cooling part Container water outlet Icemakingwaterdrain 3 4 FPT Cooling water supply outlet IM WM 0680 WC WH Water Cooled only Ice making water supplyinlet 3 8...

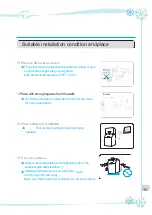
Page 15: ...thewalls Theminimumdistancerequiredis8inchesfromthe walls for normal operation P l ace w i t h good vent i l at i on Poorventilationwillleadtopoorice making capability 8 inches O n even surf aces Unev...

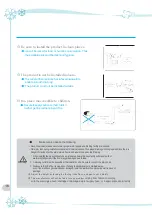
Page 16: ...ns Thus proper drainingmust be prepared Sincethereis dangerofelectricshockduetomoisturefromleak besuretoobservethefollowing 1 Wheninstallingthe product indoors be sureto havea natural drainagefacility...

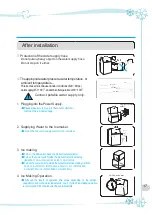
Page 17: ...age Plug into the correct outlet 2 Supplying Water to the Icemaker Open the faucet to supply water to the icemaker 3 Ice making Turnon the ELB switchback the product select models Turnonthepowerswitch...

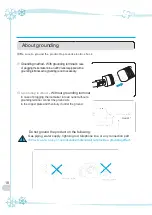
Page 18: ...ssary G roundi ng m et hod Without grounding terminal In case of plugging the icemaker into an outlet without a grounding terminal connect the ground wire to the copper plate and then bury it under th...

Page 19: ...aplace where waterpressureisverylow removethe front cover and then adjust the FLOATER heighttobehigherwithintherangeofavoidance of overflowbyslightlyunscrewingthewaterlevel adjusting screw 3 3 How To...

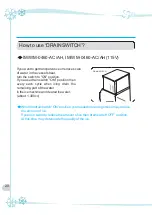
Page 20: ...e drain switch ON position then every each cycle when icing drain the remaining part of the water in the ice machine and cleared the water about 1 300cc DRAIN SWITCH Whenthedrainswitch ON position you...

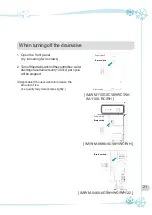
Page 21: ...drainingofacertainamount 1 300cc per cycle will bestopped Power switch Drain switch Applicable if the user wants to increase the amount of ice Ice quality may deteriorate slightly Water container IM W...

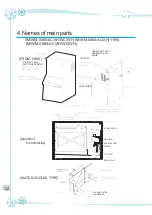
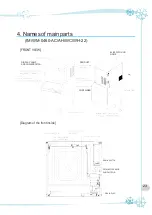
Page 22: ...0 AC AH 115V IM WM 0680 AC AH WC WH FRONT VIEW DISPLAY LAMP AND POWERSWITCH PRODUCT DRAIN SWITCH OR ELB SWITDH OR NONE CONTAINER POWER SWITCH Diagram of the front inside PROXIMITY SENSOR PUMP MOTOR DR...

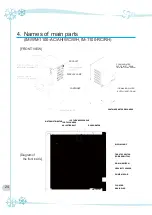
Page 23: ...ames of main parts IM WM 0460 AC AH WC WH 22 FRONTVIEW ELB SWITDH OR NONE DISPLAY LAMP AND POWERSWITCH PRODUCT CONTAINER Diagram of the front inside DRAIN SWITCH PROXIMITY SENSOR PUMP MOTOR 23 DRAIN P...

Page 24: ...ater cooling models DISPLAY LAMP CONTAINER ICE MAKING WATER SUPPLY INLET DRAIN CONTAINER WATER DISCHARGE WATER DISTRIBUTOR ICE THICKNESS SENSOR ICE THICKNESS ADJUSTING BOLT EVAPORATOR DISPLAY LAMP Dia...

Page 25: ...5 74 lb 165 3 163 1 After being packaged kg 77 87 lb 169 7 191 8 Cooling Unit Compressor Model No Nj9226GK Output HP 1 2 Current A 5 2 Cooling Method Fan Motor Water Cooled WaterAdjust ValveSetting Va...

Page 26: ...3 lb 213 8 183 After being packaged kg 99 70 lb 218 2 154 Cooling Unit Compressor Model No R92j183ABC Nj9238GK Output HP 1 5 1 Current A 7 2 7 Cooling Method Fan Motor Water Cooled WaterAdjust ValveSe...

Page 27: ...Weight Before being packaged kg 110 92 110 lb 242 5 203 242 5 After being packaged kg 123 105 123 lb 271 1 231 271 1 Cooling Unit Compressor Model No R92j253ABCA CS14K6E Output HP 2 0 2 0 Current A 10...

Page 28: ...t Compressor Model No NT6220GKV Output HP 3 4 Current A 5 92 Cooling Method Fan Motor Water Adjust Valve Setting Value psi Ice Thickness Adjustment Control Control by ICE probe sensing Full Ice Amount...

Page 29: ...being packaged kg 78 5 76 lb 173 167 6 Cooling Unit Compressor Model No NT6220GKV Output HP 3 4 Current A 5 92 Cooling Method Fan Motor Water Cooled WaterAdjust Valve Setting Value psi 265 Ice Thickne...

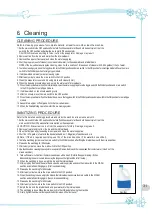
Page 30: ...duct with detergent be sure to rinse the product for more than 20 minutes there should be no bubbles left fromdetergent Do not use detergent for laundry WATER DISTRIBUTOR DRAINSWITCH WM 0460 22 WM 068...

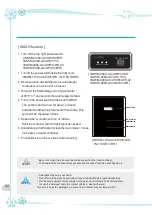
Page 31: ...g procedure and clean the machine at least once a month 1 SetthemainswitchtotheOFFpositionaftericefallsfromtheevaporatorattheendofa harvestcycle Or setthe mainswitchtotheOFFpositionaftericeismeltedont...

Page 32: ...repeated 5times 5 Repeat the cycle above for 2 or 3times Refill the container with mild detergent as needed 6 Dilutedetergentwithwatertocleantheicecontainer hoses ice bucket or water container 7 Put b...

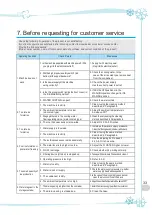
Page 33: ...50 3 Dregs gathered in the cooling water flow regulating valve water cooled type 3 Cleanthevalveusingthecleaning method described in Paragraphs 6 4 The ice thickness sensor is too wide 4 Adjust it to...

Page 34: ...MEMO 34...

Page 35: ...MEMO 35...

Page 36: ...Online Internet Service http www icetrousa com 3240288 05...

Reviews: